Spring is finally poking its head out from under the winter slush, and you know what that means. It is time to retire those moody burgundies and “I’m-hiding-in-a-blanket” navy blues for something a bit more cheerful. Easter is the ultimate excuse to deck out your fingertips in candy-colored pastels and questionable animal art.
Let’s be real for a second: we’ve all seen those professional nail art videos that make painting a hyper-realistic bunny look like a two-second job. Then, you try it at home, and your “bunny” looks more like a mutated potato with ears. I’ve been there, trust me. That is exactly why I curated this list of 19 simple Easter nails that are actually cute and easy to DIY.
You don’t need the steady hands of a neurosurgeon to pull these off. Most of these designs rely on basic shapes, a few dots, and the magic of a good top coat. Are you ready to save eighty bucks at the salon and feel like a DIY goddess? Let’s get into it.
1. The Classic Pastel Skittle
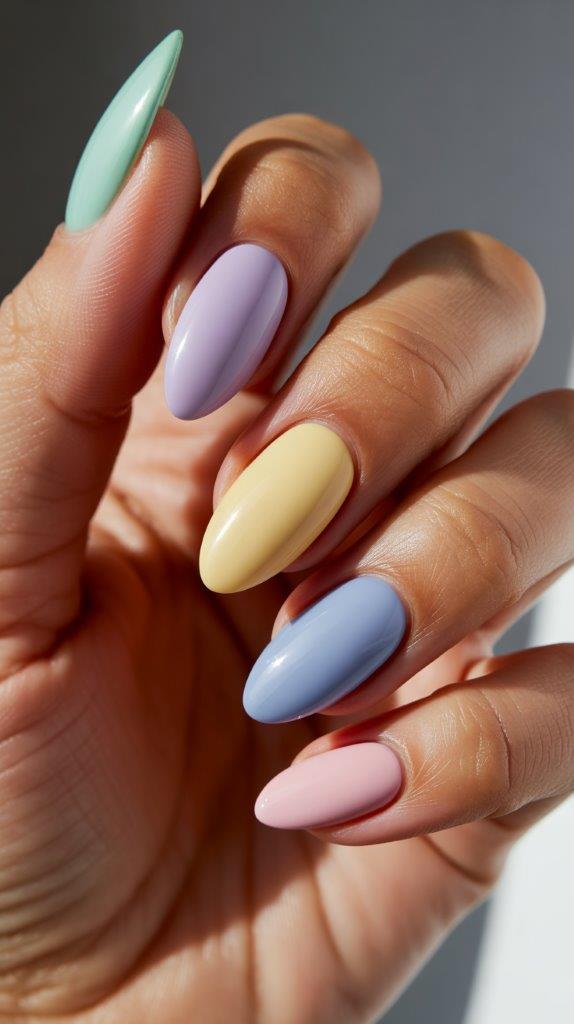
If you can paint your nails a solid color, you can do this. The “Skittle” mani simply means painting each finger a different shade of pastel. It is the ultimate “I tried but didn’t try too hard” look.
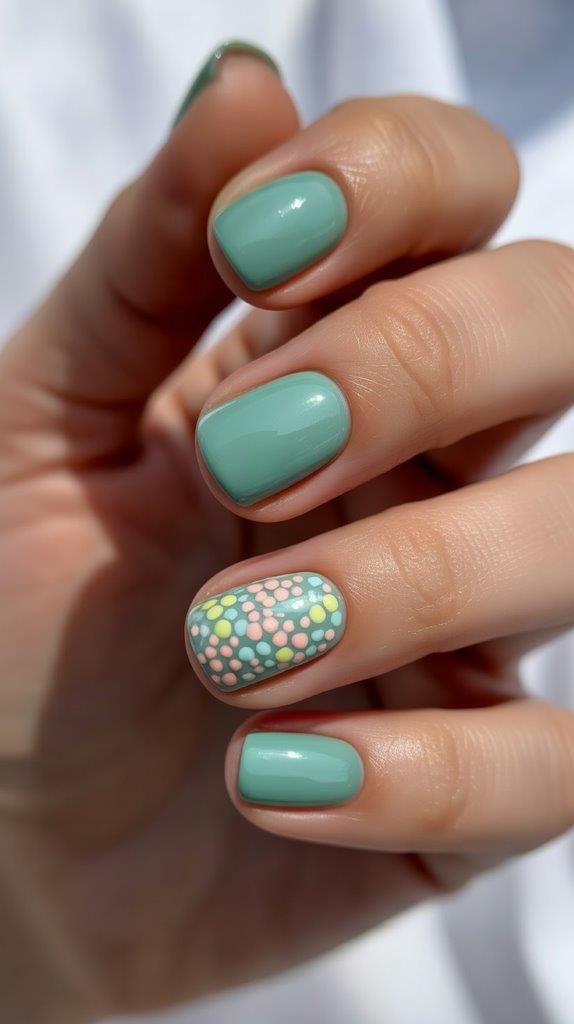
I love this because it requires zero artistic skill but looks incredibly intentional. Pick up a mint green, a soft lavender, a pale yellow, a baby blue, and a blush pink. Apply two coats of each color for a solid, opaque finish that screams spring brunch.
2. The Robin’s Egg Speckle
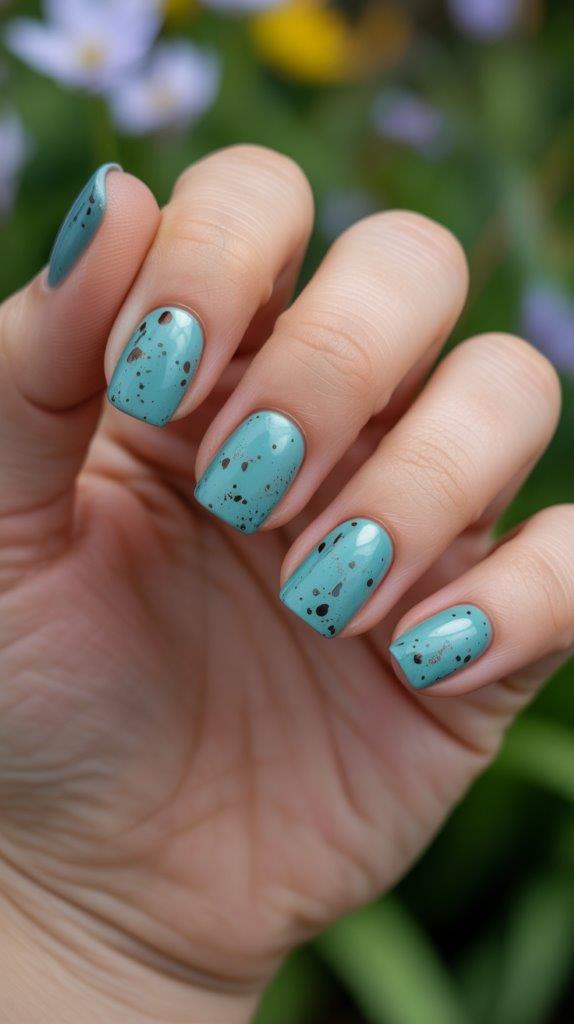
Ever looked at a Cadbury Mini Egg and thought, “I want my life to look like that?” This design is for you. Start with a pale blue or turquoise base.
To get the “speckled” look, you don’t need a fancy tool. Dip an old toothbrush or a fan brush into a tiny bit of black or dark brown polish. Flick the bristles over your nails to create random, tiny splatters. It creates a textured, organic look that hides any tiny mistakes you might have made with your base coat.
3. Minimalist Bunny Ears
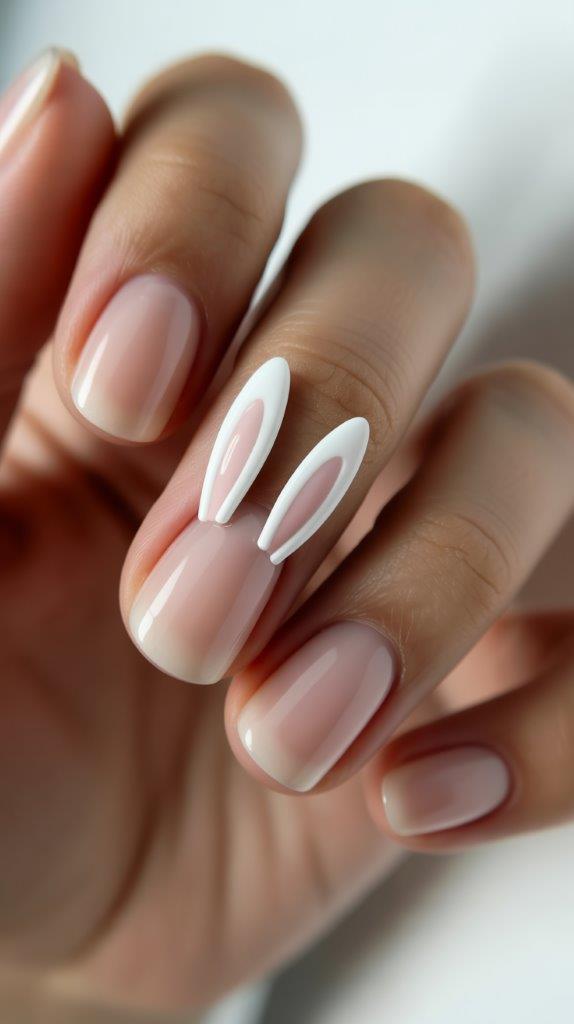
You don’t need to paint an entire rabbit to get the point across. In fact, a full bunny often ends up looking a bit creepy if the eyes aren’t perfect. Stick to the ears instead!
Paint your nails a sheer nude or a soft pink. Use a white polish and a toothpick (or a thin brush) to draw two long ovals at the tip of your ring finger. Add a tiny dot of pink inside the white ovals for the “inner ear.” It is subtle, sweet, and doesn’t require you to draw a face :).
4. Dainty Daisy Accents
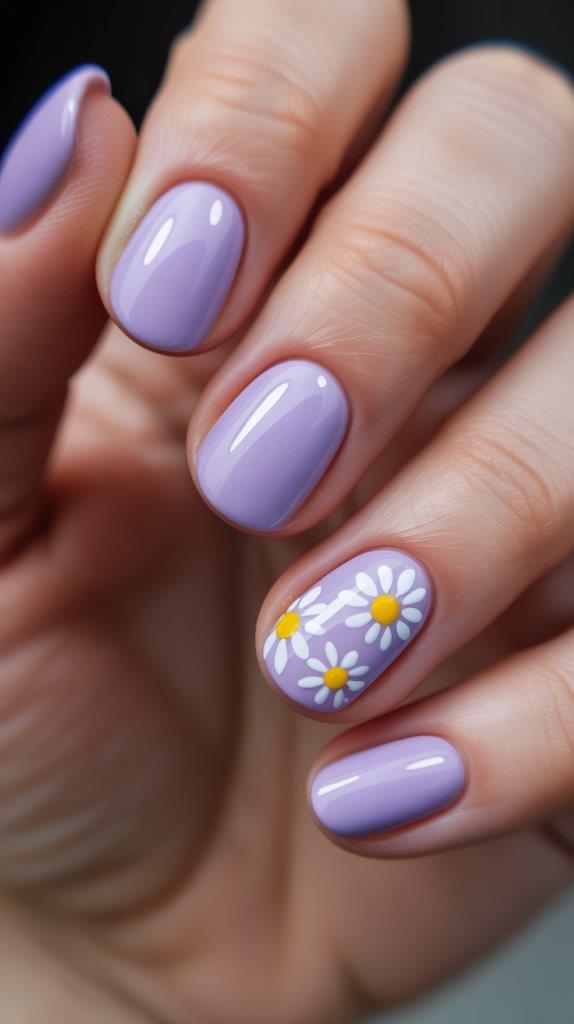
Flowers are the bread and butter of Easter nail art. If you think you can’t draw flowers, you’re overthinking it. Daisies are just five white dots in a circle with a yellow dot in the middle.
I usually put these on my thumb and ring finger and leave the rest a solid color. It keeps the look from feeling too “kindergarten craft project.” Use a bobby pin if you don’t have a dotting tool—the rounded ends are the perfect size for petals.
5. The “Peep” Inspired Palette
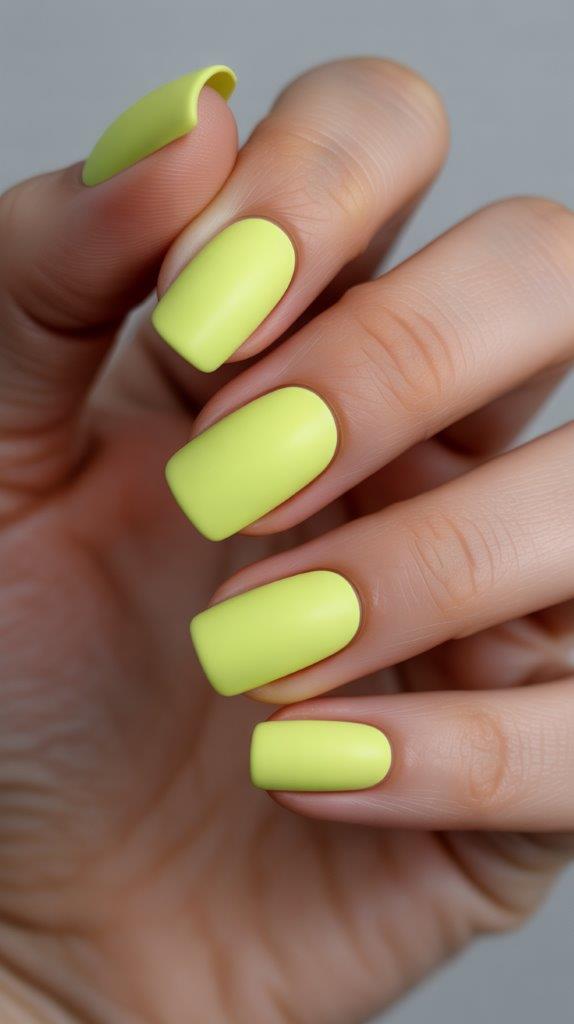
We all have a love-hate relationship with Peeps marshmallows, but we can all agree their colors are iconic. For this look, choose one super-saturated neon pastel—think highlighter yellow or electric pink.
Paint all your nails that one bold color and finish with a matte top coat. The matte finish gives the nails that slightly “sugary” texture that looks exactly like the candy. FYI, this look works best on shorter nails for a modern, punchy vibe.
6. Polka Dot Parade
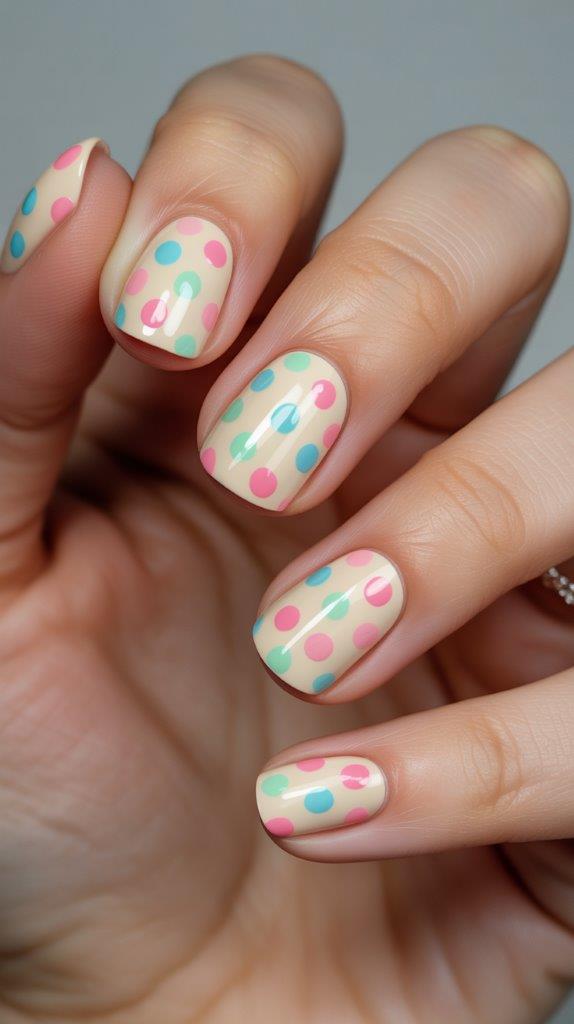
Polka dots are the easiest way to add “art” without the stress. They are also great for hiding that one nail that bubbled because you were too impatient to wait for the first coat to dry.
Choose a neutral base like cream or light gray. Use a dotting tool to place various pastel-colored dots across the nail. You can keep them in a neat line or scatter them randomly like confetti. Space them out evenly to keep the look sophisticated rather than cluttered.
7. Pastel French Tips
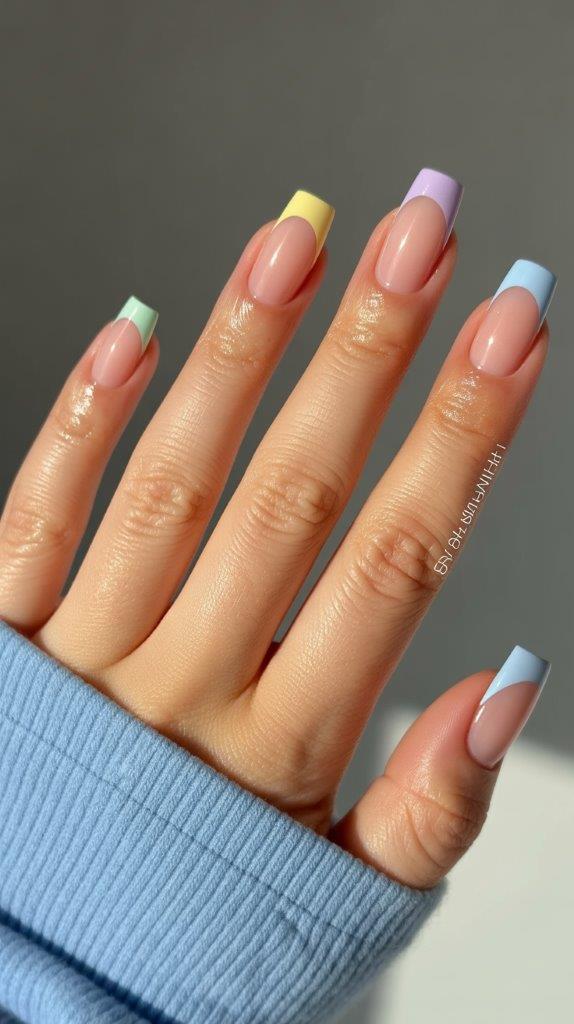
The French manicure is having a massive resurgence, but the standard white tip can feel a bit stiff. Swap the white for different pastel shades on each finger.
If you struggle with a steady hand, use a silicone nail stamper. You just apply the polish to the stamper and “squish” your nail into it. It creates a perfect, curved tip every single time. This is a great way to participate in the Easter theme while keeping things professional enough for the office.
8. Metallic Egg Wraps
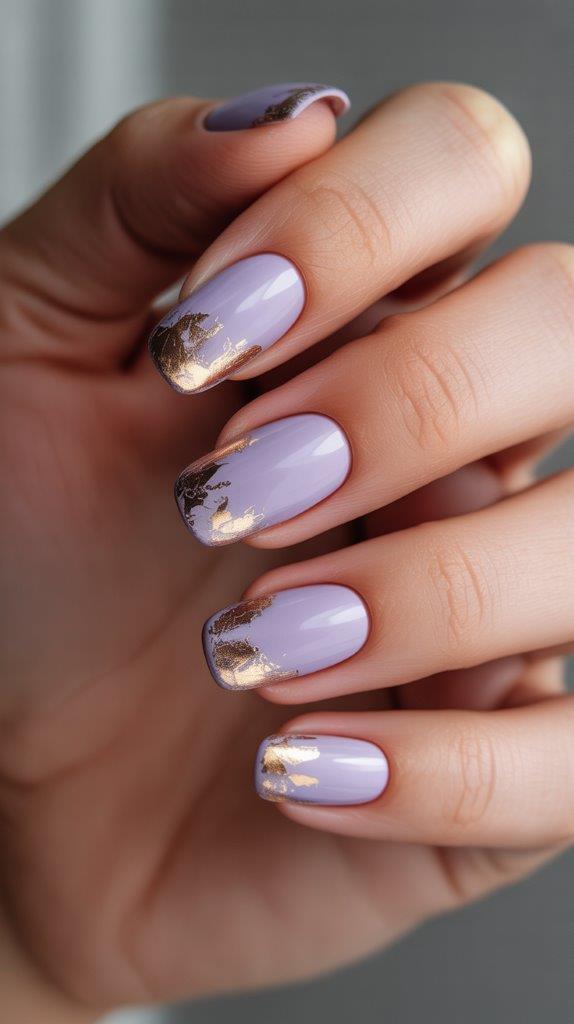
Who says Easter has to be all soft and matte? I love adding a bit of “foil” to my Easter designs to mimic the wrappers on chocolate eggs.
Start with a solid lavender or mint base. Once it is mostly dry, take a gold or silver metallic polish and wipe almost all the paint off the brush. Lightly “distress” the tips of your nails with the nearly dry brush. It adds a high-end, textured shimmer that catches the light beautifully.
9. The Carrot Accent Nail
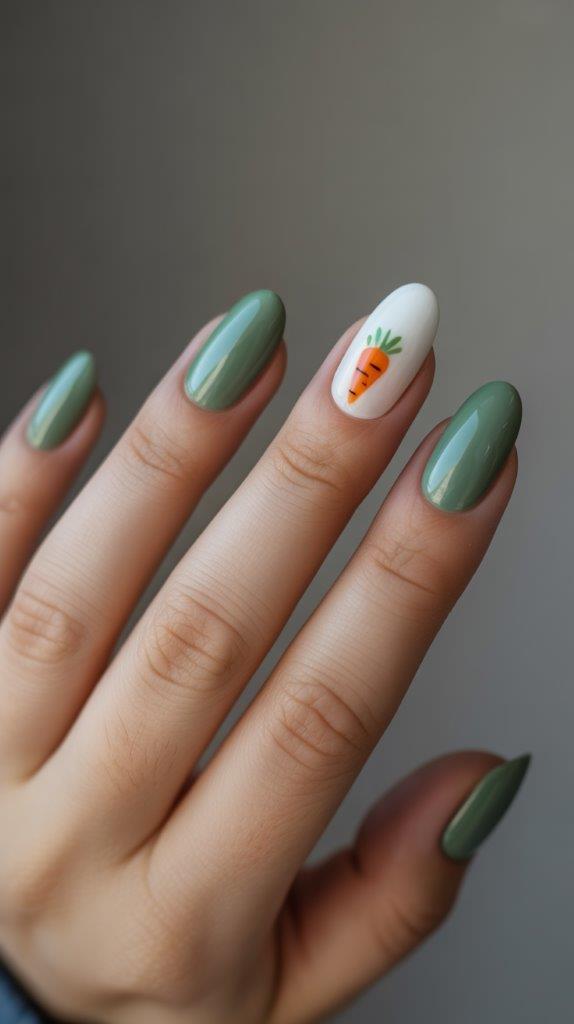
Nothing says Easter like a snack for the bunny. This design is surprisingly easy because carrots are basically just long, skinny triangles.
Paint your ring finger white and the rest of your nails a soft green. On the white nail, draw a small orange triangle pointing downward. Use a toothpick to add two or three tiny horizontal lines across the orange part for “texture,” and add a little green squiggle at the top for the leaves. It’s adorable and takes about three minutes.
10. Abstract Spring Swirls
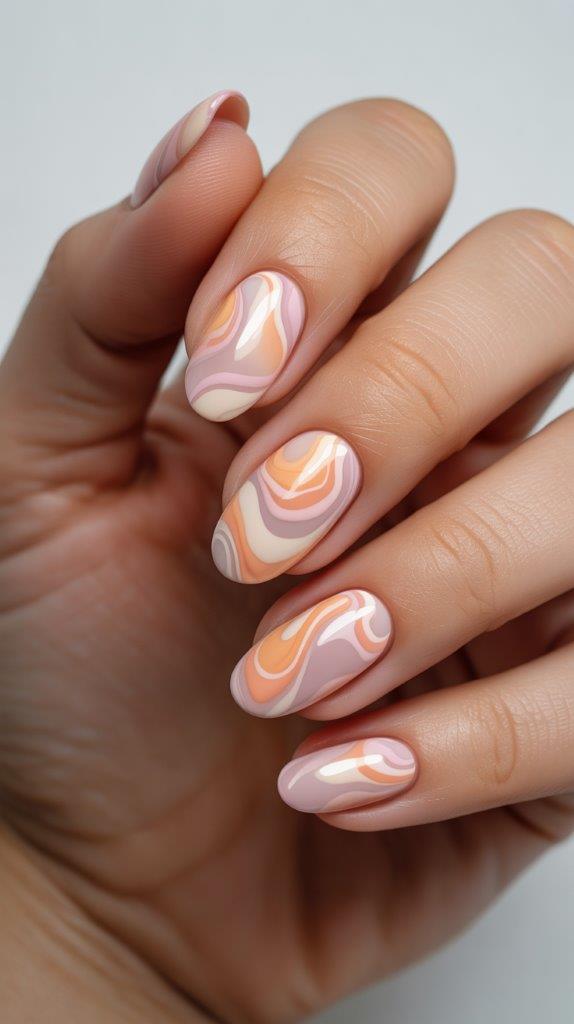
If you can’t draw a straight line or a perfect circle, abstract swirls are your best friend. They are supposed to look wavy and imperfect!
Pick three colors that look good together—like pink, orange, and white. Use a thin liner brush to draw “S” shapes across your nails. Layer the colors so they overlap slightly. The key here is movement; don’t worry about symmetry. It looks like high-end boutique nail art but requires almost no precision.
11. Yellow Chick Peeking Out
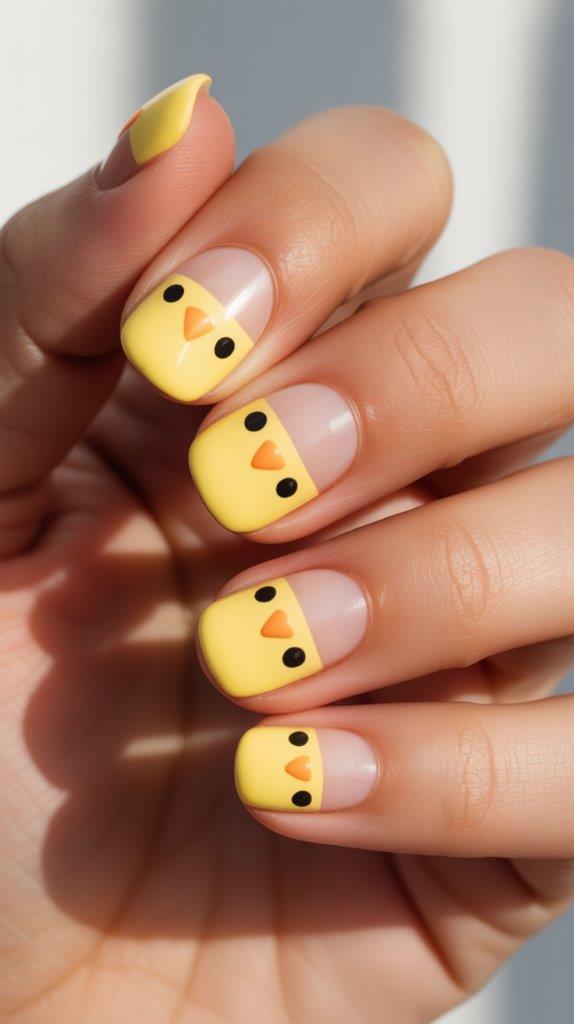
Ever wondered how to make your nails look “expert” without actually being one? Use the “peek-a-boo” technique.
Paint the bottom half of your nail a bright yellow. Leave the top half clear or nude. At the “border” of the yellow, add two tiny black dots for eyes and a tiny orange triangle for a beak. It looks like a baby chick is peeking over a fence. It is ridiculously cute and much easier than painting a whole bird.
12. Gingham Style
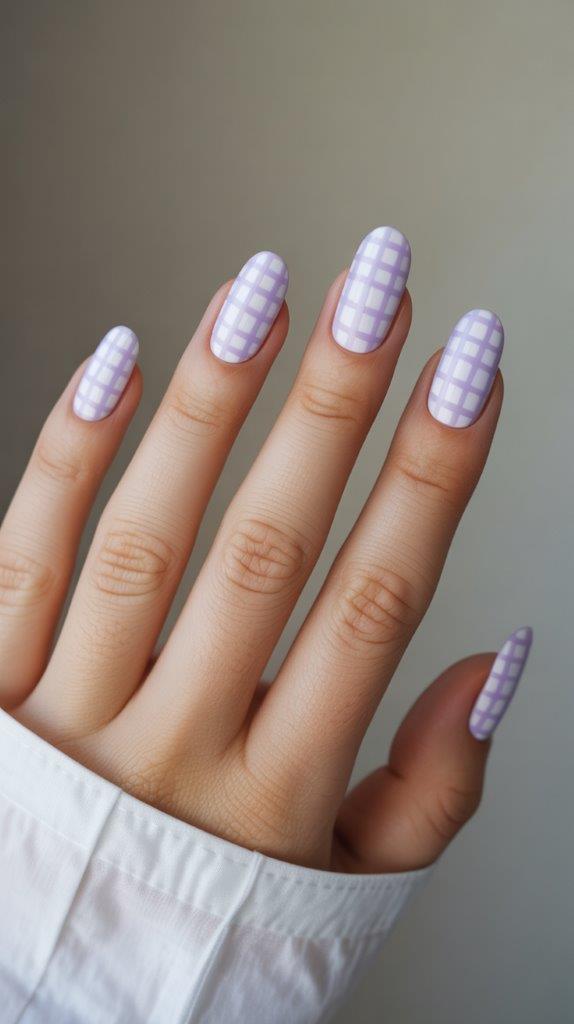
Gingham always feels like a spring picnic. While it looks complicated, it’s really just a grid of intersecting lines.
Start with a white base. Use a light purple or blue polish and a flat brush to draw two vertical stripes and two horizontal stripes. Where the lines overlap, the color will naturally look darker, creating that classic “picnic blanket” effect. IMO, this looks best on a square nail shape.
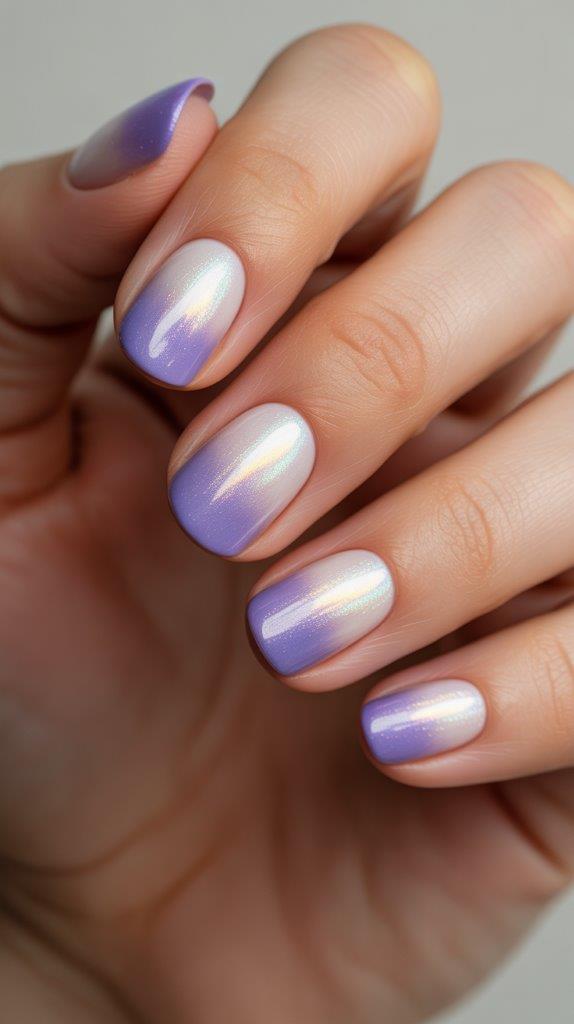
13. Soft Lavender Ombre
Ombre is a classic for a reason. It is soft, dreamy, and perfectly fits the Easter aesthetic.
Get a makeup sponge and paint a stripe of white and a stripe of lavender side-by-side. Dab the sponge onto your nail repeatedly until the colors blend. It might look a bit messy on your skin, but you can clean that up later with a Q-tip and some acetone. Finish with a glitter top coat to hide any unevenness in the blend.
14. Cloudy Sky Vibes
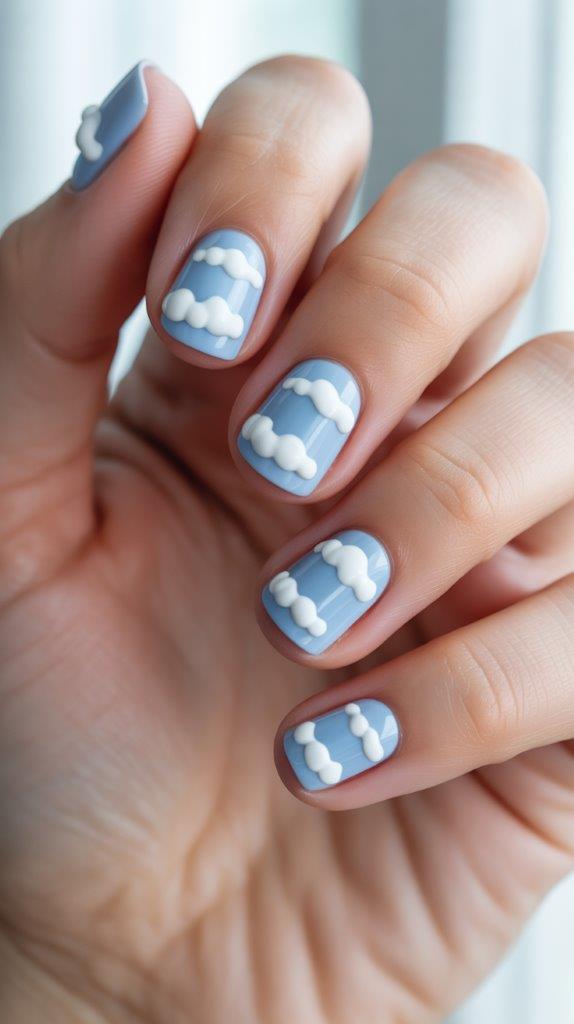
April showers bring May flowers, right? Why not put the sky on your nails?
Paint your nails a soft “baby blue.” Use a dotting tool or the end of a bobby pin to create clumps of three white dots. These become little fluffy clouds. It is a very “clean girl” aesthetic that feels fresh and airy. Does it get any easier than that?
15. The “Gold Leaf” Garden
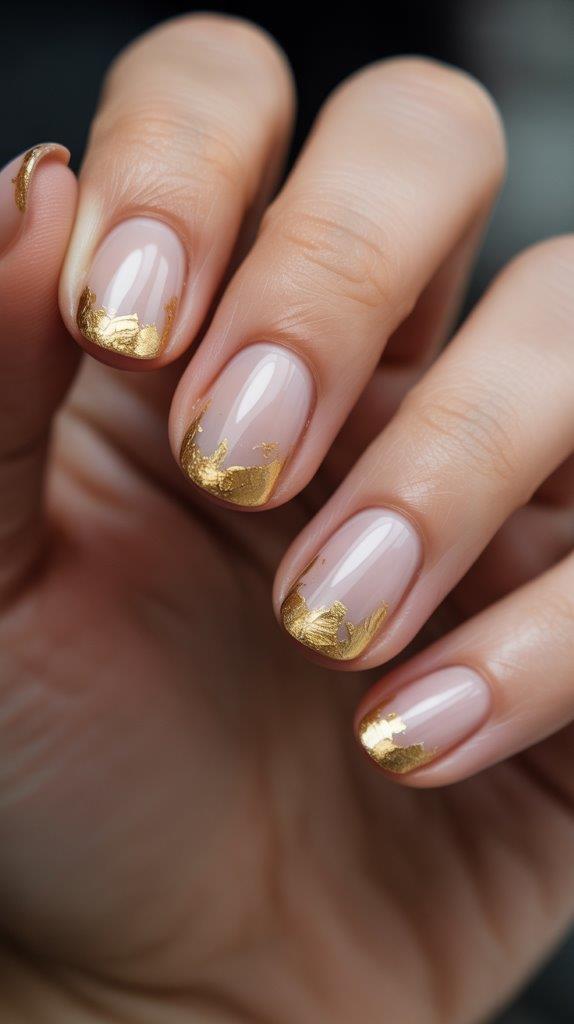
If you want something that looks expensive, go for gold leaf. You can buy little pots of gold flakes for a couple of dollars online.
Paint your nails a sheer, milky pink. While the polish is still tacky, use tweezers to place tiny flecks of gold leaf near the cuticles. It looks like a high-end designer manicure. It’s the perfect look if you’re heading to a fancy Easter dinner and want to look “adult” while still being festive :).
16. Mismatched Floral Tips
Why choose one design when you can have five? This is for the person who can’t make up their mind at the nail polish rack.
Paint three nails a solid pastel. On the other two, do a micro-floral pattern. This just means making tiny, tiny dots of different colors to represent a field of wildflowers. Because the flowers are so small, nobody will notice if one is a little wonky. Bold the contrast by using a dark green for the “stems” or leaves.
17. Negative Space Half-Moons
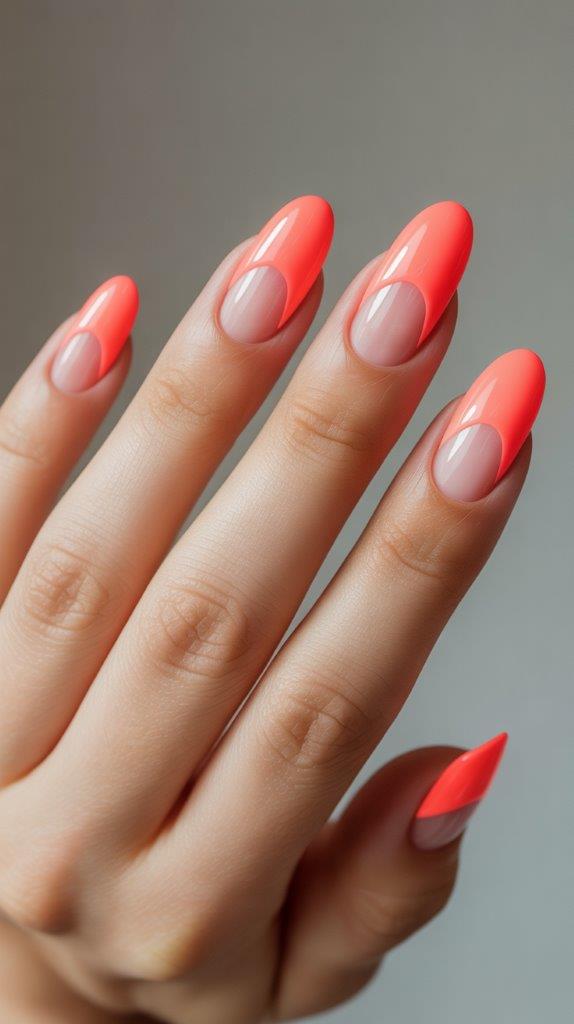
Negative space is a lifesaver for people who hate when their nails grow out and show a gap at the cuticle.
Leave the bottom curve of your nail (the “half-moon”) bare. Paint the rest of the nail a vibrant spring coral or peach. This creates a modern, geometric look that is very “in” right now. It also means you can go an extra week without needing a touch-up because the growth is less obvious.
18. Pressed Flower Illusion
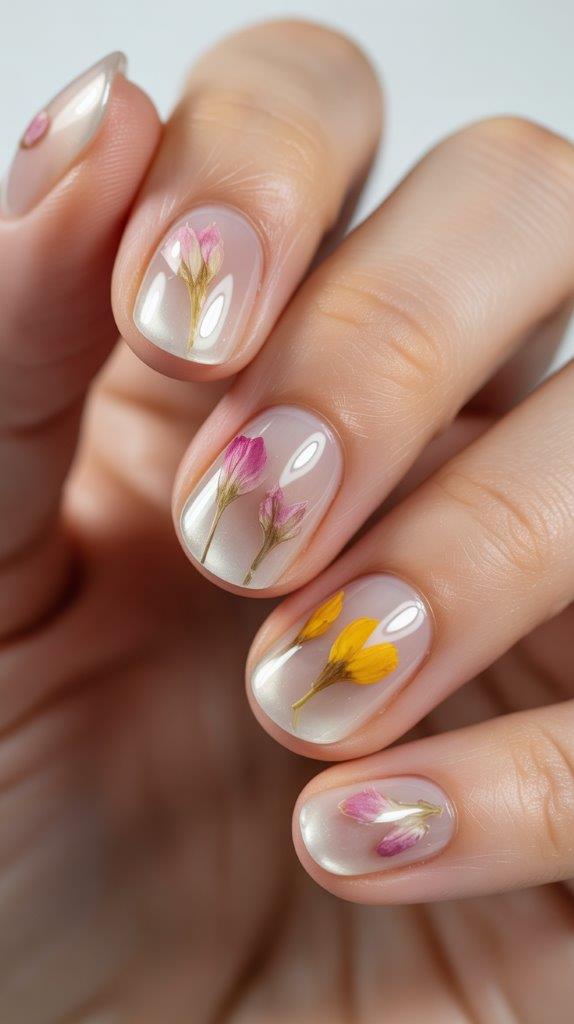
If you really can’t draw, let someone else do it for you. Buy some nail decals or stickers that look like pressed flowers.
Paint your nails a very sheer, almost translucent white. Apply the stickers once the polish is dry, then seal it with two thick layers of top coat. This gives the illusion that real flowers are “encased” in your nails. It looks sophisticated and takes almost zero effort.
19. The Glitter “Nest”
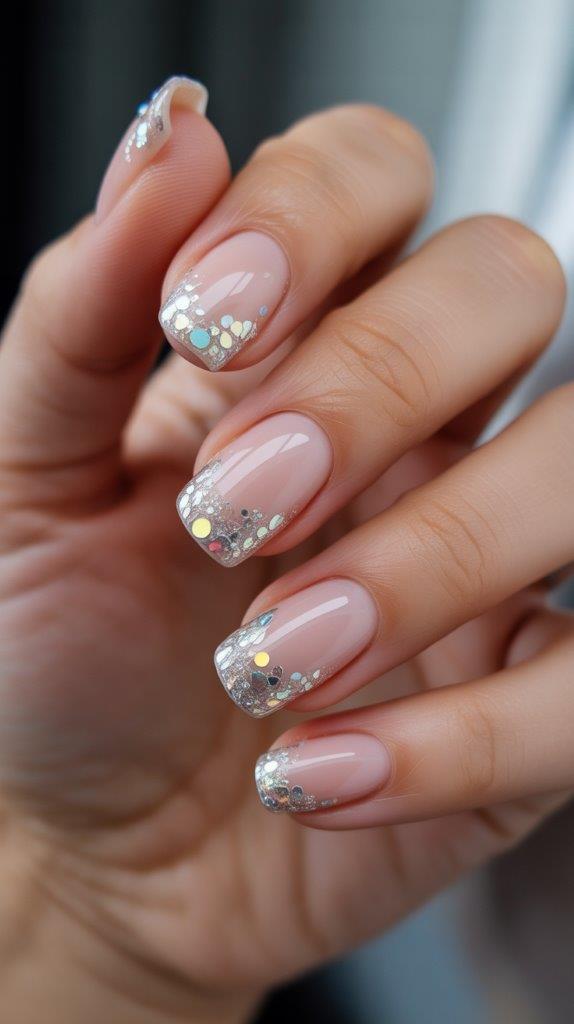
For the 19th look, let’s go for texture. Find a “chunky” glitter polish that has different sizes of hexagonal glitters in it.
Apply a nude base coat, then concentrate the glitter only at the very base of the nail, near the cuticle. It should look like a little “nest” where the rest of your nail is the “egg.” It is a clever, subtle nod to the holiday without being over-the-top.
Pro-Tips for the Perfect DIY Easter Mani
Before you run off to grab your polish, keep these few things in mind. DIY nails are 50% technique and 50% patience.
- Prep is everything: Remove all old polish and push back your cuticles. A clean canvas makes the simplest design look ten times better.
- Thin coats are your friend: I know you want to be done quickly, but three thin coats are always better than one thick, gloopy coat. Thick coats lead to bubbles and smudges.
- Don’t skip the top coat: A good, high-gloss top coat acts like “magic eraser” for nail art. It smooths out bumps and gives your DIY job that professional shine.
- Clean the edges: Dip a small, flat brush into acetone to “carve out” the edges around your cuticles. This is the difference between “I did this in the car” and “I paid $60 for this.”
Why You Should Try This At Home
I used to be the person who spent hundreds of dollars a year on gel manicures. Then I realized that for the price of one salon visit, I could buy ten high-quality polishes and all the tools I’d ever need.
Plus, there is something incredibly therapeutic about sitting down with a podcast and painting little carrots on your fingers. It’s a low-stakes way to be creative. If you mess up? Just wipe it off and try again. No harm, no foul.
Final Thoughts
Easter nails don’t have to be a masterpiece. Whether you choose the Robin’s Egg Speckle or just a simple Pastel Skittle, the goal is to have fun and embrace the season. Spring is all about new beginnings, so why not start a new hobby of doing your own nails?
Think about it: you’ll have the cutest hands at the egg hunt, and you’ll have more money left over for those giant chocolate bunnies. It’s a win-win situation. Which of these designs are you going to try first? Personally, I’m leaning toward the Minimalist Bunny Ears—mostly because I can do them while watching Netflix without looking down too much.
Happy painting, and may your top coat never smudge! 🙂
Leave a Reply
You must be logged in to post a comment.