
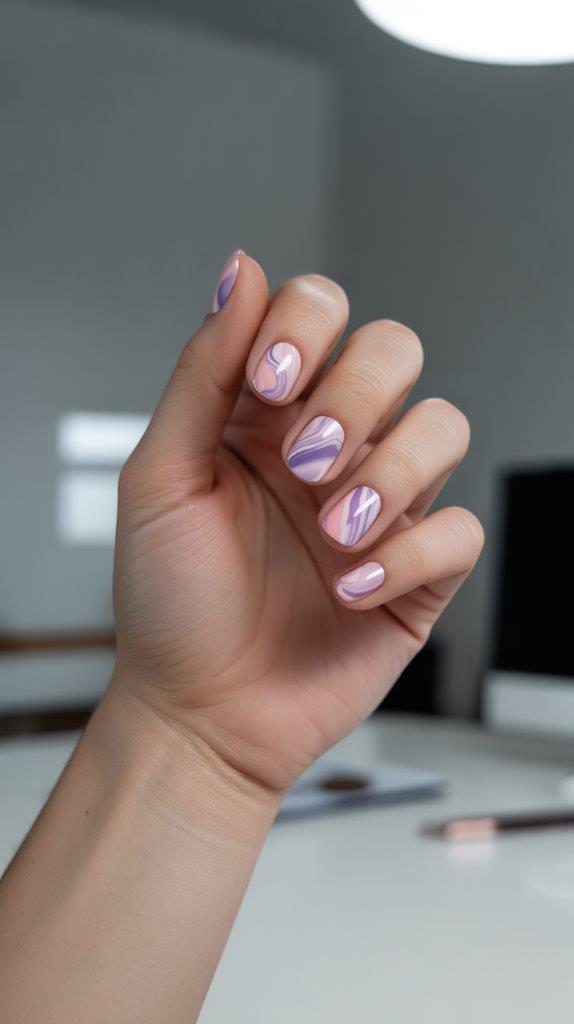
April’s here, Easter’s around the corner, and your nails are still stuck in winter mode? Yeah, we need to fix that. Easter in April is basically the universe giving you permission to go full pastel mode without anyone side-eyeing your color choices.
I’m talking soft pinks, dreamy lavenders, mint greens, and buttery yellows—all the colors that make you feel like spring actually exists (even if the weather’s still being weird). Whether you’re hosting brunch, hunting eggs with the kids, or just want nails that match your Easter outfit, I’ve got 17 ideas that range from subtle and sophisticated to full-on festive.
Let’s get your fingertips Easter-ready, shall we?
Why April Calls for Easter Nails
April’s that perfect sweet spot where winter’s definitely over but summer hasn’t hit yet. Easter nails bridge that gap beautifully—they’re festive enough for the holiday but spring-appropriate for the entire month.
Plus, Easter manicures give you an excuse to experiment. You can go cutesy with bunnies and eggs, keep it classy with pastels and florals, or somewhere in between. The beauty is that Easter aesthetic is so broad, basically anything pastel or spring-themed counts.
I’ve been doing Easter nails every April for years now, and honestly? It’s become my favorite nail season. The colors are forgiving, the designs are fun, and everything just feels lighter and brighter.
1. Soft Pastel Gradient
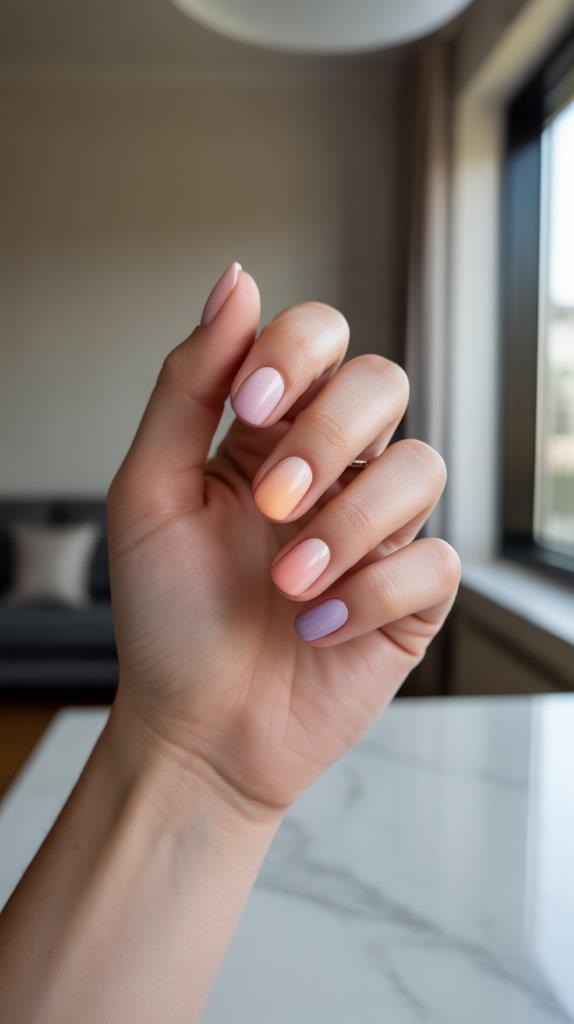
Start with a base of pale pink or peach, then create a subtle gradient using a sponge and multiple pastel shades. The ombre effect captures that sunrise-on-Easter-morning vibe without being too literal about the holiday.
The gradient technique is surprisingly foolproof. Dab your colors onto a makeup sponge, press it onto your nail, and boom—instant sophistication. The blending hides imperfections, which is basically perfect for those of us without steady hands.
I did a pink-to-lavender gradient last April and wore it for three weeks because I couldn’t bring myself to remove something so pretty. True story.
2. Classic French with Pastel Tips
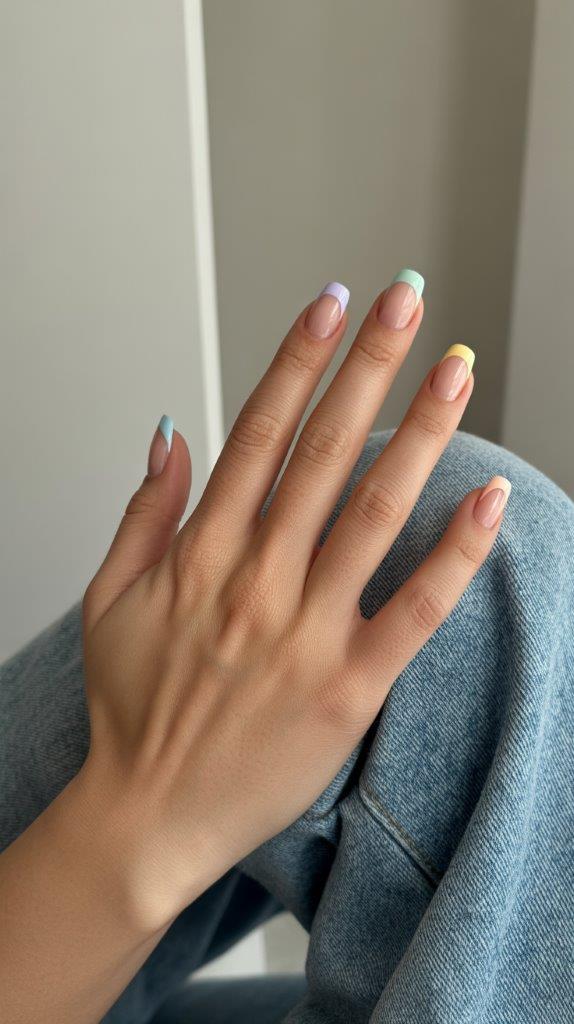
Take the timeless French manicure and swap those white tips for Easter pastels. Each nail gets a different colored tip—lavender, mint, baby blue, soft yellow, peachy pink.
This design works for literally any setting. Office meeting? Check. Easter brunch? Absolutely. Family dinner? Perfect. It’s subtle enough to be professional but festive enough to feel special.
The best part? French tips are easy to touch up if one chips. Just redo that one tip instead of your entire manicure.
3. Bunny Accent Nails
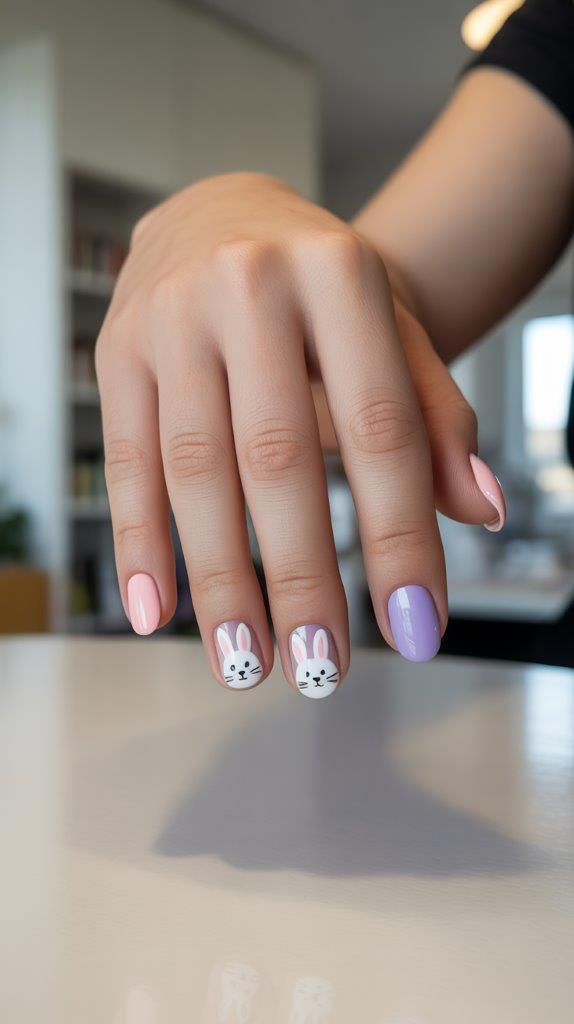
Keep most nails a solid pastel, then add cute bunny faces or silhouettes to your ring fingers. Simple, recognizable, and undeniably Easter without going full cartoon character on every finger.
You can paint bunny faces (two dots for eyes, triangle nose, whiskers) or go with a side-profile silhouette. Both work. Both are adorable. If you’re not confident in your nail art skills, bunny stickers exist and honestly, they look just as good.
IMO, white bunnies on a soft pink or lavender base are peak Easter elegance.
4. Speckled Easter Eggs
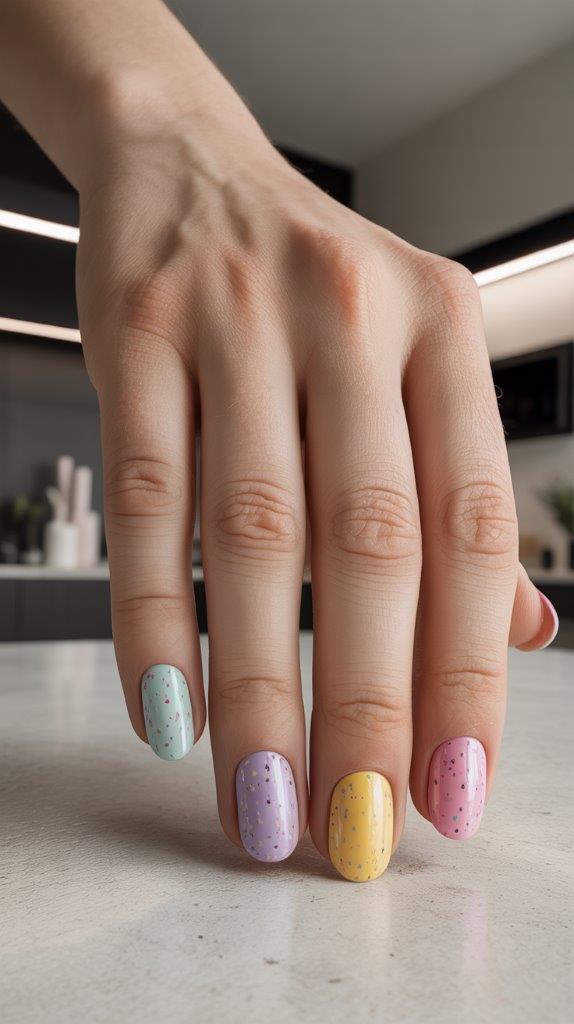
Create that classic speckled Easter egg look using a toothbrush or small brush to splatter tiny dots of contrasting colors over a pastel base. It’s literally the egg-decorating technique, just on your nails.
The randomness of the speckles means you can’t really mess this up. More dots here, fewer there—it all looks intentional. Try white speckles on pastel backgrounds, or go wild with multiple colors.
This design is therapeutic to create, weirdly satisfying to look at, and gets compliments every single time. People love the texture and detail without it being overwhelming.
5. Delicate Cherry Blossoms
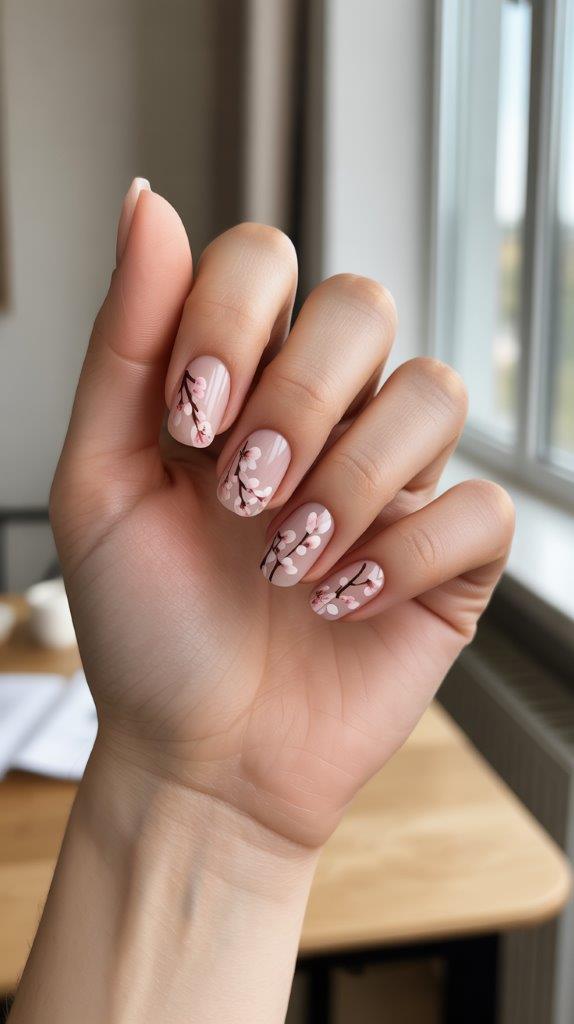
Paint soft pink or white cherry blossoms on a nude or pale pink base. Spring florals that feel classy instead of craft-project-cute. The delicate branches and petals capture April’s bloom energy perfectly.
Cherry blossoms work on any nail length or shape. They’re detailed enough to look impressive but simple enough that most nail techs can pull them off. Or you can use nail stamps if you’re DIY-ing it.
I wore cherry blossom nails to an Easter wedding once, and they matched the actual cherry trees at the venue. Accidentally coordinated with nature—chef’s kiss. 🙂
6. Pastel Marble Effect
Create marble patterns using two or three pastel colors swirled together. That abstract, artistic vibe that looks expensive but is actually pretty simple to achieve.
Use a toothpick or thin brush to swirl colors together while they’re still wet. The key is not over-mixing—you want distinct color sections, not a muddy blend. White marble with pastel veining is particularly gorgeous.
The marble effect photographs beautifully, which matters if you’re the type to post your Easter outfit pics on Instagram. Just saying.
7. Minimalist Cross Designs
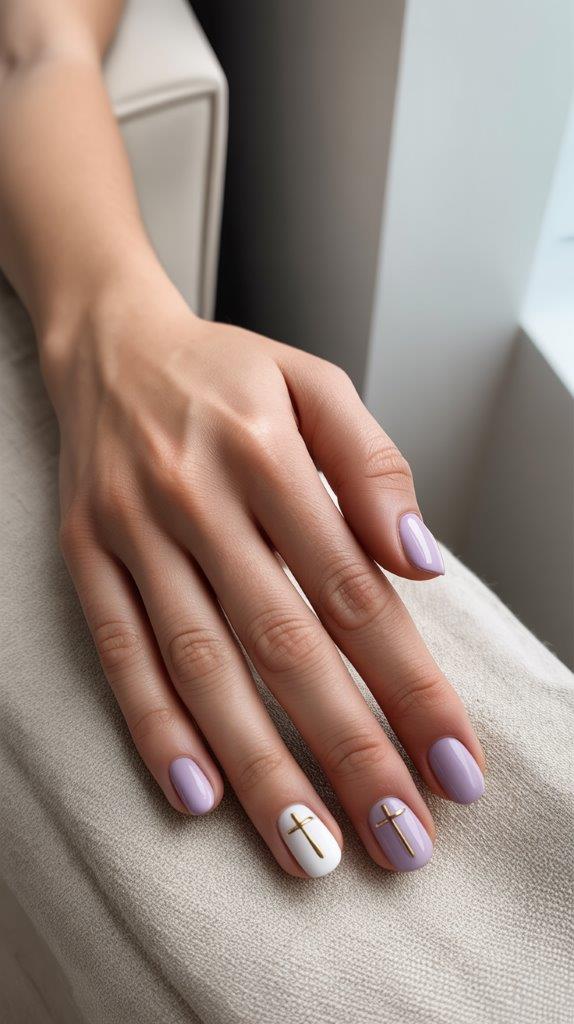
For those wanting something Easter-appropriate that’s more religious than cutesy, add simple gold or white cross designs to one or two accent nails. Elegant, meaningful, and perfectly understated.
The crosses can be small and centered, or thin lines that extend from cuticle to tip. On a soft lavender or white base, they look sophisticated rather than preachy. It’s a nice way to acknowledge the religious aspect of Easter without going full church bulletin board.
This design also transitions well into regular spring wear if you’re keeping your manicure past Easter Sunday.
8. Rainbow Pastel Blocking
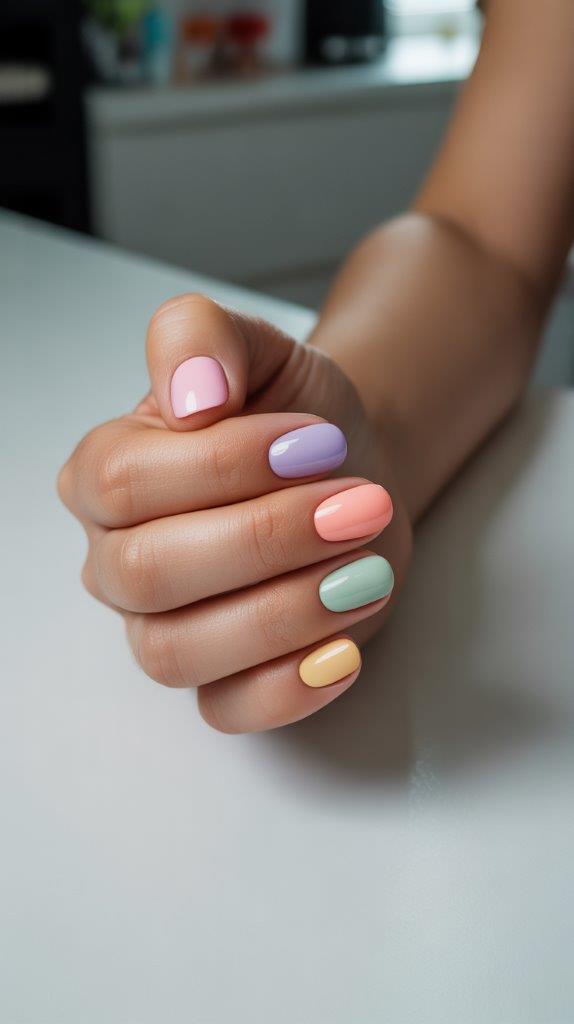
Paint each nail a different pastel shade for a rainbow effect that’s soft instead of bold. Think Easter basket colors—those pale versions of every hue that somehow all work together.
The color-blocking trend makes this feel current rather than dated. Plus, if you hate commitment, you get to enjoy five different colors at once. It’s the nail equivalent of ordering appetizers instead of an entrée.
I love how this design makes choosing outfits easier. When your nails are already rainbow-pastel, everything coordinates. Lazy? Maybe. Genius? Also yes.
9. Gold Foil Accents on Lavender
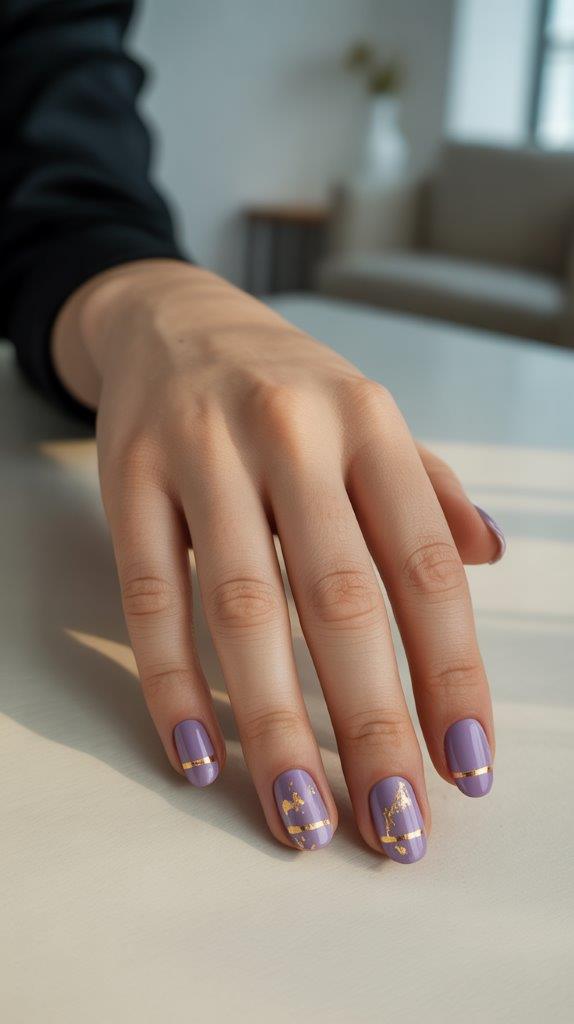
Solid lavender nails with gold foil flakes or thin gold striping tape create this luxe Easter aesthetic that feels grown-up and special.
Gold elevates any pastel, but with lavender specifically? Magic. Add gold foil randomly for a scattered effect, or use striping tape for clean geometric lines. Either way, you’re getting that expensive manicure look.
FYI, gold foil is easier to apply than you’d think. Press it onto tacky topcoat, seal with more topcoat, done. The imperfection of the foil placement actually adds to the charm.
10. Jelly Nails in Spring Shades
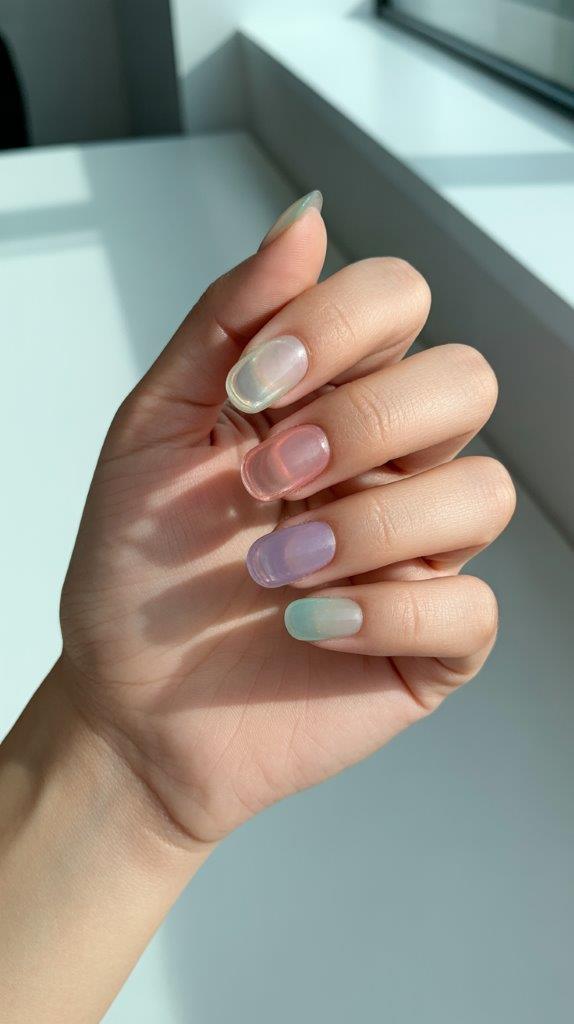
Embrace the jelly nail trend using sheer pastel polishes that create a translucent, glass-like effect. Your natural nail shows through slightly, creating this modern, minimalist Easter vibe.
Layer 2-3 coats of jelly polish for that perfect translucent look. The sheer quality makes them super forgiving—any imperfections blend into the overall effect. Try jelly pink, lavender, or mint for peak spring energy.
These nails catch light beautifully and look incredibly fresh. They’re having a major moment right now, so you’ll be trendy and seasonal simultaneously.
11. Daisy Chain Details
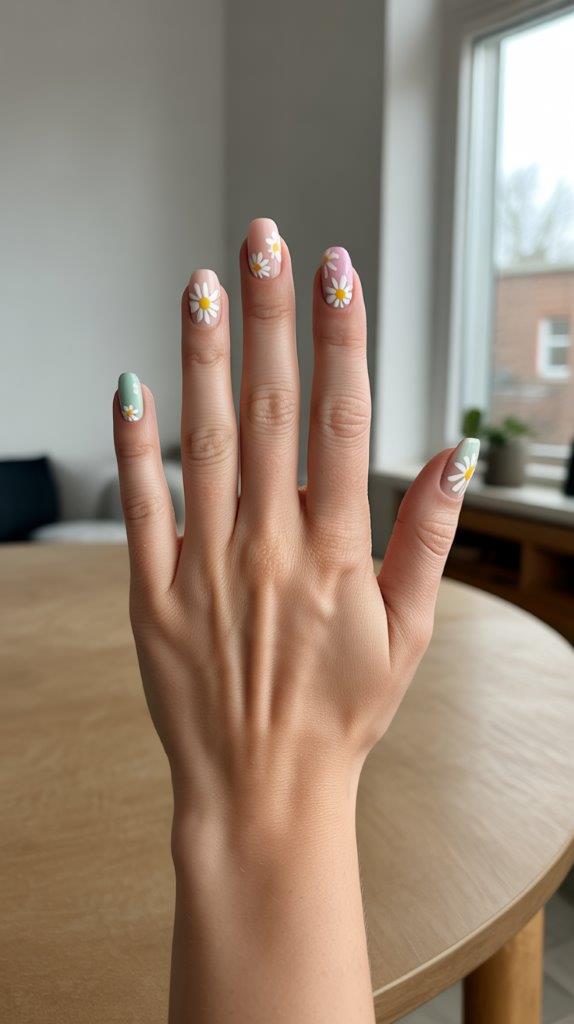
Paint tiny white daisies with yellow centers scattered across pastel bases or concentrated on accent nails. Classic spring florals that never go out of style.
Daisies are surprisingly easy to paint—five white dots in a circle, one yellow dot in the center, done. You don’t need to be Michelangelo to pull off daisies. They’re the most forgiving flower in nail art.
I’ve worn daisy nails to Easter brunches for three years running because they work every single time. Why fix what isn’t broken?
12. Soft Geometric Patterns
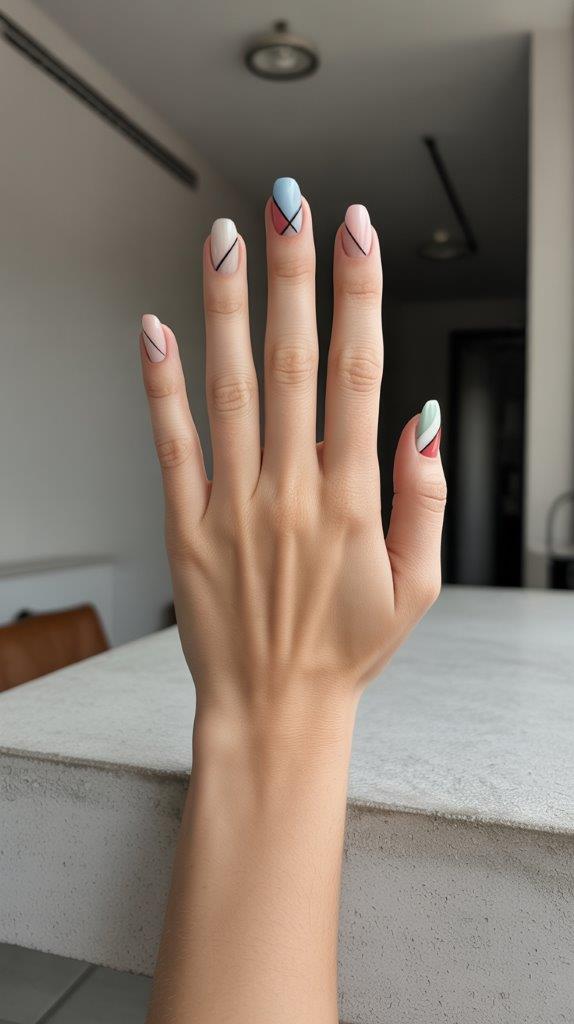
Create geometric designs using pastel colors and thin lines—think triangles, diamonds, or abstract shapes. Modern, artistic, and totally spring-appropriate without being obviously Easter-themed.
The geometric trend works beautifully with Easter pastels. Try color-blocked triangles in complementary shades, or negative space designs that let your natural nail peek through. The clean lines feel fresh and current.
This design is perfect if you want April-appropriate nails that aren’t screaming “I LOVE EASTER” at everyone. Subtle seasonal vibes for the win.
13. Pearlescent Chrome Finish
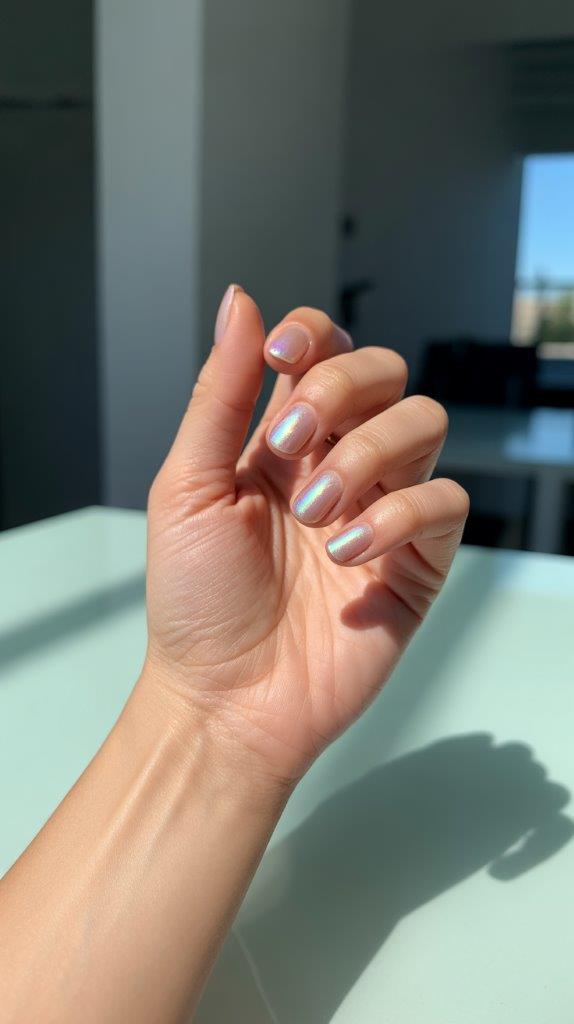
Apply pearlescent or chrome powder over pastel bases for that iridescent, almost holographic effect that’s huge right now.
The chrome trend translates perfectly to Easter. That pearly, luminous quality feels sophisticated and modern. Try it over soft pink, lavender, or mint for different effects. Each color creates a unique iridescent situation.
This finish catches light like crazy, so your nails become these little attention magnets. Bonus: they look amazing in photos, which your Easter Instagram will appreciate.
14. Baby Chick Accents
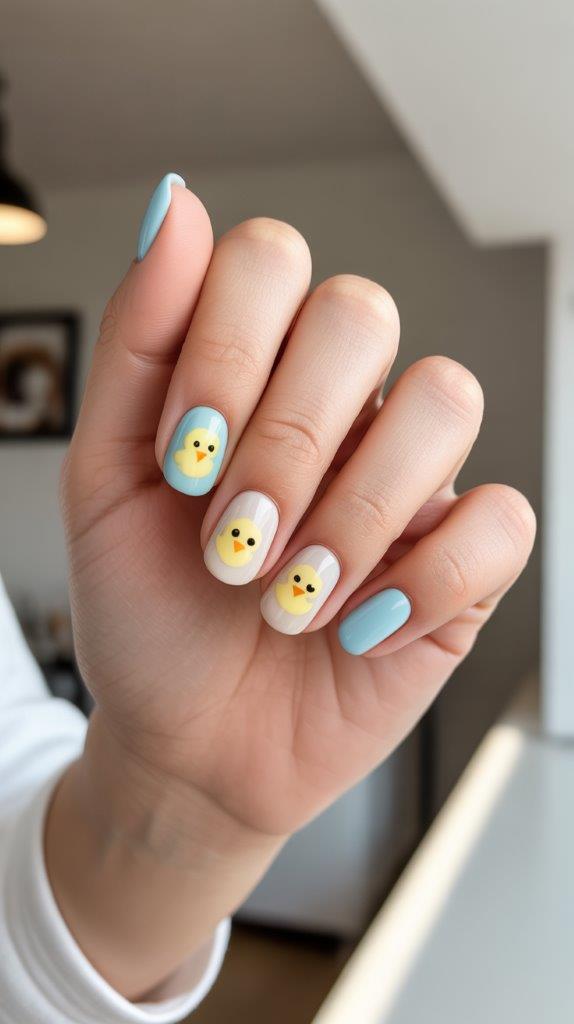
Paint adorable yellow baby chicks on a light blue or white base—just simple yellow ovals with orange beaks and dot eyes. Cute without being juvenile, especially when limited to one or two accent nails.
The chick design is genuinely easy. Create a yellow oval, add a tiny orange triangle beak, two black dot eyes, maybe some simple feet. That’s it. You’ve got a recognizable Easter chick that everyone will find adorable.
I was skeptical about this design initially (worried it would look too childish), but when done right? Absolutely charming. :/
15. Watercolor Wash Effect
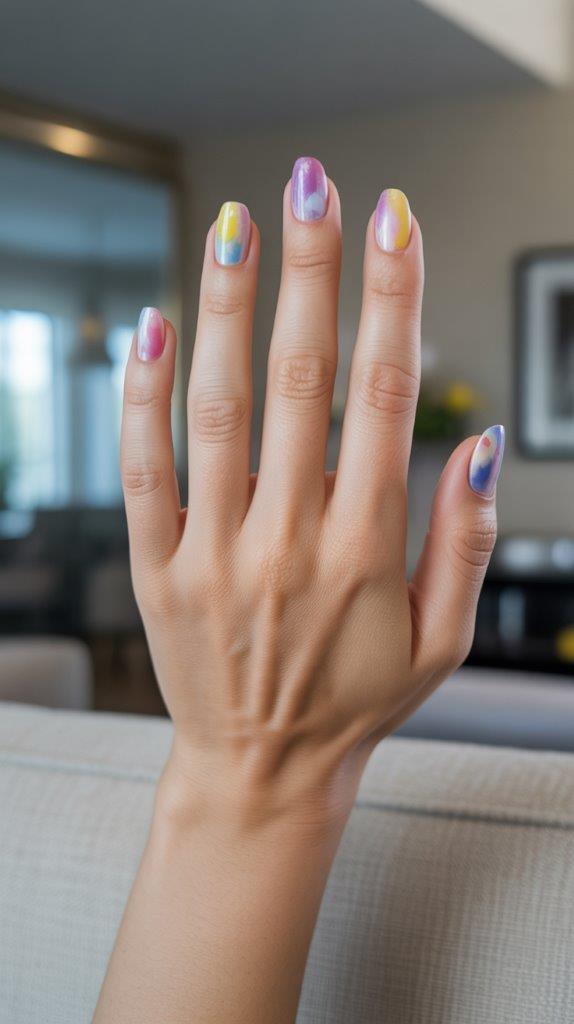
Create a watercolor effect by applying pastel polishes with a slightly wet brush, letting colors bleed into each other for that soft, artistic, painted-by-hand look.
The watercolor technique is forgiving because there’s no “right” way to do it. Blend colors randomly, let them mix naturally, and embrace the organic result. Pink bleeding into purple? Beautiful. Yellow touching blue? Gorgeous. It all works.
This design feels artistic and unique. No two nails look identical, which somehow makes the whole manicure more interesting.
16. Lavender and White Stripes
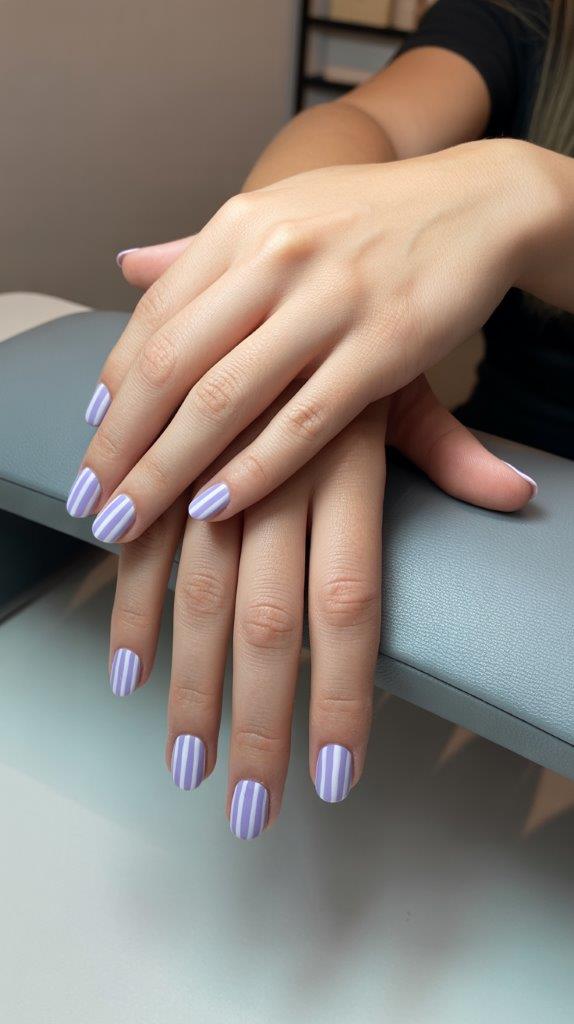
Create clean vertical or diagonal stripes alternating lavender and white. Simple, elegant, and surprisingly impactful for how basic the concept is.
Use striping tape for perfect lines, or freehand them if you’re feeling confident. The stripe pattern feels classic but fresh, especially in these soft Easter colors. You can vary stripe thickness for visual interest.
Stripes are also excellent for making nails appear longer. That vertical line creates an elongating effect that’s subtle but noticeable.
17. Easter Basket Gradient
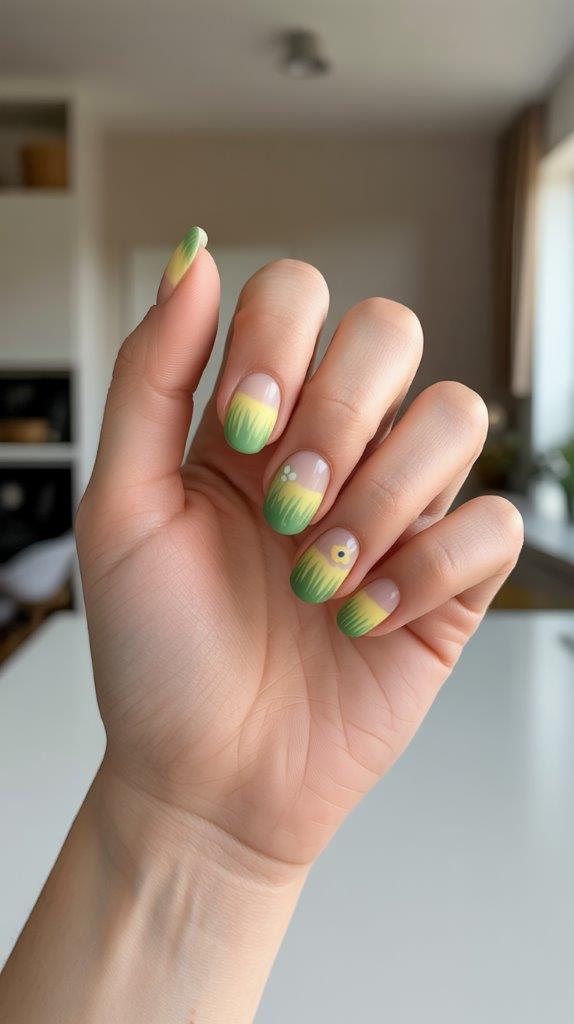
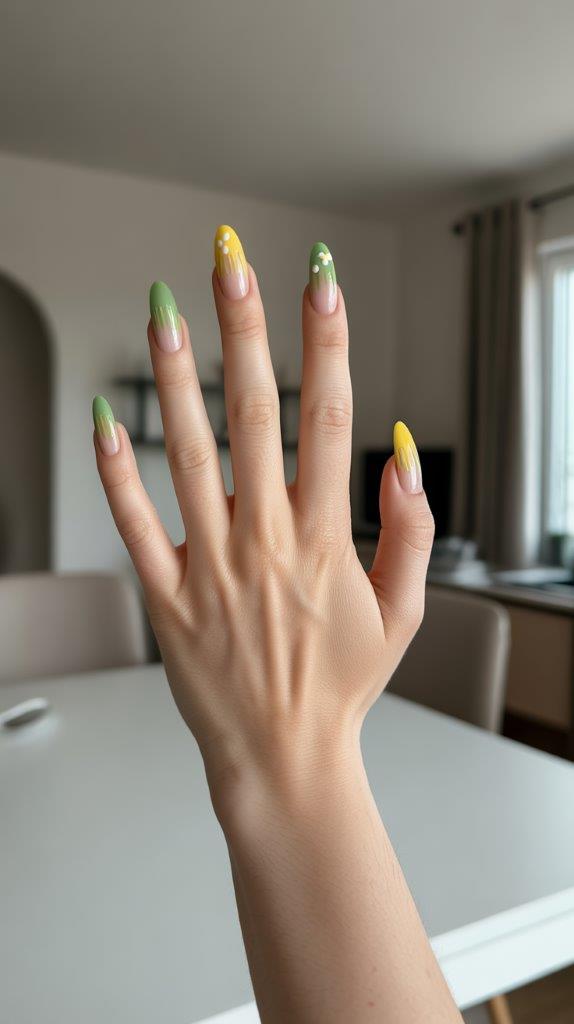
Create a gradient that mimics Easter basket grass—start with soft green at the base, fade to yellow at the tips. Add tiny egg or flower details if you’re feeling extra. It’s Easter in gradient form.
This design is surprisingly versatile. Keep it simple with just the gradient, or add small details that reference Easter baskets. Either way, you’re getting festive nails that feel cohesive and intentional.
The green-to-yellow fade is also just really pretty on its own. Even without Easter context, it reads as “spring” in the best possible way.
Choosing the Right Design for Your Style
Not all Easter nails need to scream “BUNNY SEASON.” Match the design to your personal aesthetic for nails you’ll actually want to wear.
If you’re minimalist, stick with solid pastels, subtle gradients, or simple geometric patterns. Maximalist? Go wild with multiple designs, detailed artwork, and all the embellishments. Somewhere in between? Accent nails are your best friend—keep most nails simple, make one or two pop.
The goal is feeling confident and festive, not wearing nails that don’t match your vibe just because it’s Easter. Your manicure should feel like you, just seasonally appropriate.
Making Your April Manicure Last
Easter might be one day, but your manicure can last all month with proper care. Start with good prep—clean nails, pushed-back cuticles, buffed surface, quality base coat.
Apply polish in thin layers. Seriously, thin is better than thick. Thick polish takes forever to dry and chips faster. Two thin coats beat one goopy coat every time. Seal with a good topcoat and reapply that topcoat every few days.
Wear gloves for cleaning and dishes. I know it’s annoying, but it genuinely extends your manicure life by days. Also, treat your nails gently—they’re not tools, no matter how tempting it is to use them as such.
Essential Supplies for Easter Nails
You don’t need a professional setup, just the right basics:
- Quality base and top coat: This is non-negotiable
- Pastel polish collection: Pink, lavender, mint, yellow, peach at minimum
- White and black polish: For details and contrast
- Thin nail art brush: For details and fine lines
- Dotting tool: For creating perfect dots and circles
- Striping tape: For clean lines and geometric patterns
- Gold foil or leaf: For accent details
That’s really all you need. Most Easter designs work with basic tools and standard polish. Save your money for more polish colors instead of fancy equipment.
Final Thoughts
April and Easter are basically begging you to embrace pastels, florals, and all things spring. Whether you go full festive with bunnies and chicks or keep it subtle with soft gradients and classic French tips, your nails can totally capture that Easter energy.
The beauty of Easter nails is the range. You can be playful or sophisticated, detailed or minimalist, trendy or classic. As long as you’re working with those gorgeous spring colors, you’re on theme.
So pick your favorite design (or try multiple throughout the month), grab your polish, and give yourself some Easter-worthy nails. Your fingertips deserve to celebrate spring just as much as the rest of you. And honestly? Looking down at pretty pastel nails all month is a mood booster we could all use.
Happy Easter, happy April, and happy painting! 🐰
Leave a Reply
You must be logged in to post a comment.