Okay, let’s be real. You’ve scrolled through Instagram and seen about a million holiday nail designs. Snowflakes are cute, Santa faces are a classic, but haven’t we been there, done that, got the chipped-polish T-shirt? This year, let’s skip the usual suspects and talk about the real showstopper: mistletoe nails.
Why mistletoe? It’s elegant, it’s symbolic (hello, potential holiday smooches!), and it’s just specific enough to make people lean in and say, “Wow, your nails are amazing!” It’s the perfect blend of festive and chic, and I’m honestly a little obsessed. I tried a simple mistletoe accent nail last year, and the number of compliments I got was borderline ridiculous. So, I’ve gone full-elf mode and compiled 25 of the most festive, fun, and fabulous mistletoe nail designs for Christmas 2024. Grab your favorite holiday drink, and let’s get inspired.
Why Mistletoe Nails are the Hottest Holiday Trend
Seriously, why is this trend popping off? It’s not just because we all want an excuse to stand under some mistletoe. This design is incredibly versatile. You can go from minimalist to maximalist without losing its charm. It works on short nails, long nails, almond shapes, you name it. Plus, that pop of green and white against a classic red or a deep navy? Chef’s kiss. It’s a step above the standard holiday manicure, and honestly, it just feels more sophisticated.
Getting Prepped: Your Canvas Awaits
Before we dive into the pretty pictures and ideas, let’s talk logistics for a second. A stunning design starts with a great base. You wouldn’t paint a masterpiece on a crumpled napkin, right?
First things first: shape and health.
Are you team short-and-squoval or team long-and-almond? Whatever your preference, make sure your nails are neatly filed and buffed. A healthy cuticle is your best friend here. A little cuticle oil goes a long way—trust me, it’s the difference between a manicure that lasts a week and one that looks sad after three days.
The non-negotiable base coat.
I know, I know, it’s tempting to skip it. But don’t! A good base coat prevents staining (especially from those deep reds and greens) and makes your polish cling on for dear life. It’s the unsung hero of every great manicure.
The Ultimate Mistletoe Nail Art Listicle: 25 Ideas to Steal
Alright, here’s the main event. I’ve broken these down by vibe, so you can easily find the perfect design for your holiday personality. FYI, some of these are totally doable at home, while others might be best saved for your next salon appointment. No judgment either way!
For the Minimalist Queen
You believe less is more, and your style is clean, elegant, and effortlessly cool. These designs are for you.
1. The Single Sprig Accent
This is my personal go-to. Paint all your nails a sheer, milky white or a soft nude. Then, on your ring finger, paint a single, delicate sprig of mistletoe with a tiny red dot for the berry. It’s subtle, stunning, and so easy to recreate.

2. Mistletoe French Tips
Give the classic French manicure a holiday twist. Instead of a white tip, paint a thin, forest green line along the tip of your nail. Add miniature white mistletoe leaves and red berries dotted along the green line. It’s a fresh take on a timeless look.

3. Negative Space Mistletoe
Let your natural nail be part of the design. Using nail guides or a steady hand, create a geometric section (like a triangle or a half-moon) of bare nail at the base of your nail. Fill the rest with a gorgeous burgundy or emerald green, and place a tiny mistletoe sprig in the negative space. So modern!

4. Tiny Mistletoe Doodles
On a stark white or classic red base, use a super-fine brush to draw tiny, almost abstract mistletoe sprigs randomly across all your nails. It looks like a delicate, hand-drawn pattern from a distance.

5. Mistletoe Liner
Using a striper brush, paint a single, continuous line that curves like a mistletoe vine across your nails. Add small leaves and berries off the main line. It’s elegant and artistic.

Glitter & Glam All the Way
If your philosophy is “the more sparkle, the better,” you’re in the right section. These designs are for making a statement.
6. Mistletoe on a Glitter Gradient
Start with a deep navy or black base. Then, using a makeup sponge, dab a gradient of gold or silver glitter from the tip down. Paint your mistletoe design over the glittery part. The sparkle peeking through the leaves? Absolutely magical.

7. Full-Bedazzled Mistletoe
Why use polish when you can use gems? Create a mistletoe branch using tiny green and white gemstones, with a single red crystal for the berry. This is a high-maintenance look, but for your company holiday party? Worth it. Just be prepared for everything to get slightly caught on your sweaters 🙂

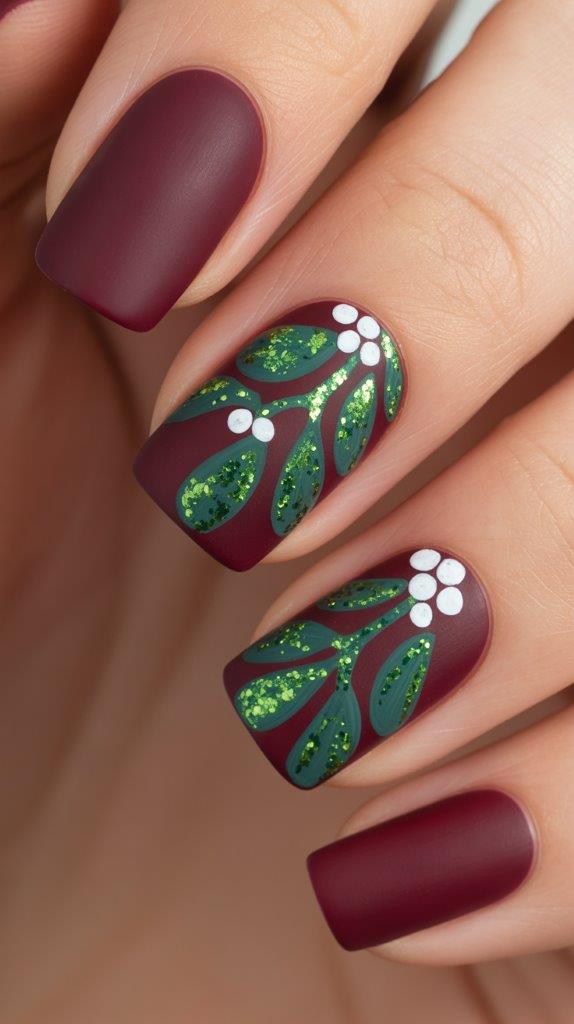
8. Glitter Cuticle Mistletoe
This one is edgy and cool. Paint your nails a matte burgundy. Then, with a fine brush or a dotting tool, draw a mistletoe sprig that seems to be “growing” from your cuticle, using green polish and a red berry. Immediately sprinkle loose green glitter only on the mistletoe leaves before the polish dries. Tap off the excess, and seal with a top coat. IMO, this is next-level.
9. Mistletoe with Gold Foil
Paint your mistletoe leaves as usual. Once they’re dry, use a clear top coat to carefully place tiny pieces of gold leaf only on the leaves themselves. It adds a luxe, textured sparkle that’s more sophisticated than straight glitter.

10. Glitter Berry Accent
Go for a simple green mistletoe design on a neutral base, but make the berries out of a single drop of red glitter polish. It adds just the right amount of festive sparkle.

Classic & Cozy Vibes
You love the traditional elements of Christmas. Think crackling fires, ugly sweaters, and a manicure that feels like a warm hug.
11. Plaid and Mistletoe Combo
This is a power couple. Paint a classic red and black or green and white plaid pattern on most of your nails. Then, on one or two accent nails, paint a detailed mistletoe bouquet with a satin ribbon bow. It’s the ultimate cozy-chic manicure.

12. Mistletoe Berries as Red Polka Dots
Can’t draw a detailed leaf to save your life? No problem. Paint your nails a creamy, off-white color. Then, using a dotting tool, create a pattern of random forest green and bright red dots. In your head, they’re just polka dots. To everyone else, it’s a clever and abstract mistletoe design. It’s a win-win.

13. The Mistletoe Bow
Focus on the cute bow that often ties the mistletoe together. Paint your nails a rich, creamy red. Then, on an accent nail, paint a simple white or gold satin ribbon bow. It’s simple, festive, and unmistakably holiday.

14. Classic Green and Red Combo
Embrace the classic color scheme fully. Paint your nails a deep Christmas green. On your accent nails, create a beautiful mistletoe bouquet with white detailing on the leaves and perfect red berries. It’s traditional, but oh-so-pretty.

15. Mistletoe in a Snow Globe
On a nude or light blue base, paint a circle on your accent nail to look like a snow globe. Inside, paint your mistletoe sprig sitting on a little mound of “snow” (white polish with a sprinkle of white glitter). So whimsical and cute!

Artsy & Abstract
You like your nail art to be a conversation piece. These designs are creative, unique, and a little unexpected.
16. Mistletoe Marble
Create a marble nail effect using white and forest green polish swirled together. Once it’s dry, use a dotting tool to add perfect red berries nestled within the green swirls. It’s mistletoe, but make it modern art.

17. Stained Glass Mistletoe
Using a black nail art striper, outline the shapes of mistletoe leaves and berries on a clear or white base. Then, carefully fill in the sections with different shades of green and red polish, like a stained-glass window. It’s stunningly detailed.

18. Watercolor Mistletoe
Using a damp brush and sheer green polish, create soft, watercolor-style washes of color on your nail in the shape of mistletoe leaves. Add a few defined red dots for berries. The effect is dreamy and ethereal.

19. Mistletoe Ombré
Create an ombré effect from a deep red at the cuticle to a forest green at the tip. Then, paint a white mistletoe design over the blend. The colors peeking through make the design pop.

20. Reverse Mistletoe
Paint your mistletoe design in negative space. Imagine the leaves and berries are cut out, showing your natural nail, against a solid color like hunter green or burgundy. It requires a steady hand but looks incredibly cool.

Dramatic & Daring
You’re not afraid to go big. Long nails, bold colors, and intricate art are your playground.
21. The Wrapping Paper Nail
Turn your entire nail into a piece of mistletoe-themed wrapping paper. Create a repeating pattern of mistletoe sprigs and berries over a solid base. It’s busy, it’s bold, and it’s absolutely festive.

22. Mistletoe Vine
Paint a single, elegant vine of mistletoe that starts on one nail, trails over the cuticle, and continues onto the next nail. This is a show-stopping design best for long stiletto or coffin nails.

23. Mistletoe with a Splash of Holo
Paint a classic mistletoe design on a jet-black base. Then, cover everything with a sheer holographic top coat. The entire design will shimmer with a rainbow sparkle in the light. Yes, please!

24. 3D Mistletoe
Take the gemstone idea further by using tiny green and white pearl beads to create a 3D mistletoe sprig that physically stands off the nail. It’s the ultimate dramatic look (just maybe don’t try to put on gloves).

25. Mistletoe & Candle
Create a whole holiday scene! On an accent nail, paint a classic Christmas candle with a glowing flame, and have a sprig of mistletoe draped over it. It’s detailed, it’s festive, and it proves your nail artist is a true wizard.

Your Mistletoe Nail Art Toolkit
Feeling inspired to try one yourself? Here’s what you’ll need to have on hand. You don’t need a professional kit, but a few key tools will make your life so much easier.
- A Detail Brush: This is non-negotiable for painting those tiny leaves. You can get a super cheap set online that will work perfectly.
- Dotting Tools: These are fantastic for creating perfect berries and even the little clusters on the leaves. If you don’t have any, the end of a bobby pin works in a pinch!
- Good Top Coat: Are you using a quick-dry top coat yet? If not, you’re living in the past. It prevents smudges and adds a glorious shine. Seche Vite is a cult favorite for a reason.
- The Right Greens: Not all greens are created equal. You’ll want a forest green and maybe a brighter lime green for highlights to make the leaves look more dimensional.
Pro Tips I Learned the Hard Way (So You Don’t Have To)
Let me save you some frustration and smudged polish. Here are my hard-earned lessons.
- Patience is a Virtue: Wait for each layer to be completely dry before moving on to the next step. I’ve ruined more designs by being impatient than I care to admit.
- Clean-Up is King: Keep a small brush dipped in pure acetone nearby to clean up any mistakes around your cuticles. A crisp line makes even a simple design look professional.
- Less is More with Polish: When loading your detail brush, use less polish than you think you need. It’s easier to add more than to fix a giant blob of green on your nail.
- Top Coat Between Layers? For really intricate designs, sometimes I’ll do a base color, top coat, let it dry, then do the art, then another top coat. This way, if you mess up the art, you can wipe it off without ruining your base. You’re welcome :/
So, Which Mistletoe Vibe is So You?
See? I told you there was a mistletoe design for everyone. From the single subtle sprig to the full-on 3D gemstone masterpiece, this theme is flexible enough to fit your style perfectly. The best part is that it feels personal and thoughtfully festive.
This year, ditch the same old snowman and give your tips a touch of tradition with a modern, flirty twist. Your nails will be the talk of every holiday gathering—and who knows, they might even earn you a kiss or two under the real thing 😉
Now, I have to know—which of these 25 designs are you trying first? DM me your creations! Happy polishing
Leave a Reply
You must be logged in to post a comment.