Okay, let’s be real for a second. Do you ever scroll through nail art Instagram and just feel… tired? Like, I’m supposed to sculpt a tiny, perfect sunflower on each nail while also making breakfast? My hands are many things, but they are not micro-surgeons. I’m convinced some of those artists have robot precision the rest of us lack.
But here’s the good news: spring nail art doesn’t have to be complicated to be absolutely adorable. In fact, some of the cutest looks are the simplest ones. I’ve spent more time and money than I’d like to admit on bottles of polish and dotting tools, and I’ve learned one thing: if it takes longer than an episode of your favorite show, it’s probably not a “simple at-home” design.
So, whether you’re a total newbie or just someone who wants a quick, cheerful mani without the salon price tag, this list is for you. We’re talking minimal tools, forgiving techniques, and designs that actually look like you meant them to. Let’s get those nails ready for sunshine and blooming flowers.
Your Starter Kit for Success (It’s Smaller Than You Think)
Before we jump into the designs, let’s talk tools. You don’t need a whole kit. Seriously, I made this mistake and bought a 50-piece set where I use, like, three things. Here’s the real MVP list:
- A Good Base & Top Coat: This is non-negotiable. It makes your polish last and prevents stains. I love a good quick-dry top coat—it’s a lifesaver.
- Your Color Palette: A few key spring colors go a long way. Think: a pastel pink, a mint green, a lavender, a sky blue, and a clean white. A sheer nude or pale peach is also clutch.
- A Dotting Tool: This is your secret weapon. You can buy one for a few bucks, or use a bobby pin, a toothpick, or the end of a makeup brush. I’m not judging.
- Scotch Tape or Nail Art Tape: For crisp lines. Just make sure your base color is completely dry first. I learned that lesson the hard way with a smeary, sad mess.
- A Small Makeup Sponge: For effortless gradients.
Got that? Cool. You’re basically a professional now. Let’s get to the fun part.
The 17 Designs: From “I Can Do That!” to “Okay, Let Me Try That”
I’ve broken these down from super-easy to “requires one deep breath of concentration.” But trust me, they’re all totally doable.
Category 1: Literally One Step Beyond a Solid Color
These are for the days you want something cute but have approximately 10 minutes of patience.
1. The Glossy Pastel
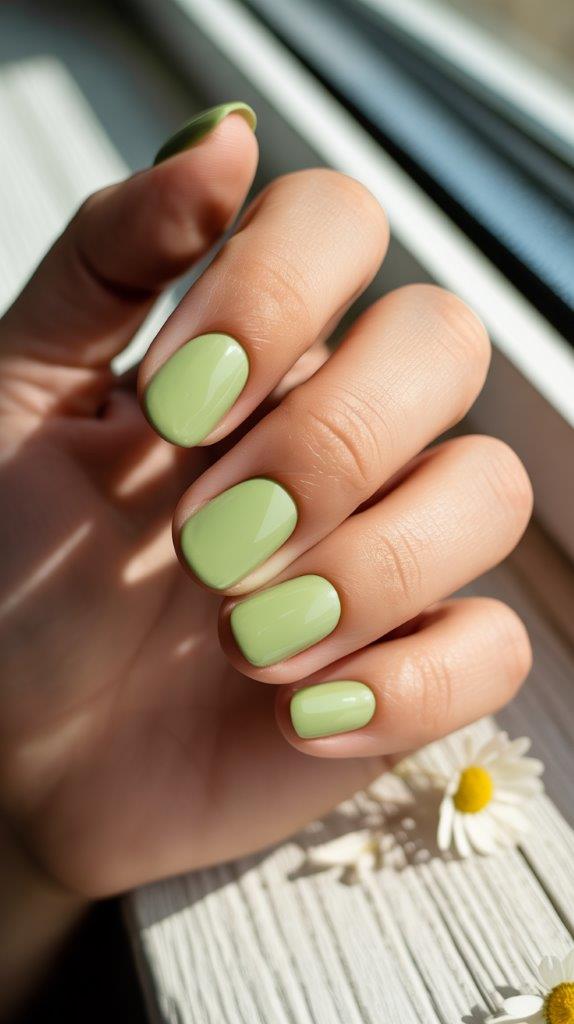
Sometimes, you just need a perfect swipe of color. The trick here is choosing a high-quality pastel polish that isn’t streaky. Apply two thin coats, seal with a super-glossy top coat, and boom. It’s fresh, clean, and looks amazing with a spring tan. A creamy lilac or a soft pistachio green are my go-to shades.
2. Confetti Sprinkle
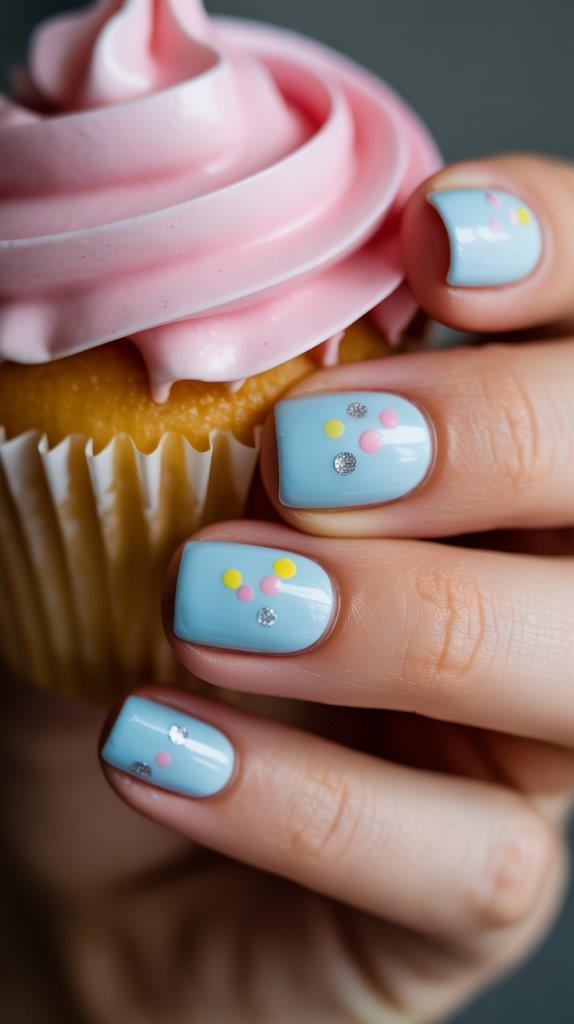
Paint your nails a light, solid color. While the top coat is still wet, take a glitter polish with small, multi-colored glitters and just dab one tiny sprinkle onto each nail. It’s random, joyful, and impossible to mess up. It looks like you captured a bit of a party.
3. Negative Space Tip
Paint a thick, colorful stripe across just the tip of your nail, leaving a clear gap of bare nail between the color and your cuticle. You can use the nail’s natural edge as a guide. It’s modern, cool, and uses less polish. Win-win.
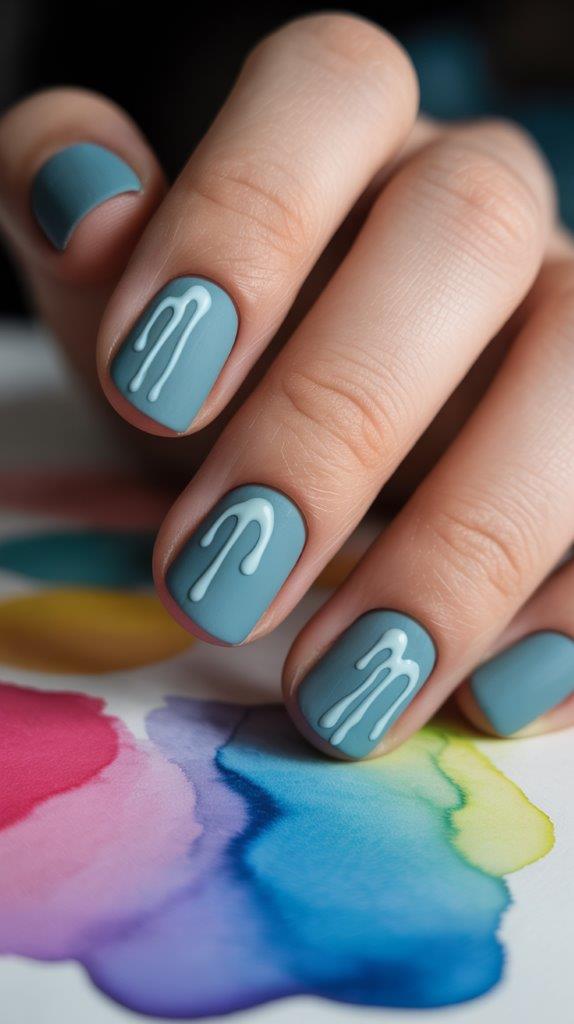
4. Drizzle Art
Got a nearly-empty polish bottle with a drippy brush? Use it! After your base color dries, let the polish drip from the brush in a loose, squiggly line across your nail. It’s abstract, artsy, and requires zero precision. My favorite is a white drizzle over a robin’s egg blue.
Category 2: The Magic of Dots & Lines
Once you master a dot and a semi-straight line, the world is your oyster.
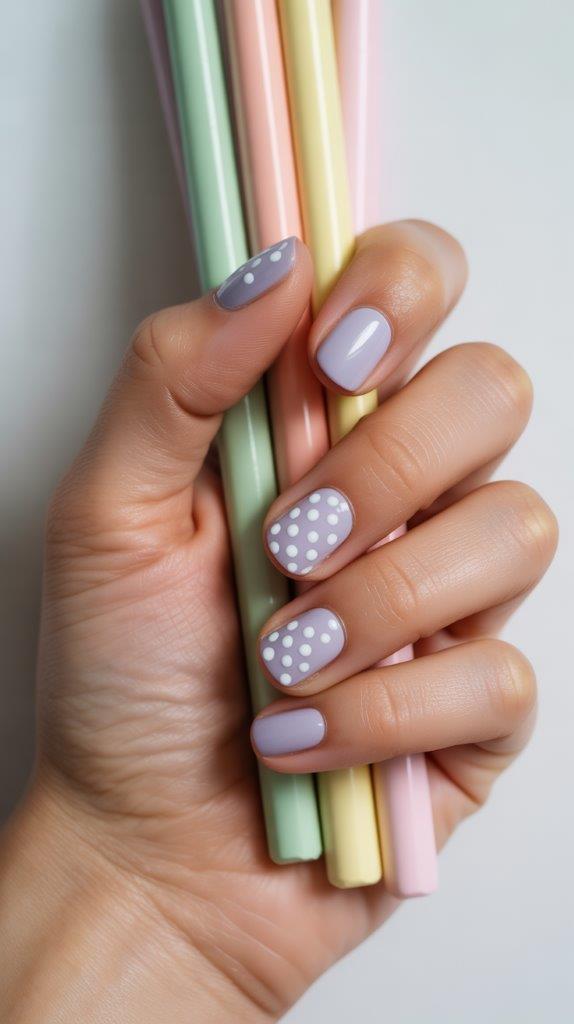
5. Polka-Dot Party
You knew this was coming. Using your dotting tool (or bobby pin!), add tiny dots in a contrasting color to your pastel base. Space them out evenly or cluster them in one corner. Pro tip: dip your tool in polish dabbed onto a piece of foil, not straight into the bottle. You’ll get better control.
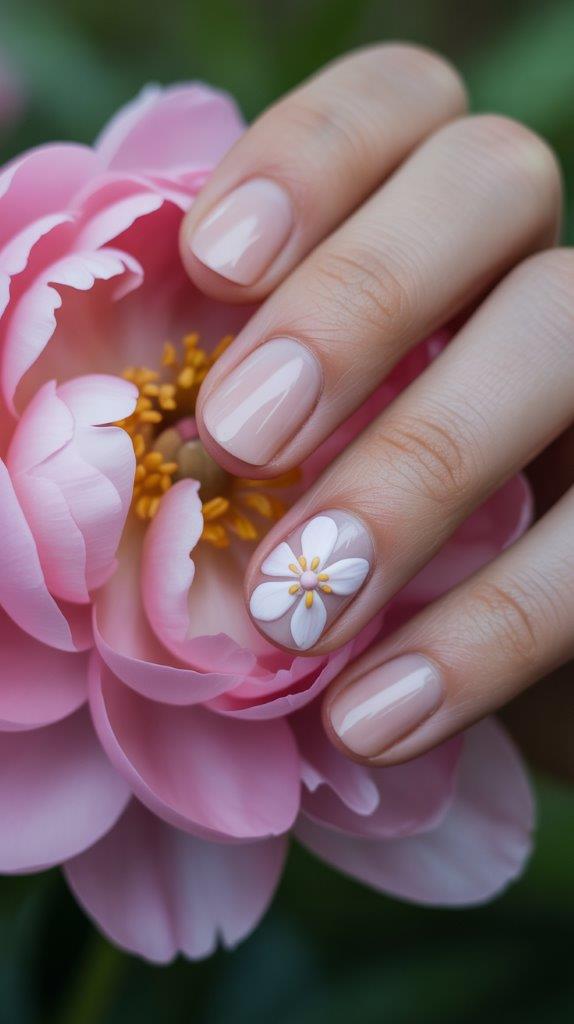
6. Baby Blooms
Make five dots in a circle (use the end of a pen if you need to!). Before they dry, drag a toothpick from the center out through each dot to create simple petals. Add a different colored dot in the center. Instant, tiny flower on an accent nail!
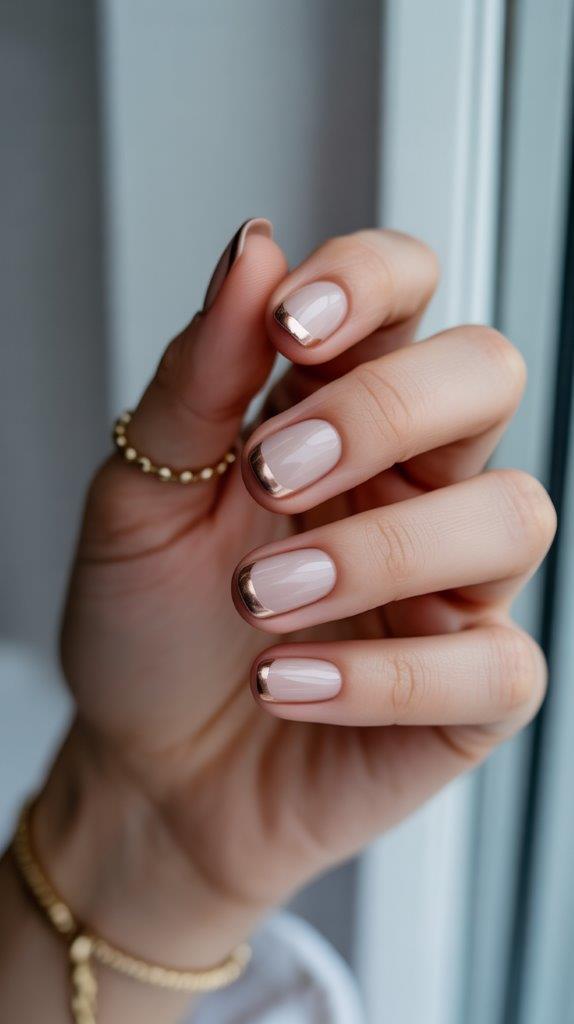
7. Side-Stripe Chic
Paint all nails a neutral or soft color. Then, take a striping brush or even the edge of a skinny piece of tape, and paint a single, thin line along the very side edge of your nail. Metallic gold or silver on a nude base is incredibly elegant and sneaky-easy.
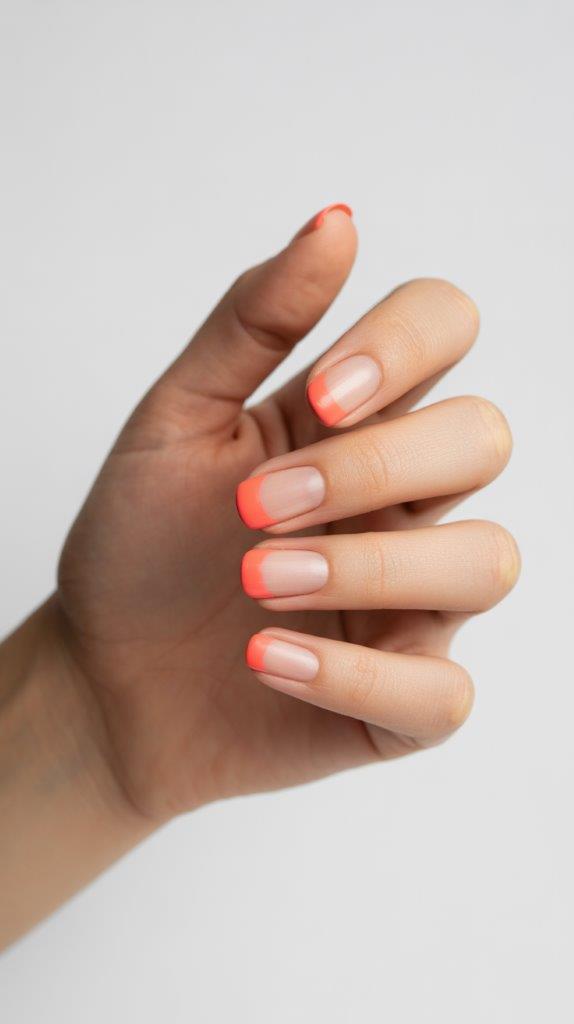
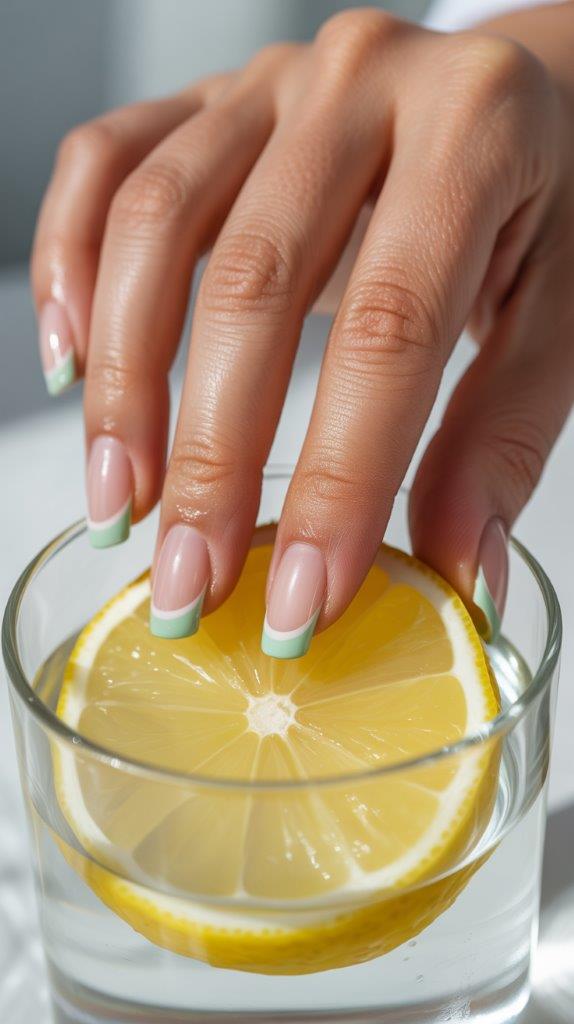
8. Minimalist French
Forget the traditional pink-and-white. Paint a classic French tip, but use a fun spring color instead of white. A coral tip on a bare nail? A mint green tip on a sheer base? It’s a fresh take that feels special.
Category 3: Simple Shapes & Tape Tricks
Tape is your friend. It does the hard work for you.
9. Color-Block Half Moon
Use hole reinforcement stickers (yes, from the office supply aisle!). Place them at the base of your nail after your base color dries. Paint the exposed half-moon at your cuticle with a new color. Peel off the sticker for a perfect curve. No sticker? You can also gently draw the curve with the polish brush itself.
10. Geometric Accent Nail
Use scotch tape to create a clean triangle or diagonal line on one nail. Paint over it with a bold color, peel the tape off immediately, and you have a perfect graphic shape. Keep the other nails a complementary solid.

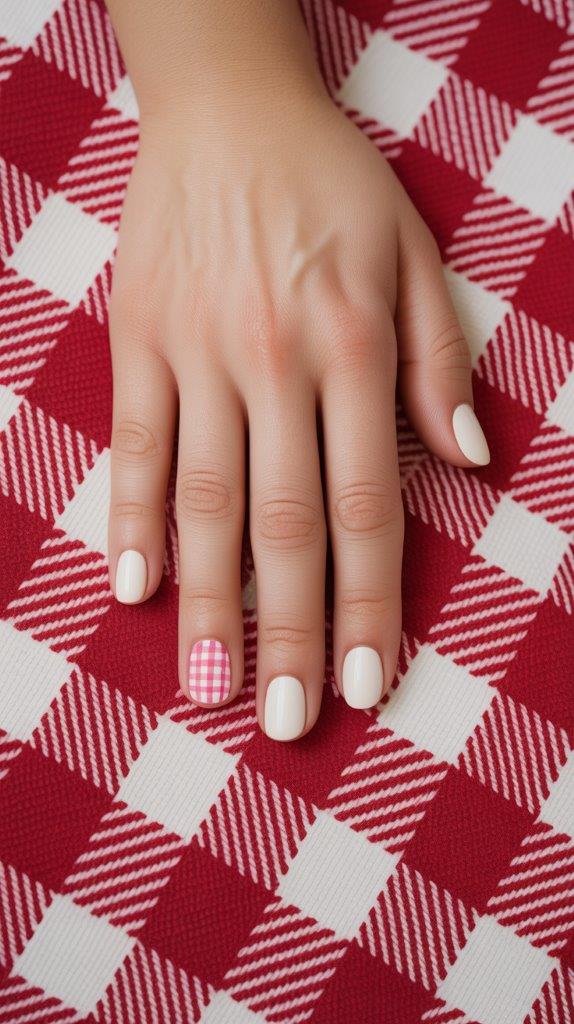
11. Gingham Patch
This sounds hard but isn’t. Paint a nail white. Once dry, use a thin brush or nail art pen to draw a few crossing horizontal and vertical lines in a pastel color. Then, fill in every other tiny square they create. Just do a small patch in the center—you don’t need to cover the whole nail. It’s so cute and picnic-ready.
Category 4: Easy-Peasy Art Techniques
These involve a little technique, but they’re very forgiving.
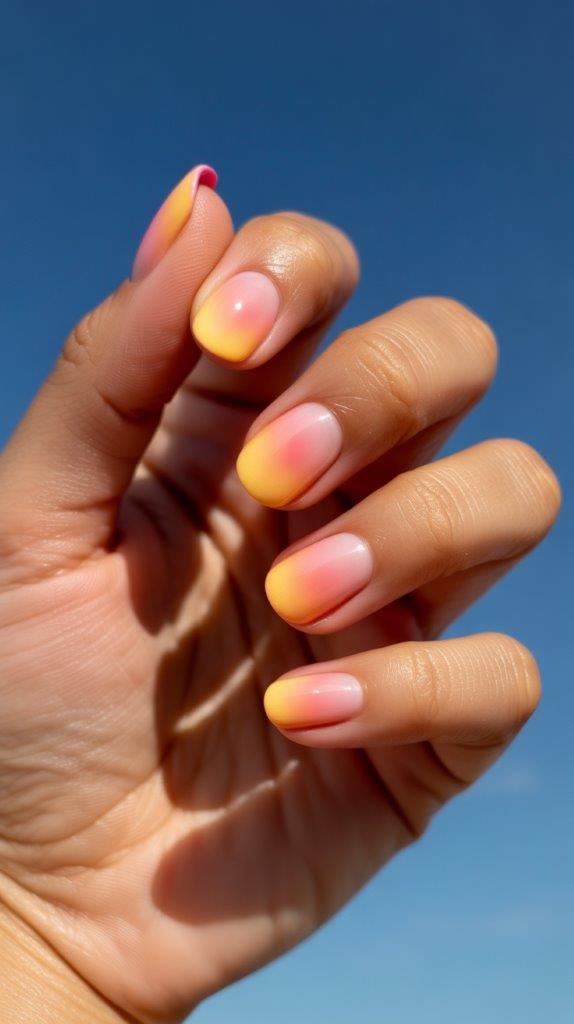
12. Sponged Gradient
This is easier than it looks! Paint your nails white. Dab two colors onto a makeup sponge (like pink and orange). Gently dab the sponge onto your nail. The colors will blend seamlessly. It’s a gorgeous sunset effect every time. Messy is good here!
13. Marble Nails (The Easy Way)
Drop a dot of white polish into a cup of room-temperature water. Add a dot of a pastel color so it rings the white. Swirl with a toothpick. Dip your finger into the center, pull it out, clean up the excess with a cotton swab, and voilà. It takes practice, but even the “failures” look cool. FYI, this is a desk-clearing, roll-up-your-sleeves project, but so worth it.

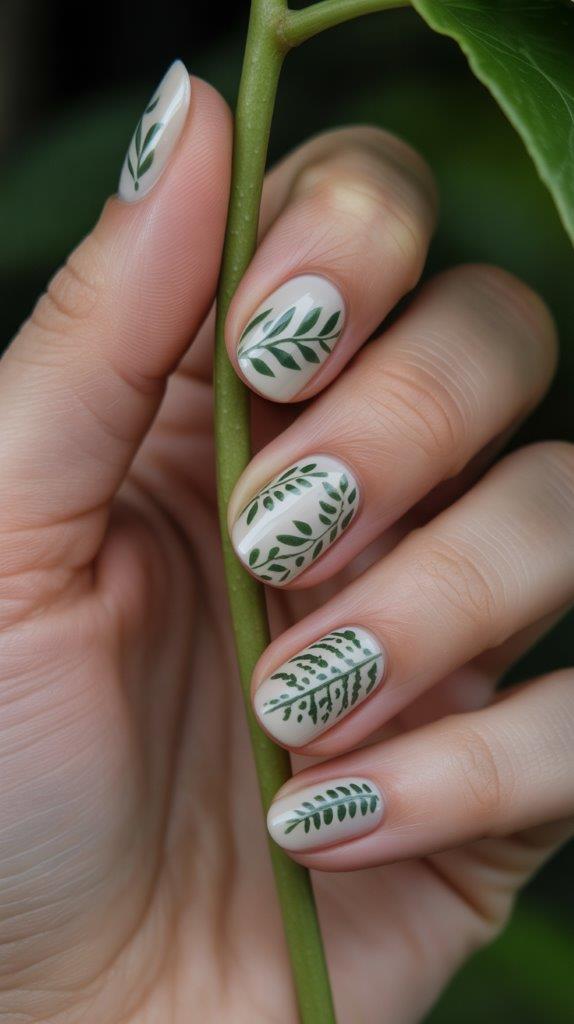
14. Stamped Leaves
If you want to invest in one “fancy” tool, get a clear nail stamping kit with a simple leaf plate. You paint the design on the plate, pick it up with the stamper, and press it onto your nail. It feels like magic and gives you perfect, intricate art in seconds. IMO, it’s the biggest bang for your buck in nail art.
Category 5: Cute Character Energy
Because why shouldn’t your nails have faces?
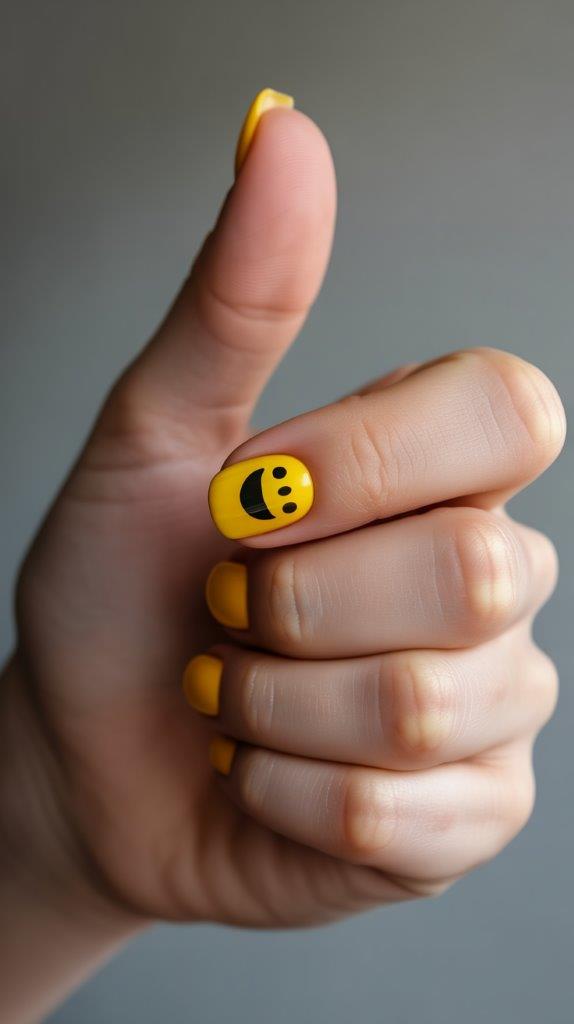
15. Happy Face Accent
On one or two nails, use your dotting tool to make two eyes and a big, smiling U-shaped mouth. That’s it. It’s impossibly cheerful. Try it on a bright yellow nail.
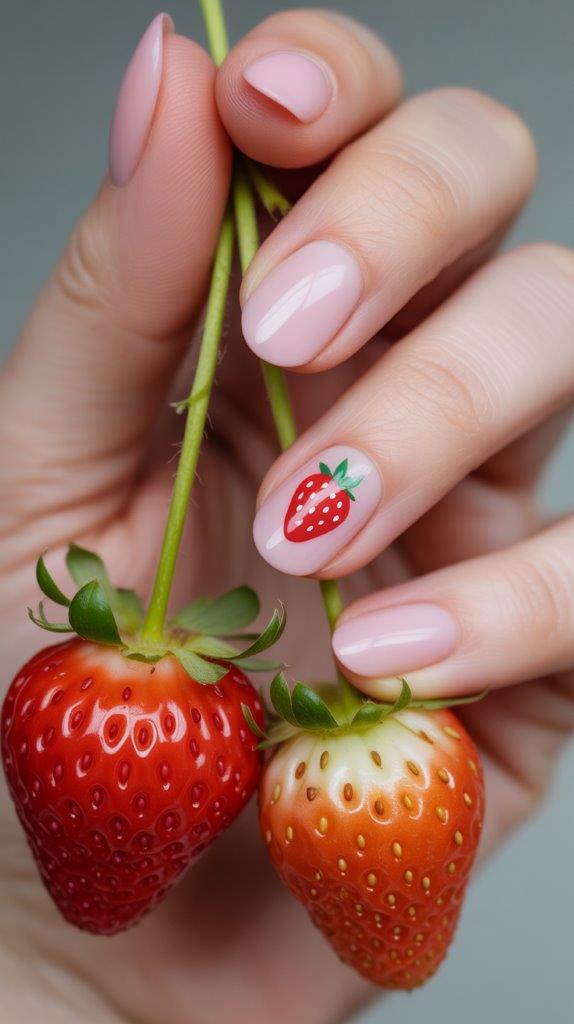
16. Simple Strawberry
Paint a nail red. Let it dry. Add small green dots at the tip for seeds and a little green V for the leaf. Instantly sweet and fruity!
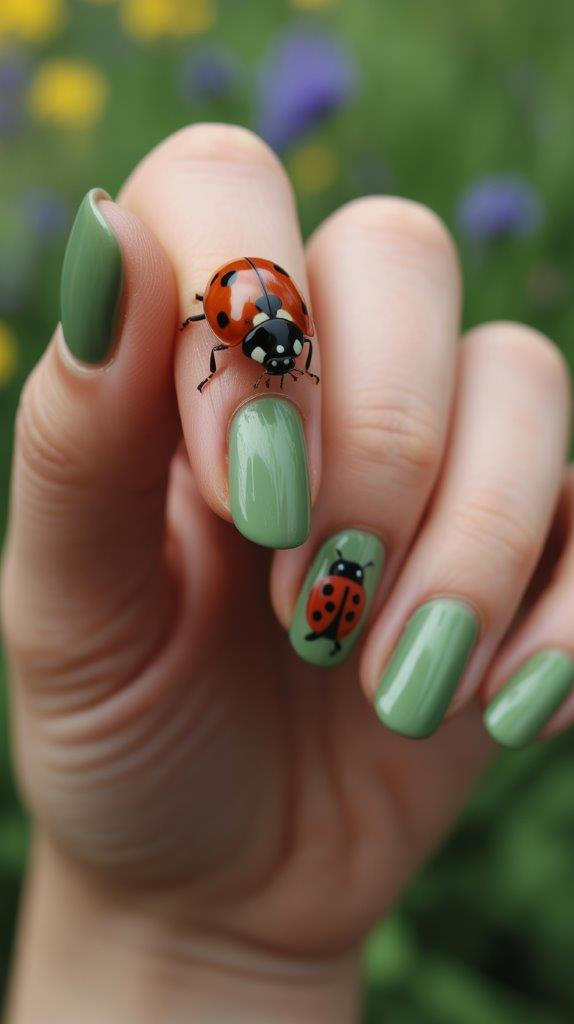
17. Ladylbug Love
A red dot on a white or green base. Add a few tiny black dots and a little black head. It’s just dots on dots! So charming.
The Real Secret to Making It Last (And Look Good)
A cute design is pointless if it chips in a day. Here’s my battle-tested routine:
- Wrap Your Tips: When you paint, swipe the brush along the very edge of your free nail tip. This seals the polish and prevents that ugly tip-wear.
- Thin Coats Win: Always, always do two thin coats instead of one gloopy one. It dries faster and lasts longer.
- Oil is Your Friend: Rub cuticle oil around your nails every day. It keeps your skin happy and makes your mani look salon-fresh.
So, what are you waiting for? Grab that polish hiding in the back of your drawer and pick one design. Start with the dots. I promise, it’s not scary. The best part about doing it yourself? If you smudge it, literally no one knows but you. And you can always just add another dot on top and call it abstract art. 🙂
Now go on, give your fingertips a little spring fling. And hey, if you try one, I’d love to see it! Tag me or something. (Just kidding, I’m not famous. But seriously, you’ll do great).
Leave a Reply
You must be logged in to post a comment.