

Okay, almond nail girlies, this one’s for you. You’ve committed to the most elegant, lengthening nail shape out there (good choice, btw), and now Easter is rolling around. But how do you translate bunnies and pastels onto that sophisticated, tapered canvas without it looking… juvenile?
I feel you. There’s nothing worse than a gorgeous almond shape getting weighed down by a clunky, awkward design. The good news? Almond nails are actually the perfect playground for spring nail art. Their elongated silhouette makes negative space look chic, lets delicate lines flow, and turns every finger into a mini masterpiece.
Let’s skip the basics and jump right into 15 almond nail ideas that celebrate Easter and spring with the elegance your nail shape deserves. I’ve tested more than a few of these myself, and I’m telling you, almond makes all the difference.
Why Almond Nails Are Spring’s Best Friend
Before we get to the designs, let’s geek out for a second on why this shape works so well. It’s not just about looks.
- The Canvas: That long, tapered space is like a artist’s dream. You have room for gradients, intricate line work, and designs that need to “breathe.”
- The Illusion: Everything looks more graceful. A simple stripe becomes a sweeping line. A dot becomes part of a deliberate composition.
- The Vibe: It naturally leans chic. Even with a playful Easter theme, your manicure will feel intentional and polished, not like a kids’ craft project.
Ready to see what I mean? Let’s dive in.
1. The Almond Speckled Egg
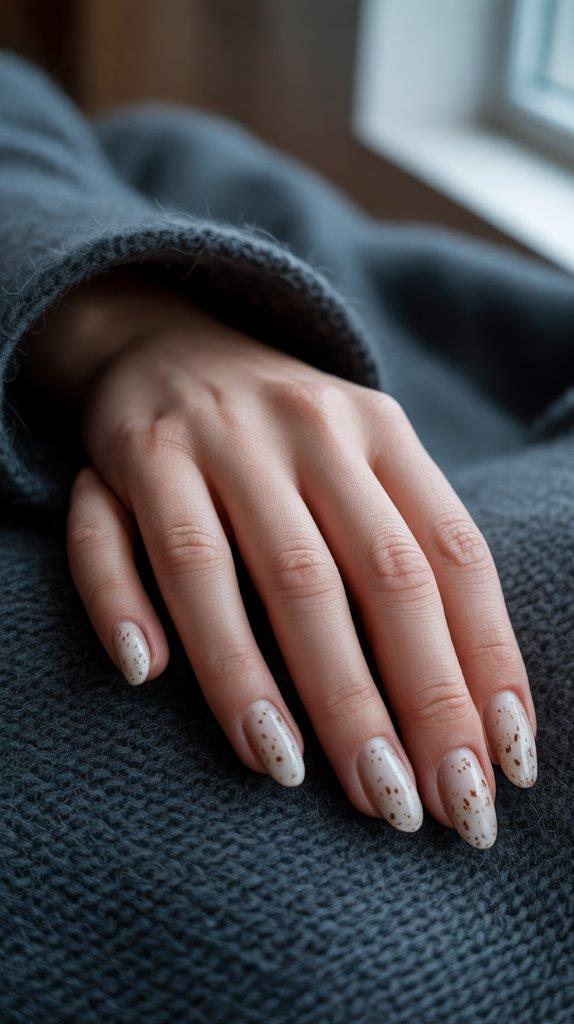
This classic Easter look gets an upgrade on an almond shape. The speckles follow the natural curve of the nail, making them look more organic than on a square tip.
How to nail it: Go for a soft, creamy pastel base. Use a toothbrush to spatter fine brown or gold speckles, concentrating them slightly along the sides to accentuate the taper. Finish with a high-shine glossy top coat to mimic a real egg’s finish. It’s effortlessly chic.
2. Pastel French Ombré Tips
Forget a stark French line. On an almond nail, a soft ombré fade at the tips is everything.
Use a makeup sponge to gradient two complementary pastels (like lilac into sky blue) from the tip down. The almond shape makes the fade look longer and more seamless. It’s like a spring sunset on your fingertips.
3. Delicate Sideways Bunny Silhouette

This is where almond nails shine. Paint a single, minimalist bunny profile sideways, stretching along the length of the nail bed.
Place it near the cuticle so the bunny seems to be hopping down the elegant slope of your nail. It’s storytelling. On a short nail, it’s cute. On an almond nail, it’s art.
4. Negative Space Half-Moons with a Twist

The almond shape and negative space are a match made in minimalist heaven.
Use stickers to expose your natural nail in a perfect half-moon at the cuticle. Then, paint the rest of the nail a bold pastel, like a vibrant magenta or cerulean blue. The sharp contrast and elongated color block look incredibly modern and expensive.
5. Single Glitter Gradient

Want sparkle without going full disco ball? A glitter gradient along just one side edge of your almond nail is the answer.
Apply dense glitter polish or loose glitter along the side of the nail, from cuticle to tip, fading it inward. It creates a dazzling, asymmetrical accent that catches the light with every movement. IMO, this is the classiest way to wear glitter.
6. Wispy Botanical Vines

The length of an almond nail is perfect for delicate line art. Using a thin brush or nail art pen, paint a single, wispy vine that starts at your cuticle and curls elegantly toward the tip.
Add tiny leaves and a couple of dot-style flowers. It looks like a delicate tattoo or jewelry. This design makes the most of your nail’s real estate without overcrowding it.
7. Modern Color Block with Metallic Line

Clean, graphic, and so chic. Use nail tape to block off a diagonal or vertical section of your almond nail. Paint one side a pastel, the other a neutral.
Then, right where the colors meet, add a thin, precise line of metallic gold or silver polish. The almond shape turns this simple design into a striking architectural statement.
8. “Stained Glass” Almond Nails
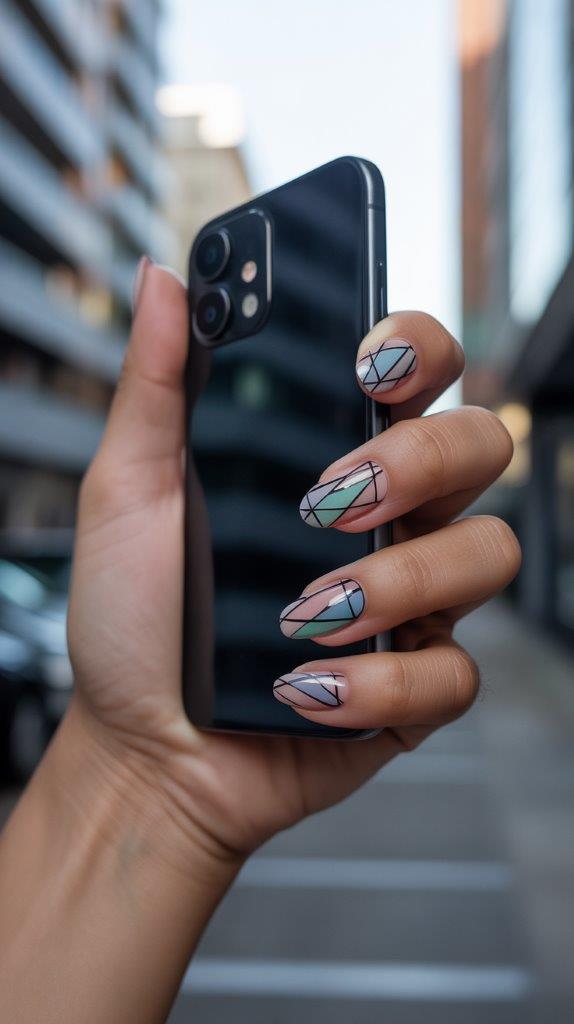
This looks complex but is manageable with striping tape. Use black nail art tape or a very fine brush to create leading lines in a geometric pattern down the length of your nail.
Fill the resulting panels with different jewel-toned pastels (think emerald, sapphire, amethyst). The tapered shape makes the design look like a real stained glass window. It’s a showstopper.
9. Marbled Perfection

The fluid, swirling patterns of marble look phenomenal on a long, tapered nail. Each nail becomes a unique, organic work of art.
Use a water marble technique or a sheer marbled gel to get those deep, realistic veins. The almond shape lets the swirls flow beautifully from base to tip. Pro tip: a matte top coat on this looks like actual stone.
10. Minimalist Dot Grid
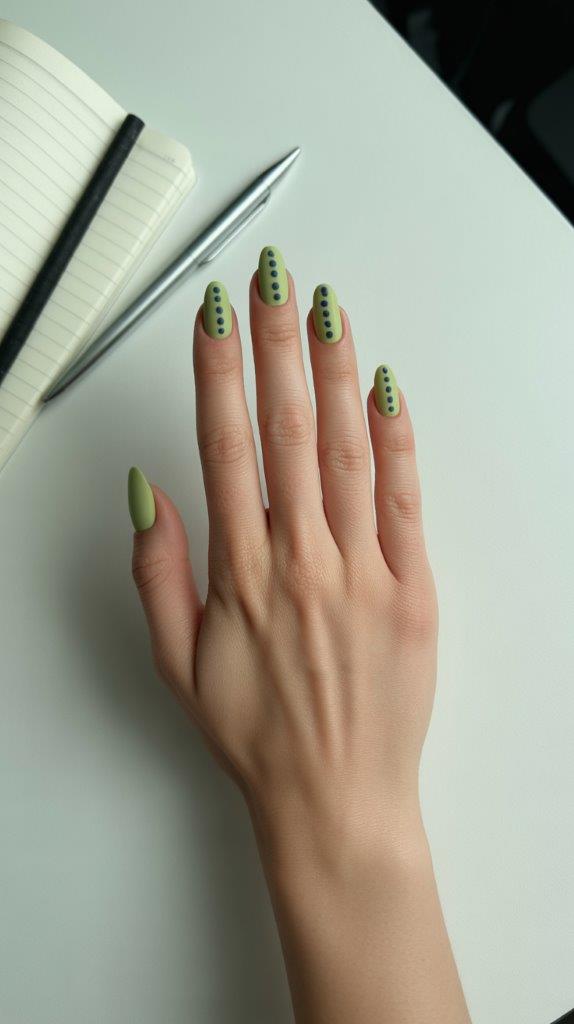
Instead of random polka dots, try a precise grid. Using a dotting tool, place three small dots in a vertical line down the center of the nail.
The almond shape naturally guides the placement, creating a sophisticated, orderly pattern. Use contrasting colors, like navy dots on cream, for maximum impact.
11. Sun-Kissed Almond Tips

This is like a reverse French with attitude. Paint the majority of your nail a deep, sun-kissed coral or peach.
Leave the very tips bare, just sealed with a clear gloss, or paint them a sheer, shimmering gold. It’s a warm, summery look that feels fresh and unexpected for Easter.
12. Abstract Watercolor Wash
Channel soft, dreamy watercolors. Using a damp brush, blend washes of pastel pink, yellow, and blue directly on the nail, letting them bleed together softly.
The almond shape provides the perfect “canvas” for this painterly, ethereal effect. No two nails will be alike, and that’s the beauty of it.
13. Single Statement Pearl

Sometimes, less is infinitely more. Paint all your nails a solid, matte pastel.
On your ring fingers, affix a single, perfect, medium-sized iridescent pearl just off-center near the cuticle. The pearl follows the curve of the almond shape, creating a look that’s both bridal and cool-girl chic. It’s incredibly elegant.
14. “Bunny Ear” French Tips

A playful twist on the French manicure for almond nails. Paint the tips white, but instead of a straight line, create two subtle points to form abstract “bunny ears.”
Keep the rest of the nail a sheer pink or nude. It’s a clever, subtle nod to the holiday that only those in the know will get. Wink-wink.
15. Gilded Edge Accent

This is the ultimate in minimalist luxury. After applying your base color (a neutral taupe or soft grey works beautifully), use a tiny brush to paint just the very edge of the almond nail with liquid gold leaf or metallic polish.
It’s like your nails are gilded with gold. This detail pops spectacularly on the tapered edges and looks expensive beyond belief.
Pro Tips for Maintaining Your Almond Spring Manicure
FYI, a great design needs a strong foundation. Almond nails can be prone to breakage at the tip if you’re not careful.
- Invest in a Good Builder Gel or Dip Powder: If you get extensions or overlays, these provide the flexible strength almond shapes need. I learned this the hard way after a sad breakage incident.
- File Correctly: Always file the sides straight toward the tip to create the taper, never saw back and forth. This preserves the nail’s integrity.
- The Right Top Coat: A thick, encapsulating top coat that wraps over the free edge is non-negotiable. It seals the design and acts as a shock absorber.
So, which of these almond nail ideas has you ready to book your appointment? Honestly, I’m torn between the Gilded Edge for everyday luxury and the Stained Glass for a total moment. The beauty of the almond shape is that it elevates everything it touches.
Your spring manicure should make you feel as fresh and vibrant as the season itself. With these designs, your nails will be not just festive, but flawlessly chic. Go ahead, show off that perfect taper! 🙂
Leave a Reply
You must be logged in to post a comment.