You know that weird spot where your hair is too long for a “messy bob” but too short for a “real” ponytail? Yeah, I live there too. Medium hair is the Goldilocks of lengths—full of potential, but sometimes you just stare in the mirror, sigh, and throw it in a claw clip for the third day in a row. Sound familiar?
I refuse to let you suffer another boring hair day. I spent a weekend binge-watching tutorials and testing these out on my own stubborn strands. The result? 29 ridiculously easy hairstyles that take under five minutes each. No double-jointed fingers required. No fancy tools. Just you, your hair, and a little bit of attitude.
1. The TikTok Twist Ponytail

This one went viral for a reason—it looks complicated but takes fifteen seconds. Section your hair into two halves at the nape of your neck. Twist them individually, then twist them around each other before securing with an elastic. The result looks like a $50 braid without the brainpower. Pro tip: pulling a few face-framing strands loose makes it look intentionally messy (and hides the fact you did it while half-asleep).
2. The “I Woke Up Like This” Half-Up Knot

Grab the top half of your hair like you’re making a tiny ponytail. Instead of pulling it all the way through the elastic on the last loop, stop halfway. You get this cute little loop that sits on top of your head like a bow. I call this the “brunch” hairstyle because it works for both a hangover and a meeting with your boss.
Why it works:
It keeps hair off your neck without committing to a full updo. Plus, it hides greasy roots like a magician.
3. The Mini Space Buns
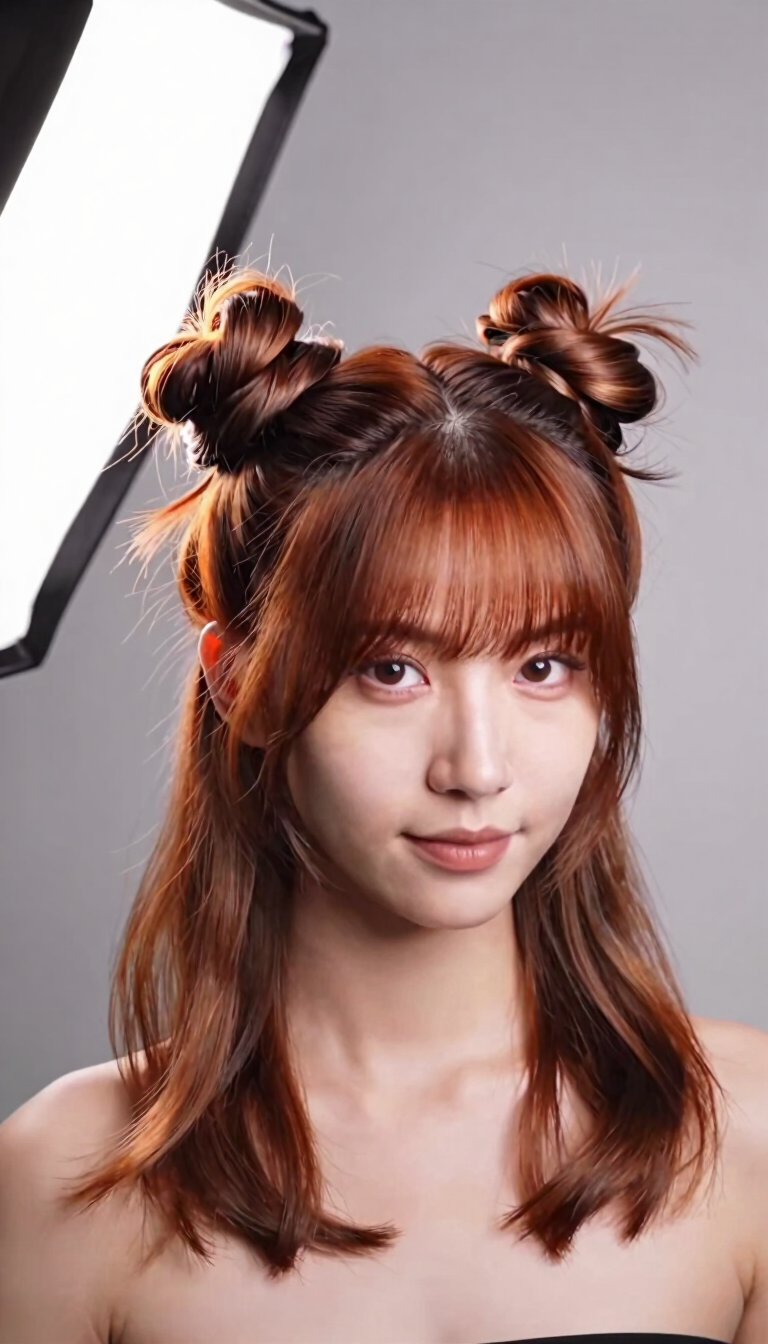
Split your hair down the middle. On each side, gather a section from your temple to your ear and twist it into a tiny bun on top of your head. Don’t make them perfect—chaos is the point here. Leave the rest of your hair down for an edgy contrast. This is my go-to for concerts or days when I want to look like I have a personality.
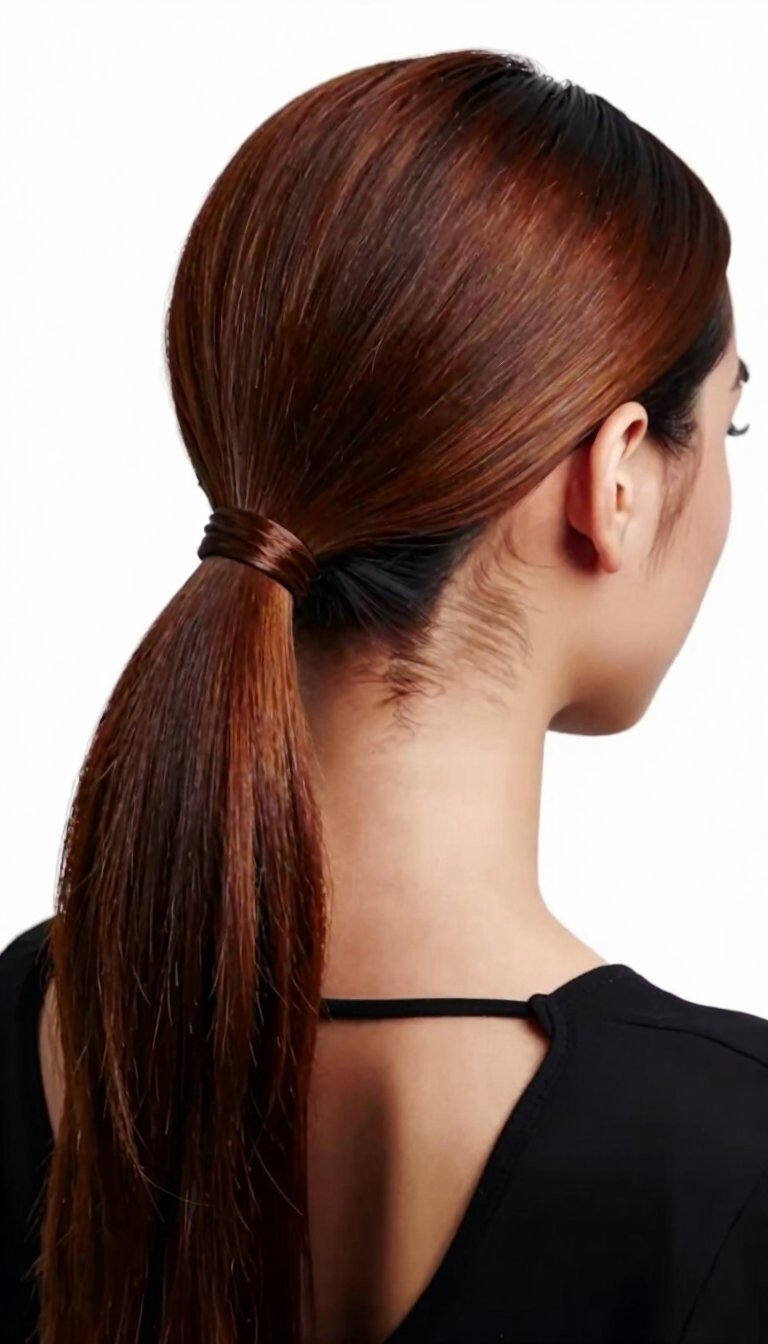
4. The Low Slicked-Back Pony

Wet your hair slightly or use gel. Comb everything straight back—think ballerina vibes. Secure it low at the nape of your neck. The secret weapon here is a satin scrunchie because it won’t dent your hair. Wrap a tiny strand around the elastic to hide it. This screams “effortless chic” even though you used six bobby pins and a prayer.
5. The Faux French Twist

Twist all your hair to one side, roll it upward toward your head, and pin it in place with bobby pins. You don’t need to tuck the ends perfectly—let them peek out for a modern vibe. I practiced this in front of the mirror for exactly two minutes before mastering it. Use texturizing spray beforehand so your hair doesn’t slip away like a wet bar of soap.
6. The Side Braid with Ribbon
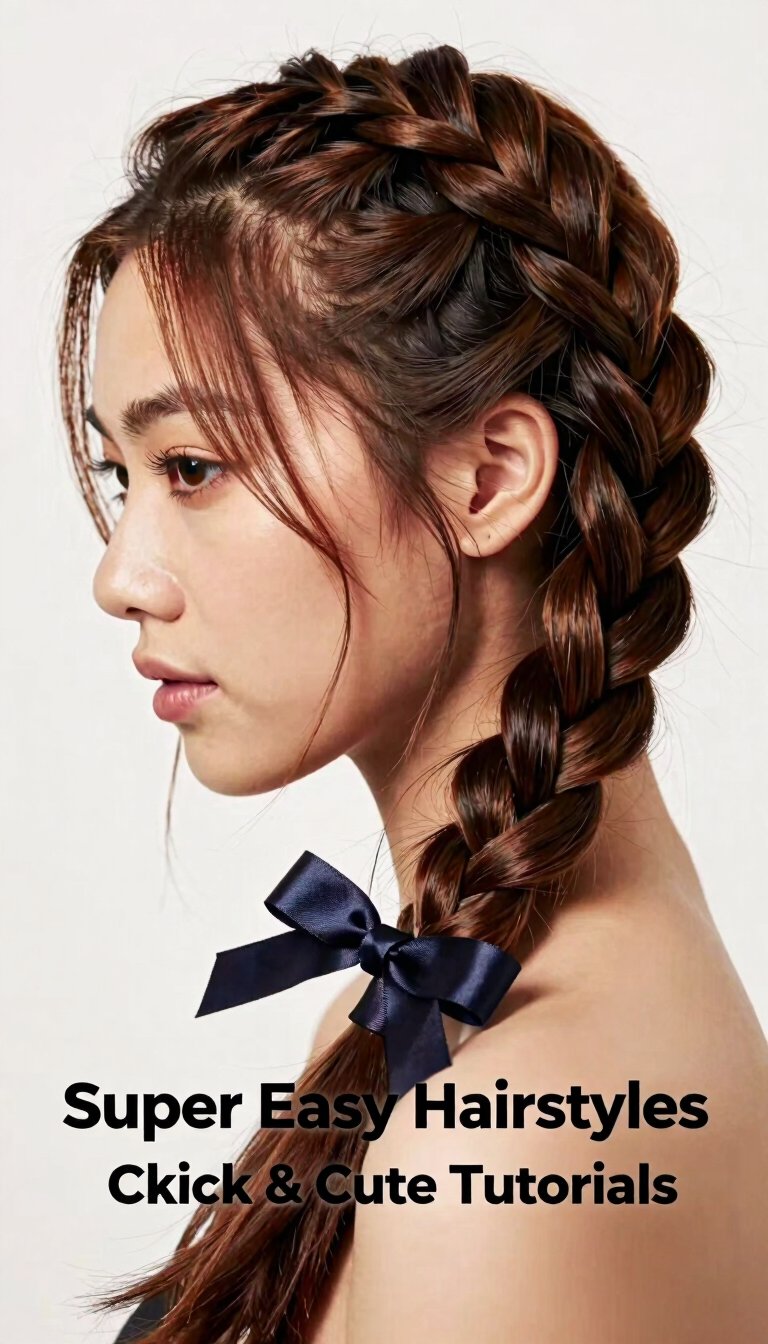
Braid your hair loosely to one side. Before you secure it, tie a thin ribbon (or a shoelace if you’re desperate) around the base of the braid. Weave it through a few sections or let it hang loose. This adds a pop of color that instantly upgrades the style. I keep a ribbon in my purse specifically for bad hair days. Don’t overthink the weaving—messy looks intentional here.
7. The “Goddess” Waterfall Twist
Take a small section from your hairline, twist it, and pin it at the back of your head. Repeat on the other side. Let the two sections meet and twist together before securing. This creates a romantic, boho look without actually braiding. It’s the lazy girl’s answer to complicated festival hair. I wore this to a wedding and got three compliments before the appetizers arrived.
8. The Bubble Pony

Make a high ponytail. Take tiny elastics and space them about two inches apart down the length. Gently pull each section to puff it out like a bubble. This works best on day-two hair when there’s a little texture. The puffier the bubbles, the better. My niece calls this the “caterpillar” hairstyle, and honestly, she’s not wrong, but it’s adorable.
9. The Scarf-Wrap Half-Up

Tie a silk scarf around your head like a headband. Pull the top half of your hair into a small ponytail, then wrap the scarf tails around the base. This hides flyaways and adds a 70s retro vibe. Use a scarf with a pattern to distract from any messy sections. I’m convinced this style makes you 30% more productive because you feel like you’re on vacation.
10. The Quick Triple Bun (Crown Style)
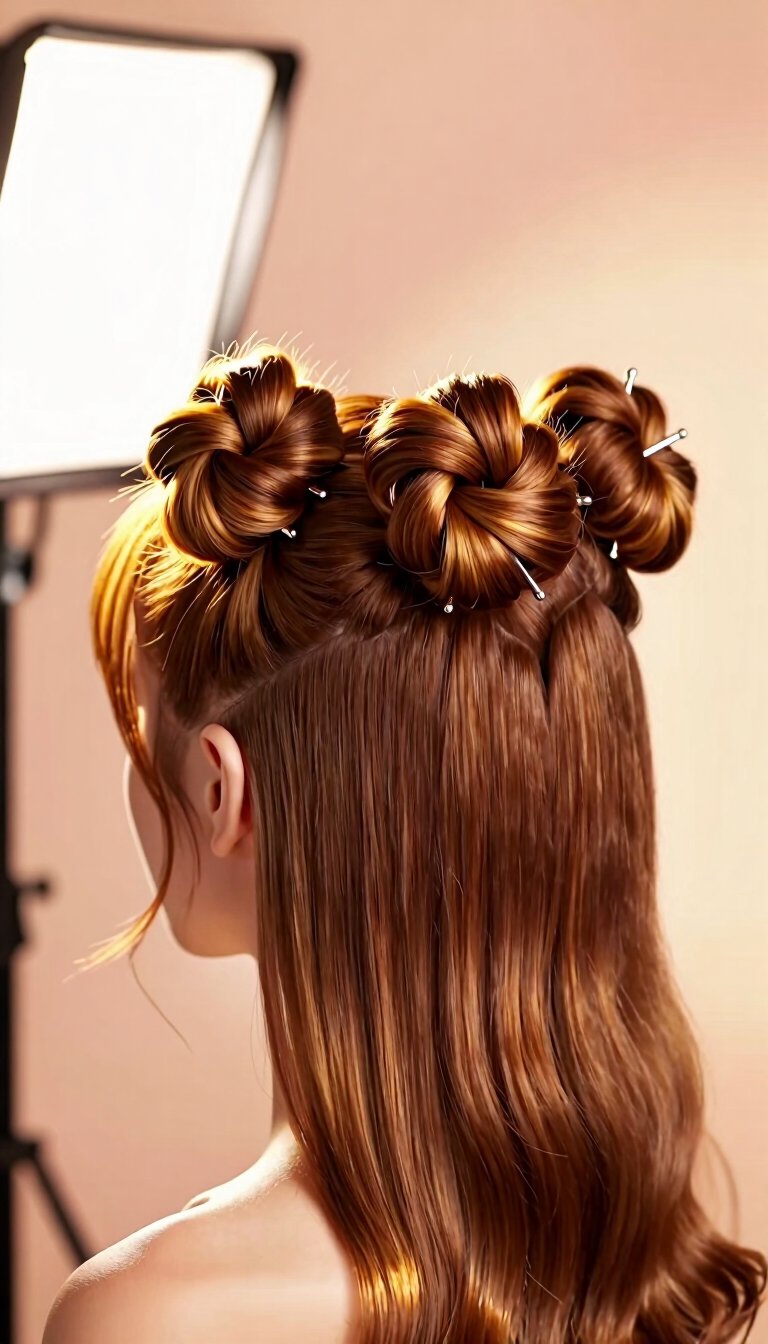
Section the top of your hair into three small sections in a row. Twist each into a tiny bun and pin them in a line across the back of your head. Leave the rest of your hair loose. This looks like art but takes ninety seconds. I do this when I want to look “put together” but actually have a deadline looming. Don’t try to hide the pins—let them be part of the aesthetic.
11. The Sleek Side Part + Clip
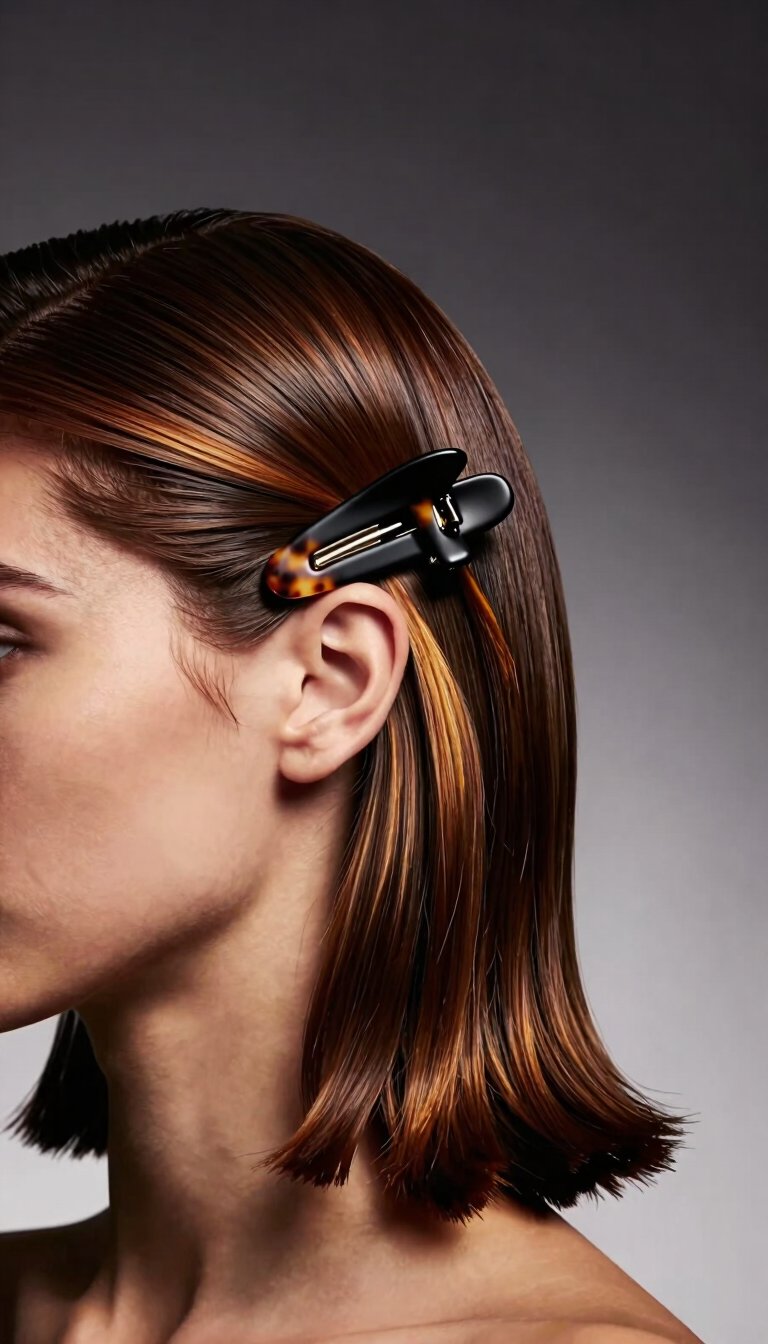
Create a deep side part (like, really deep—almost to your ear). Smooth your hair down with a tiny bit of serum. Add a single, bold clip right at the temple area. It’s not a hairstyle so much as a strategic distraction. But it works. I own seven oversized clips for this exact purpose.
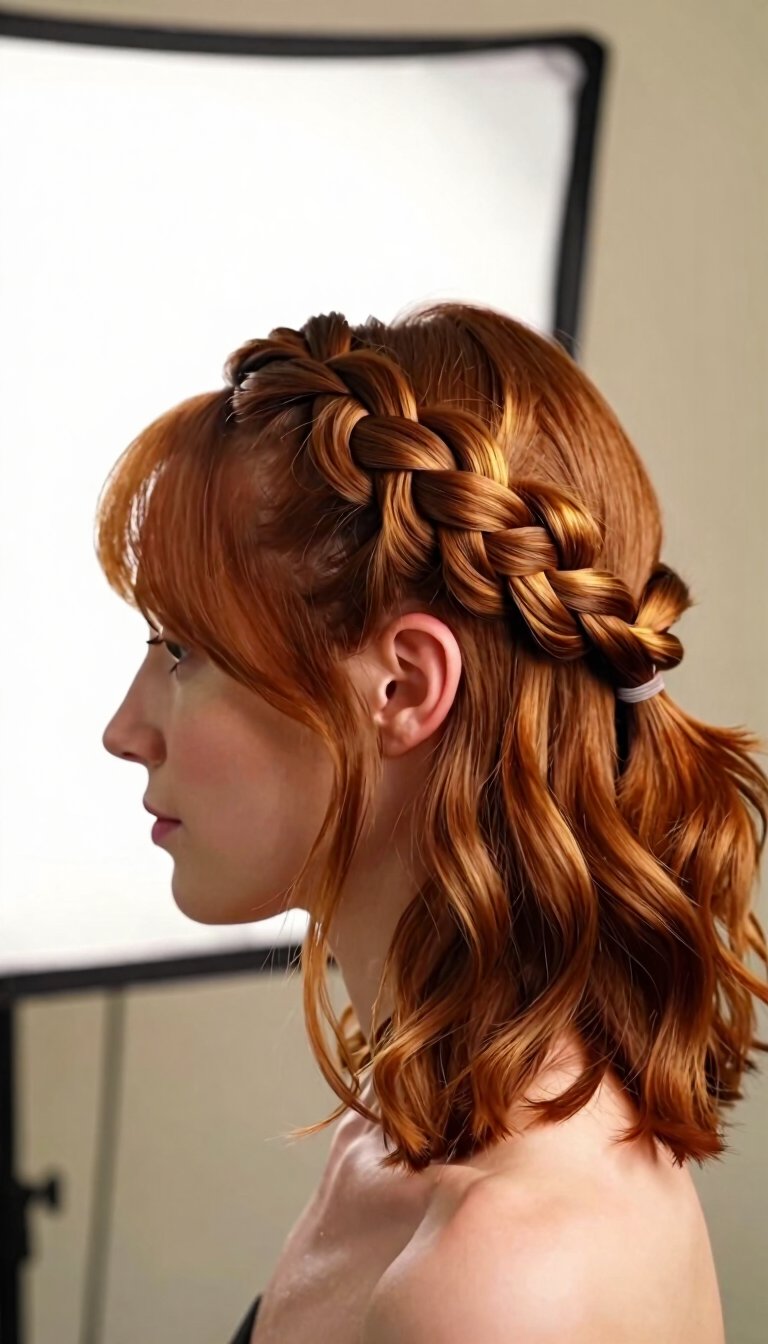
12. The Twisted Crown Braid

Take a section from one ear, twist it, and pin it across the top of your head like a headband. Repeat on the other side, overlapping the first twist. This creates a crown effect without the braiding skills. Use bobby pins that match your hair color so they disappear into the twist. I’ve worn this to the gym and to dinner—it’s that versatile.
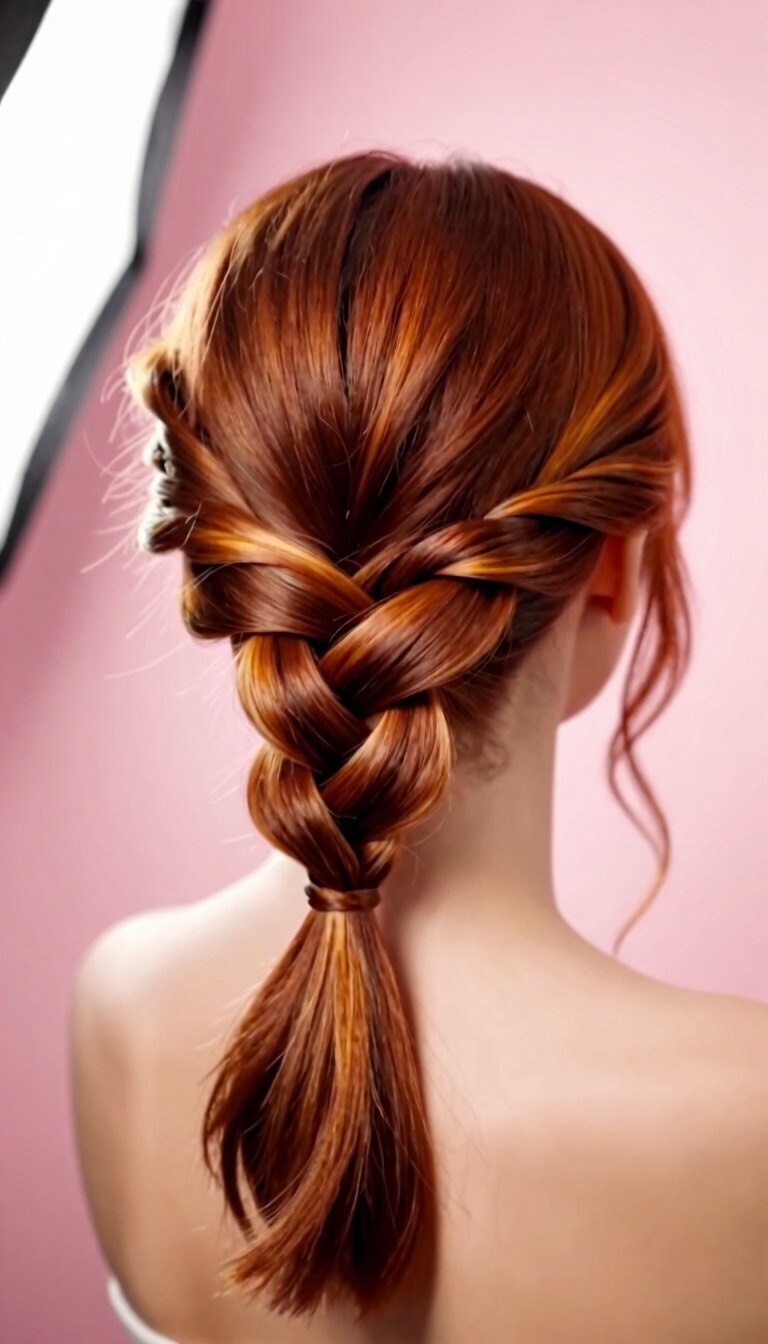
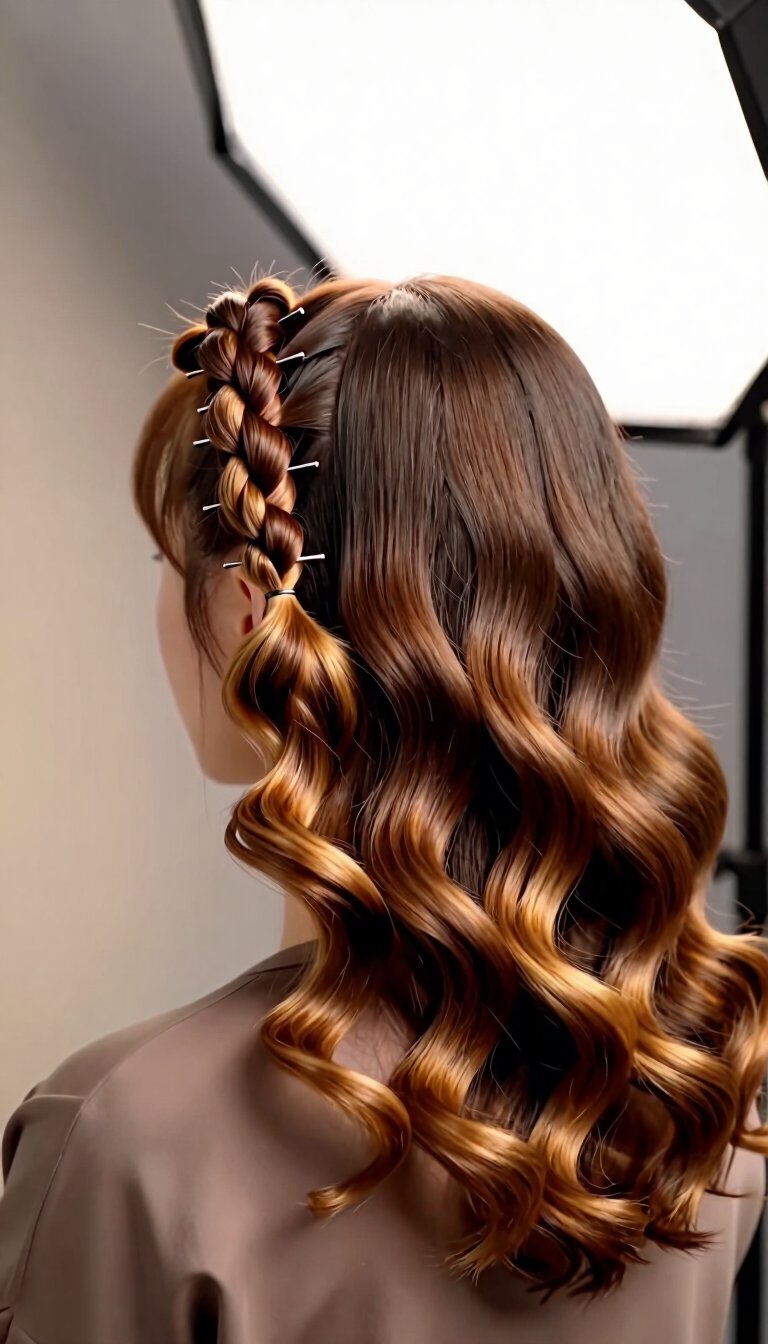
13. The Rope Braid (The Easiest Braid Ever)

Split your hair into two sections. Twist each section individually in the same direction. Then, twist them around each other in the opposite direction. Secure with an elastic. This looks like a regular braid but requires zero hand coordination. If you can twist a towel, you can do this. I learned this in the dark during a power outage.
14. The Messy Low Bun with Tendrils

Gather your hair at the nape of your neck. Twist it into a loose bun—don’t wrap it too tight. Pull out a few tendrils around your face and ears. The key is imperfection. If it looks like you tried, you failed. I usually do this while brushing my teeth, and it turns out perfectly 80% of the time.
15. The Double Dutch Braid (Cheater Version)

Split your hair down the middle. On one side, take three small strands and do a regular braid—but cross the outer strands under instead of over the middle. This creates an upside-down Dutch braid. Repeat on the other side. It looks complex, but you’re just braiding normally with a slight angle change. Tug the loops loose for a fuller look. I call this the “unicorn braid” because it makes me feel magical.
16. The Pin-Down Waves (No Heat)
Section damp hair into two parts. Twist each section tightly and pin it against your head in a flat coil. Sleep on it or let it dry for 30 minutes. When you unpin, you get soft, heatless waves. This saves your hair from heat damage and gives you a valid excuse to lie down. I do this during Netflix binges.
17. The Half-Up Braid Crown
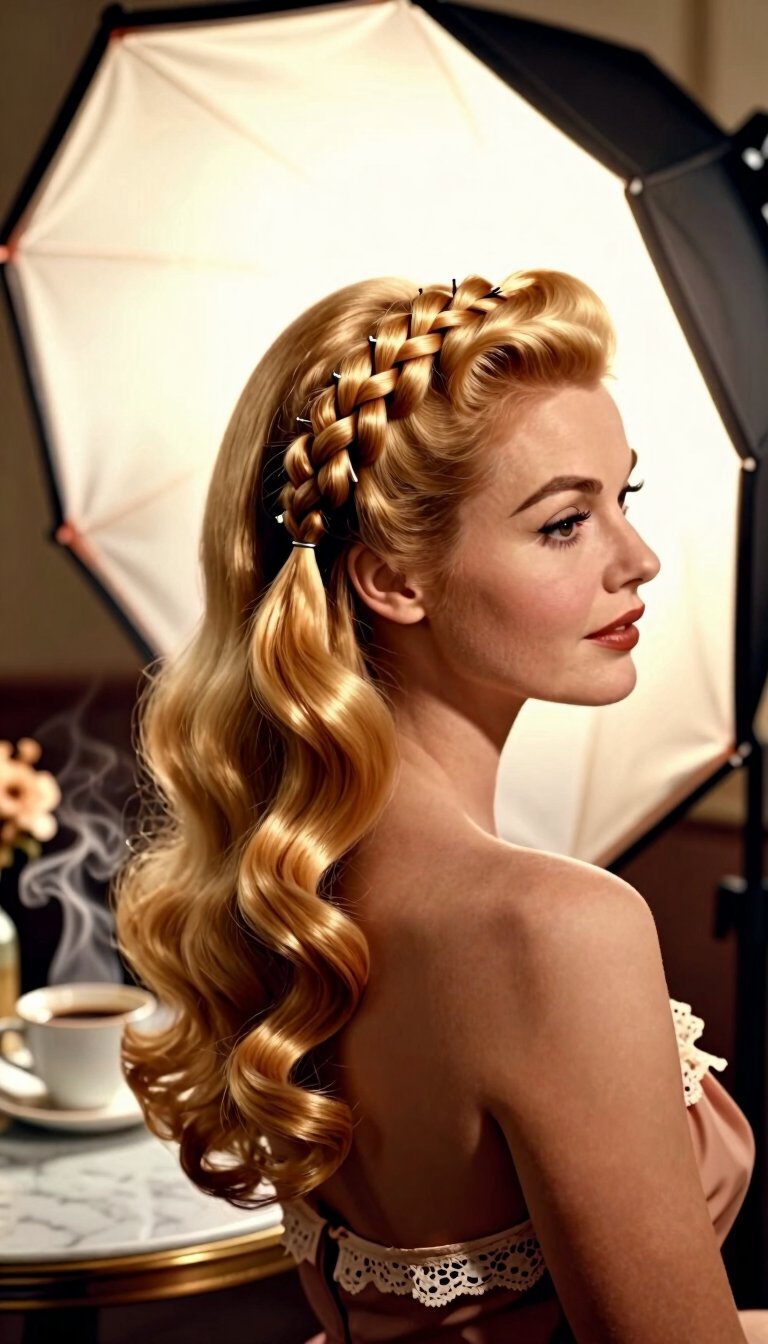
Braid a section from one temple going backward. Do the same on the other side. Cross the two braids at the back and pin them in place. Let the rest of your hair hang loose. This takes about two minutes but gives you vintage pin-up vibes. I wore this to a coffee date and felt like a 1950s movie star.
18. The Braided Headband (No Braiding Required)
Take a small section from behind one ear. Twist it, wrap it around your forehead like a headband, and tuck/pin it behind the opposite ear. Use a hair tie to secure it at the end and hide it under your hair. This keeps hair out of your face without a headband slipping off. I use this when I’m applying makeup and don’t want foundation in my hair.
19. The Fishtail Ponytail
Make a low ponytail. Split the ponytail into two sections. Take a tiny strand from the outside of the left section, cross it over to the inside of the right section. Repeat on the other side. Keep going until you run out of hair. This is a two-minute upgrade to a boring ponytail. My friends think I spent ten minutes on this, but I’m not telling them the truth.
20. The Sock Bun (For Medium Hair That Won’t Cooperate)

Cut the toe off a clean sock (or use a foam donut). Poke your ponytail through the hole. Roll the sock down to your scalp, tucking your hair ends around it as you go. This creates a perfect, smooth bun. Medium hair is the ideal length for this because it’s not too heavy. I’ve fooled everyone at family gatherings with this trick.
21. The Pull-Through Ponytail

Make a mid-height ponytail. Above the elastic, split the hair open, then flip the ponytail up and through the gap. Repeat once or twice down the length. This creates a beautiful twisted chain effect with zero braiding. It’s the perfect ‘I tried but I didn’t try’ hairstyle. I do this on Zoom calls when I want to look professional without actually brushing my hair.
22. The Braided Space Buns

Split your hair down the middle. Braid each side into a simple three-strand braid. Wrap each braid up into a bun on top of your head. Secure with pins and a spritz of hairspray. This is my “big event” hairstyle because it stays put through dancing, eating, and maybe crying. It gives off major Sailor Moon energy.
23. The Reverse Ponytail

Gather your hair into a low ponytail at the nape. Split the ponytail into two sections. Take the right section, cross it over to the left, and pin it. Take the left section, cross it over to the right, and pin it. Repeat until you run out of hair. This creates a woven look at the back without braiding. I discovered this during a boring webinar and it changed my life.
24. The Claw Clip Sculpture

Twist your hair upward into a messy bun at the back. Instead of using an elastic, just clamp a large claw clip over the twisted section. Angle the clip downward for maximum hold. This takes five seconds and looks effortlessly cool. I have claw clips in every room of my apartment—bathroom, kitchen, car, purse.
25. The Side French Braid (Toddler-Level Difficulty)

Pull all your hair to one side. Start braiding normally, but after each crossing, add a small section of hair from the scalp to the outside strand. Continue down until you run out of hair. Don’t worry about neatness—loose tension looks dreamy. I learned this from a 10-year-old girl on YouTube, and it’s the only braid I can do without crying.
26. The Triple Low Knots

Gather the bottom third of your hair into three small sections. Twist each into a tiny knot and pin them at the nape of your neck. Leave the top two-thirds loose. This creates a subtle detail that makes people say, “Did you do something different?” Yes. I spent three minutes tying knots. That’s all.
27. The Scrunch + Pin Updo
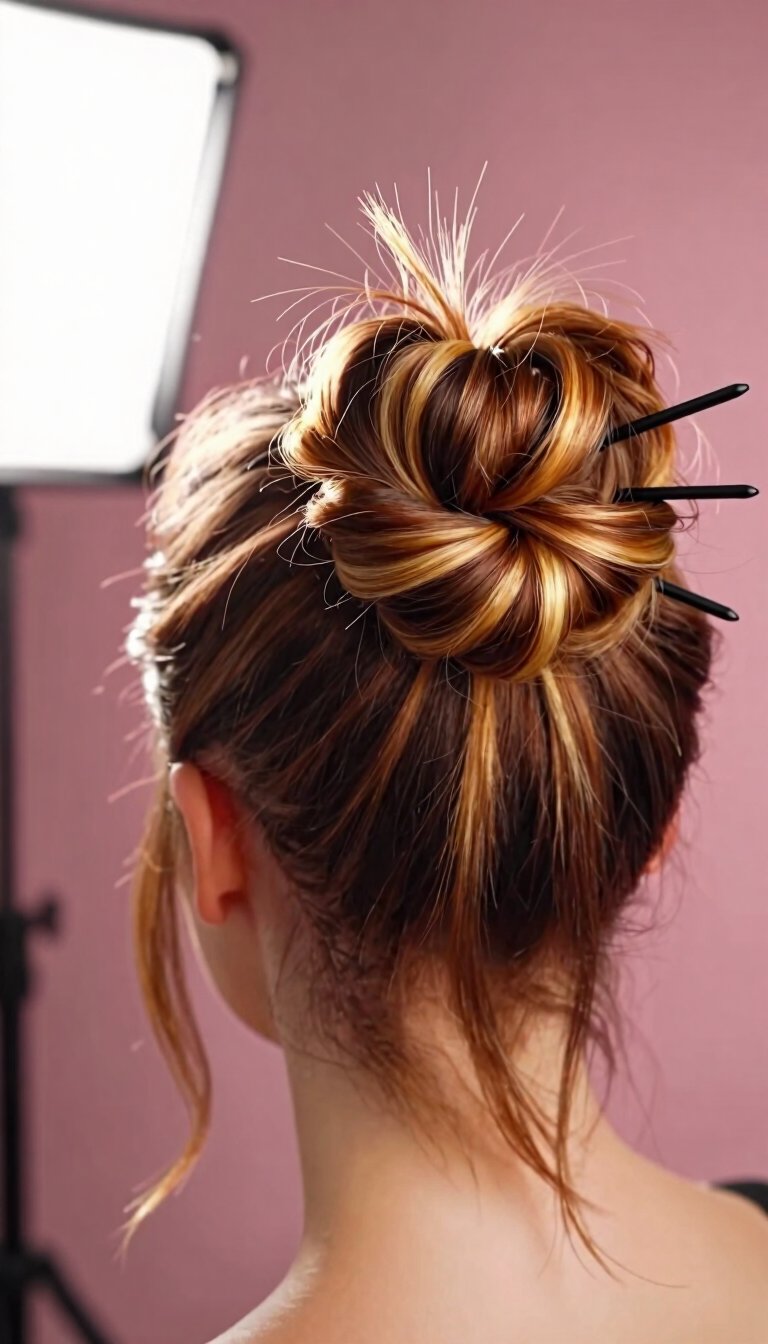
Scrunch your hair with a texturizing spray. Gather it all at the crown like you’re making a ponytail. Instead of pulling it through, twist it into a loose bun and pin it in place with three or four bobby pins. The key is to leave the ends poking out for that “I got dressed in the dark” look. I wear this to the grocery store and somehow get asked for directions.
28. The Tucked-Under Roll

Smooth your hair back with a bit of mousse. Tuck the ends under and roll them inward toward your head. Pin the roll at the nape of your neck. This is basically a modified French twist but easier because you’re just rolling. I did this for my passport photo, and it looked legit.
29. The “I Give Up” High Pony with a Twist

Make a high ponytail. That’s step one. Step two: wrap a tiny section of hair around the base to hide the elastic. Step three: add a cute accessory—a velvet bow, a metal clip, anything. This takes thirty seconds but looks intentional. I use this as my default hairstyle for bad-hair-days-that-become-good-hair-days.
There you have it—29 ways to style your medium-length hair without losing your mind or your morning coffee time. The beauty of this length is that you can fake braids, use accessories, and experiment without commitment. Your hair will grow, the trends will change, but these easy tutorials will always save you when you’re running late or just feeling uninspired.
So which one are you trying first? The TikTok twist? The lazy crown braid? Or are you going to bookmark this list and try them all? I triple-dog dare you to pick a random number between 1 and 29 and wear that style tomorrow. Your hair deserves a little adventure—and honestly, so do you.
Leave a Reply
You must be logged in to post a comment.