
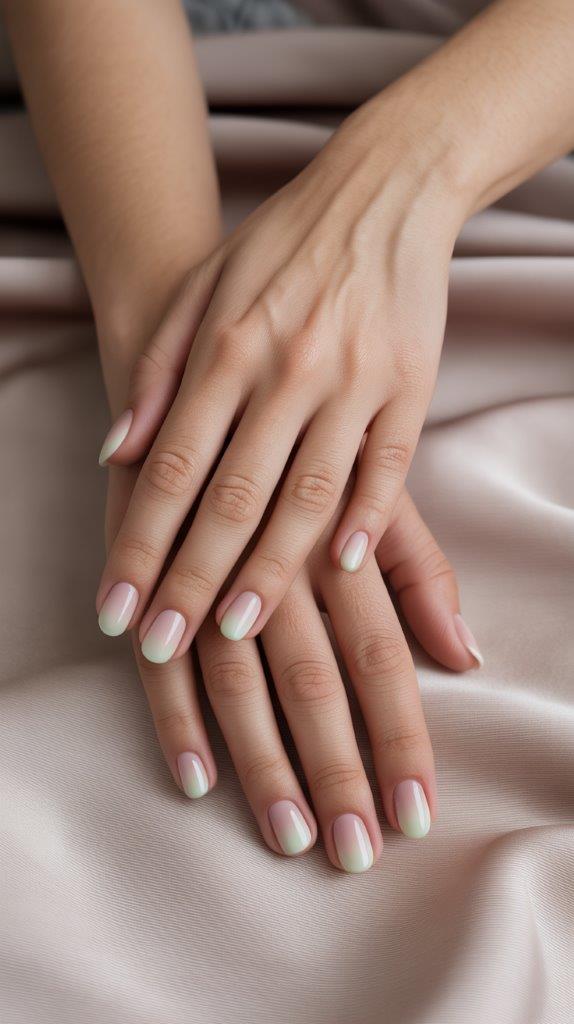
Gel manicures are basically the superhero of nail care—durable, glossy, and they actually last longer than your average New Year’s resolution. Spring’s the perfect time to embrace gel because who wants to touch up their nails every three days when you could be outside enjoying the weather?
I’ve been team gel for years now, and spring brings out the best in gel polish. The colors pop, the shine catches that spring sunshine, and you can actually do all your spring activities without worrying about chips. Whether you’re keeping it minimal or going for something with a bit more personality, these 15 gel manicure ideas hit that sweet spot between cute and simple.
Let’s get into it, because your spring nails deserve better than basic.
Why Gel Manicures Own Spring
Gel polish lasts 2-3 weeks without chipping, which means your spring manicure survives gardening, spring cleaning, and whatever else life throws at you. Regular polish? Chips after two days if you look at it wrong.
The high-shine finish of gel is also perfect for spring. That glossy look catches natural light beautifully and makes even simple designs look more expensive. Plus, gel dries instantly under the LED lamp—no more sitting around hoping you don’t smudge your fresh manicure.
Spring activities demand durability. Gel delivers. It’s really that simple.
1. Classic Sheer Pink
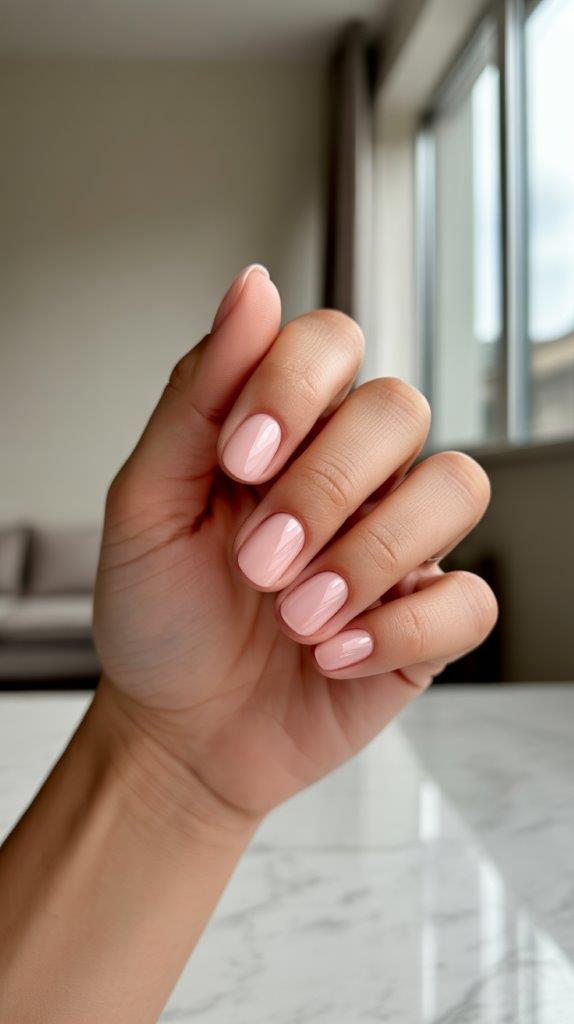
A sheer pink gel is the ultimate “my nails but better” look. It’s natural, it’s elegant, and it goes with literally everything in your spring wardrobe.
This shade works for any occasion—job interviews, weddings, casual weekends. The sheerness means you can get away with 2-3 weeks of growth without it looking obvious. Apply 2-3 thin coats for the perfect opacity level.
I wore sheer pink gel for an entire month last spring and nobody noticed it was the same manicure. That’s the power of a good neutral.
2. Soft Pastel Collection
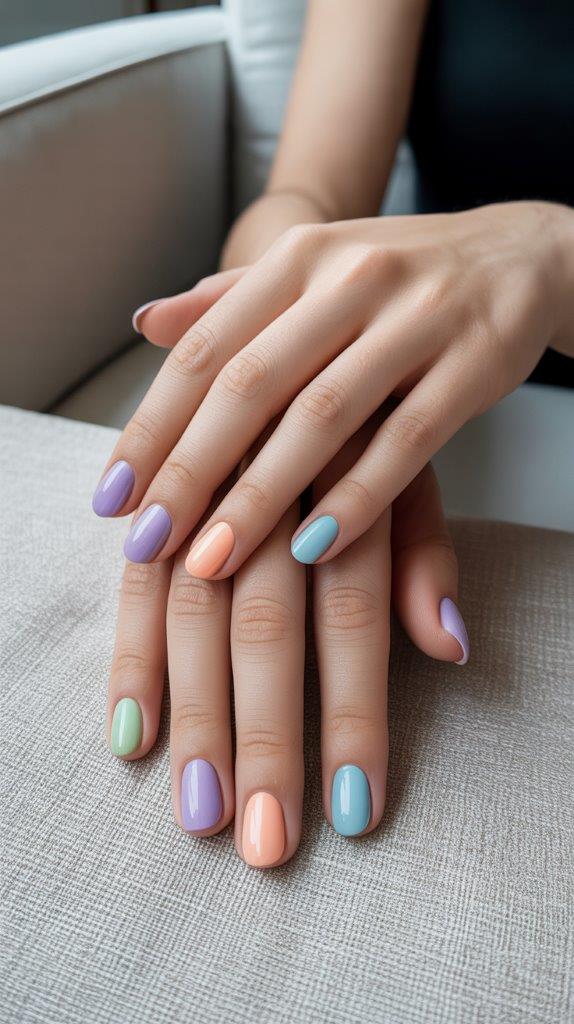
Pick one perfect pastel—lavender, mint, peach, baby blue—and commit. Solid pastel gel has that spring energy without requiring any artistic skills.
The gel formula makes pastels look more pigmented and professional than regular polish. They dry glossy instead of chalky, which is a game-changer for these lighter shades. The 2-3 week wear time means you can actually enjoy your pastel choice instead of watching it chip after four days.
Pastels photograph beautifully too, which matters for those inevitable spring photoshoots with flowers and sunshine.
3. Minimalist French Tips
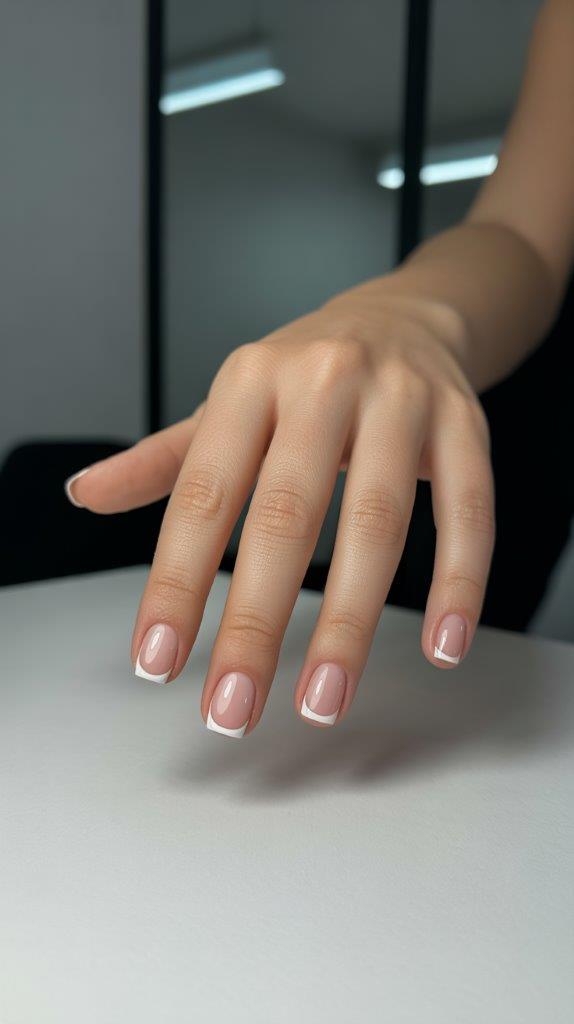
Thin, barely-there white tips on a nude gel base create that clean, timeless look that never goes out of style.
The key word here is “thin”—we’re not doing chunky 2000s French tips. Modern French is delicate and subtle. Use a thin brush for precision, or ask your nail tech to keep the white line minimal. The gel formula keeps those tips crisp and chip-free for weeks.
This design transitions seamlessly from work to weekend, which is exactly what you want from a spring manicure.
4. Single Accent Nail
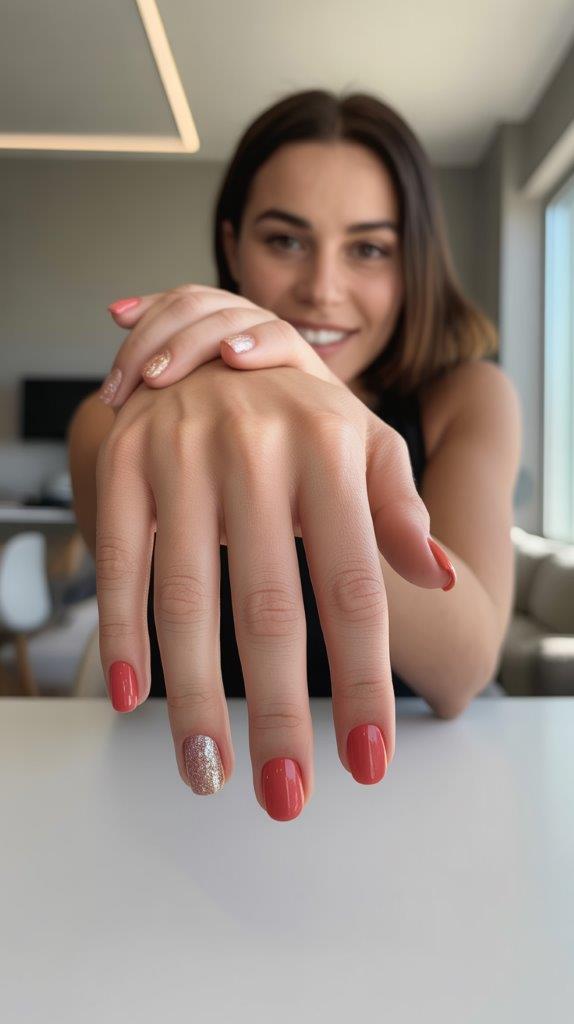
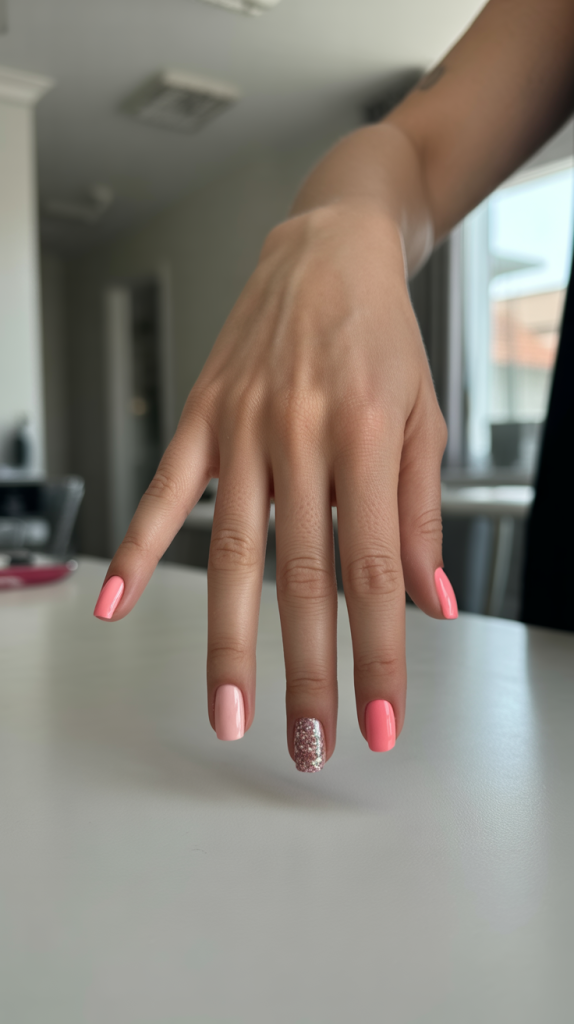
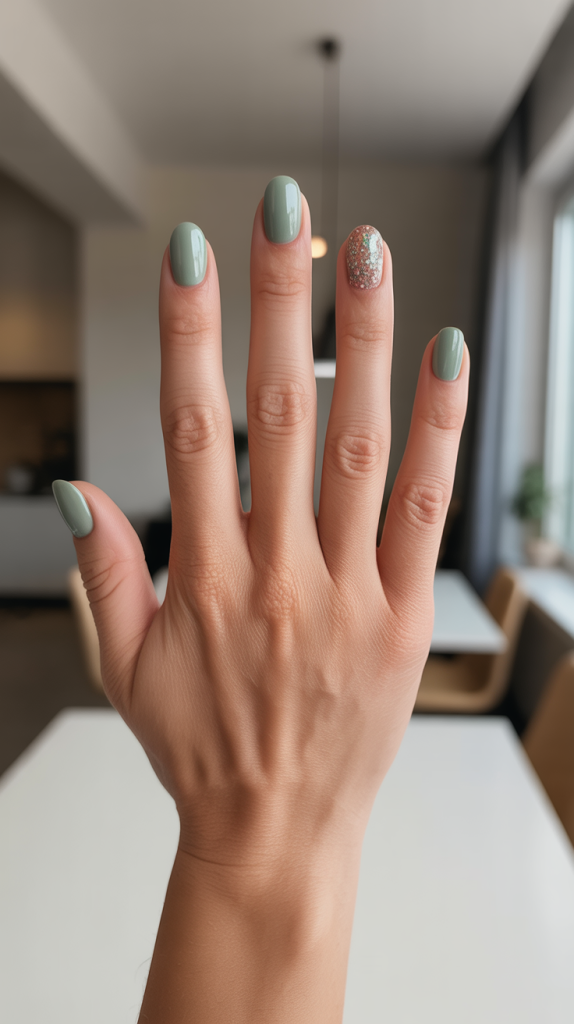
Keep nine nails one solid spring color, then add something special to your ring fingers—glitter, a different shade, or a simple design. The accent nail approach is foolproof.
This works because it’s interesting without being overwhelming. Your hands don’t look busy, but there’s enough variation to keep things from being boring. Try a glitter accent nail on pastel bases, or a complementary pastel as your accent color.
The single accent strategy is perfect for people who want something beyond basic but aren’t ready for full nail art commitment.
5. Negative Space Half Moon
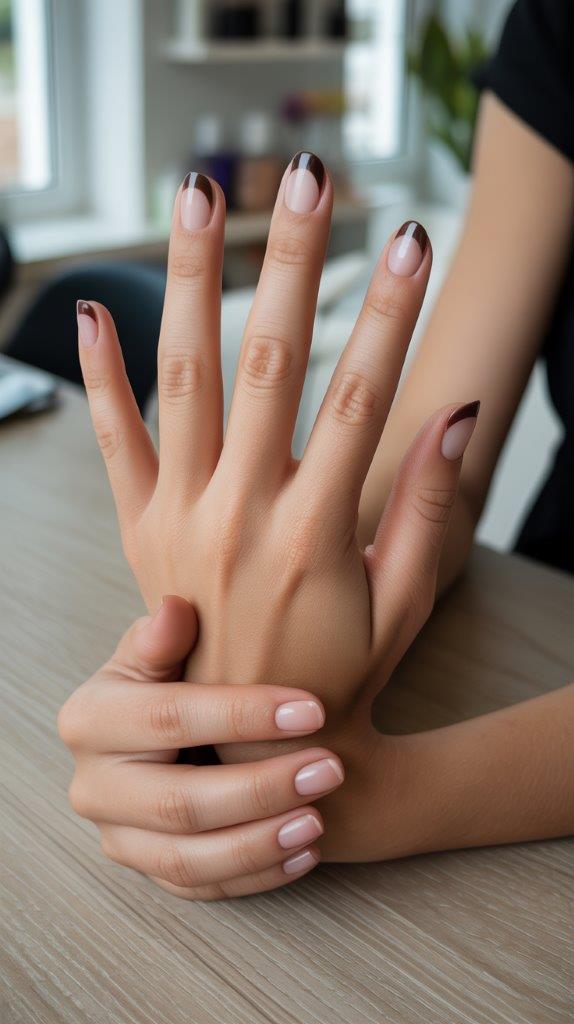
Leave the half-moon area near your cuticle bare and paint the rest in gel color. The negative space creates automatic interest without requiring steady hands or artistic ability.
This design is genius because as your nails grow, the negative space just expands naturally—you’re basically designing for growth from the start. The gel formula on the painted portion stays perfect while your natural nail does its thing.
Choose any spring color for the painted section. The negative space works with everything and adds that modern, intentional vibe.
6. Soft Ombre Effect
Blend two spring colors from base to tip using the sponge technique, then seal with gel topcoat. Ombre hides imperfections while looking intentionally artistic.
The beauty of ombre is that “imperfect” blending often looks better than too-perfect gradients. Apply your colors to a makeup sponge, dab onto the nail, cure under the lamp, and topcoat. The gel topcoat smooths out any texture from the sponge technique.
Pink to white, lavender to mint, peach to yellow—any spring color combination works. The ombre effect adds dimension without complexity.
7. Thin Line Accents
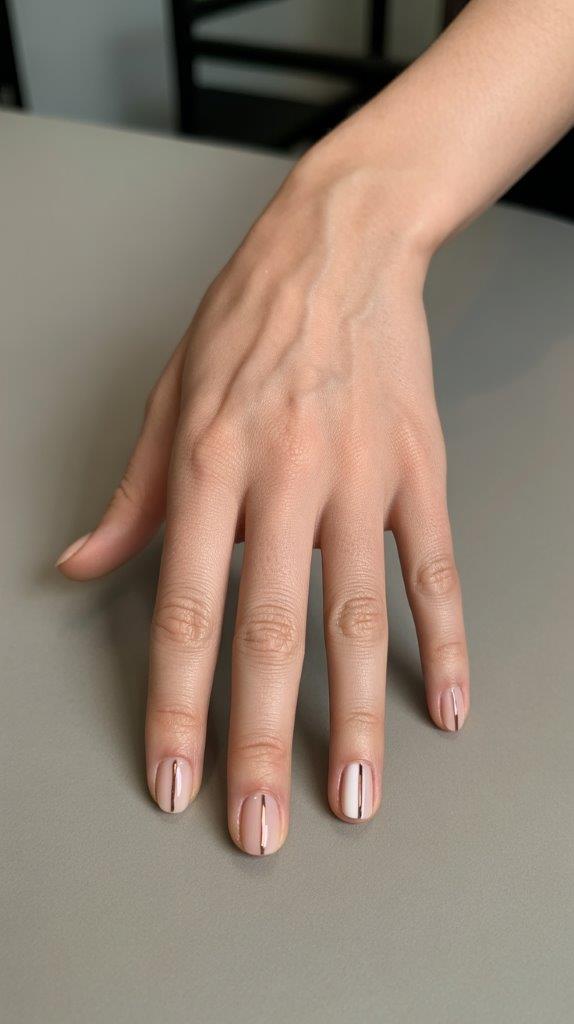
Add one thin metallic line (gold, silver, or rose gold) using gel polish or striping tape sealed under topcoat. Maximum impact with minimal effort.
The single line can run vertically down the center, diagonally across the nail, or horizontally as a delicate stripe. It’s subtle enough for professional settings but interesting enough to feel special. The gel topcoat seals everything perfectly, so the line won’t peel or chip.
This design elevates any solid color base from basic to intentional with literally one line. Efficiency at its finest. 🙂
8. Polka Dot Perfection
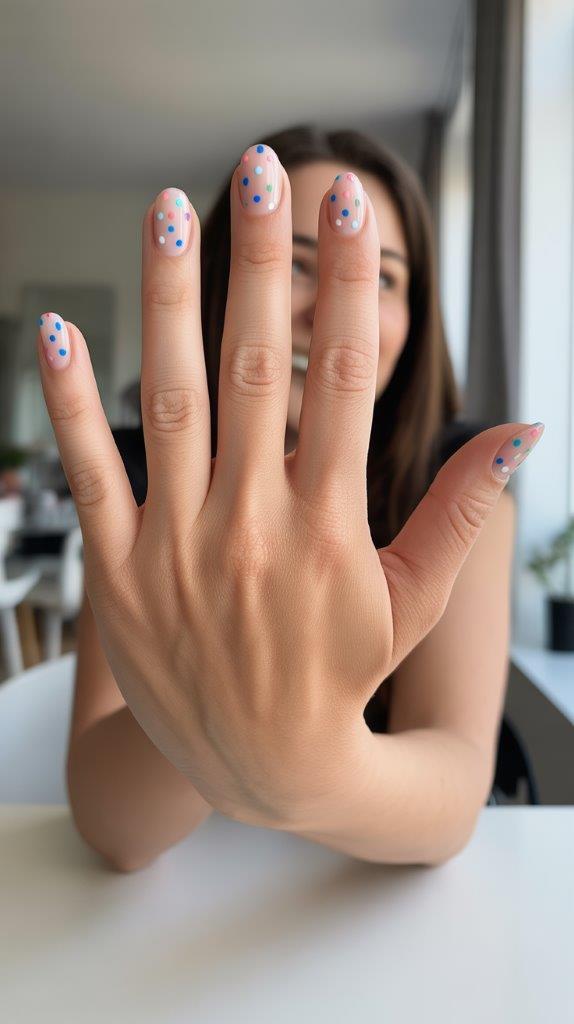
Use a dotting tool to add small dots in a contrasting color over a gel base. Simple, playful, and surprisingly versatile for spring.
White dots on pastel bases, pastel dots on white bases, or multi-color dots on nude—they all work. The gel formula keeps dots crisp and prevents smudging during application. Apply dots before curing, then cure everything together under the lamp.
Polka dots feel playful without being childish, especially when you keep the dots small and well-spaced. It’s whimsy with sophistication.
9. Sheer Nude with Shimmer
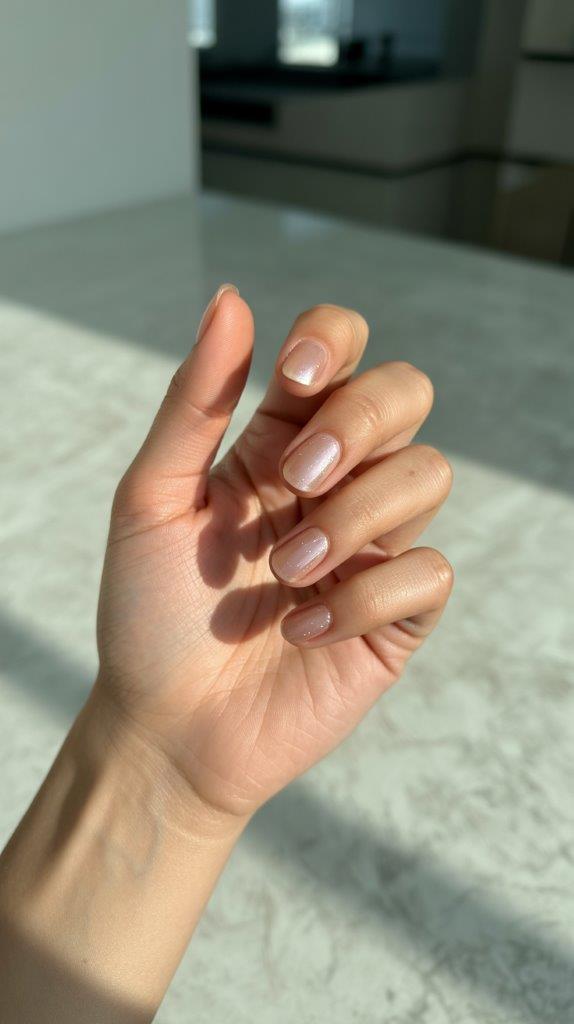
A sheer nude gel with subtle shimmer creates that “expensive manicure” look without complicated designs.
The shimmer catches light beautifully during those longer spring days. It’s noticeable in direct sunlight but subtle in normal lighting, which gives you versatility. The sheer nude base keeps it professional and wearable for any situation.
This is my go-to when I want my nails to look polished but don’t want to commit to a statement color. It’s the Swiss Army knife of spring gel manicures.
10. Two-Tone Color Block
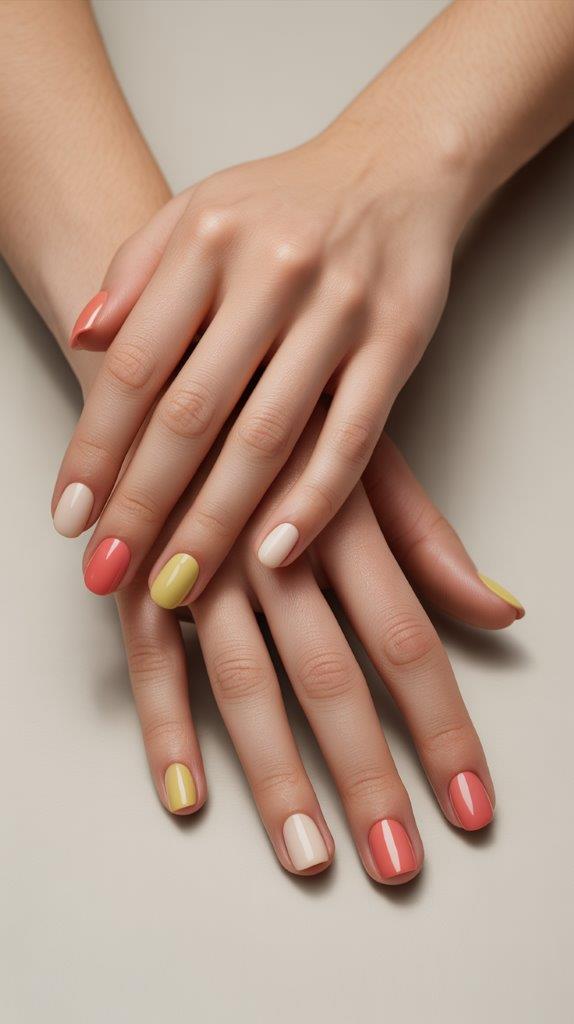
Paint some nails one spring color and others a complementary shade. Color blocking is foolproof because any two spring colors work together.
Try mint and peach, lavender and yellow, pink and sage green. The contrast creates visual interest without requiring artistic skills. The gel formula keeps both colors looking fresh and vibrant for the full 2-3 weeks.
FYI, this design also makes choosing just one color unnecessary. Can’t decide? Don’t. Use both.
11. Matte Topcoat Magic
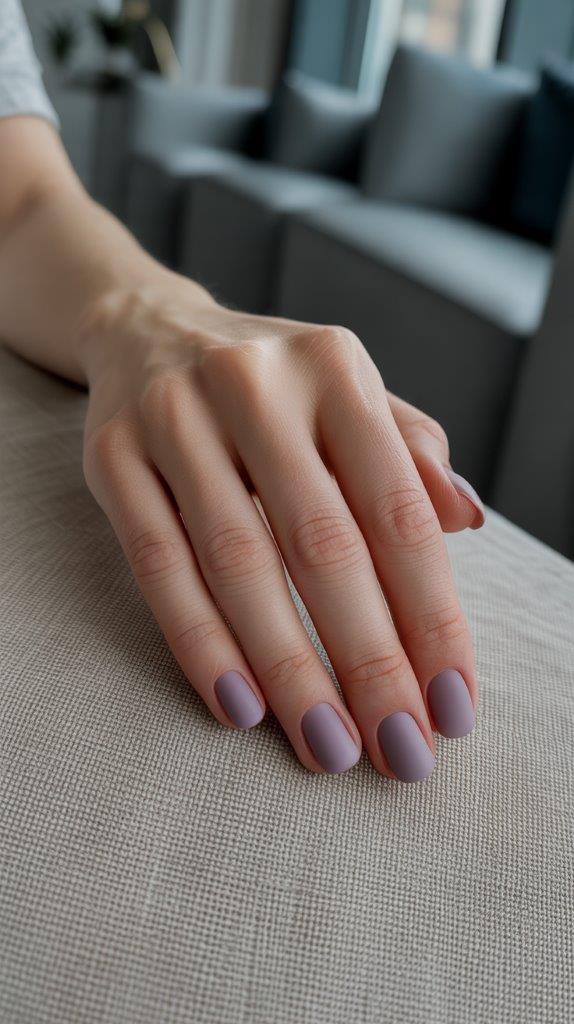
Apply any spring gel color, then seal with a matte topcoat instead of glossy. The texture change transforms basic into sophisticated.
Matte finishes feel modern and intentional. They also hide minor imperfections better than glossy finishes, which reflects every tiny flaw. Pastel gels in matte finishes are particularly stunning—they have this velvety quality that photographs beautifully.
You can even do half matte, half glossy for added interest. The gel formulas make mixing finishes easy and long-lasting.
12. Delicate Floral Details
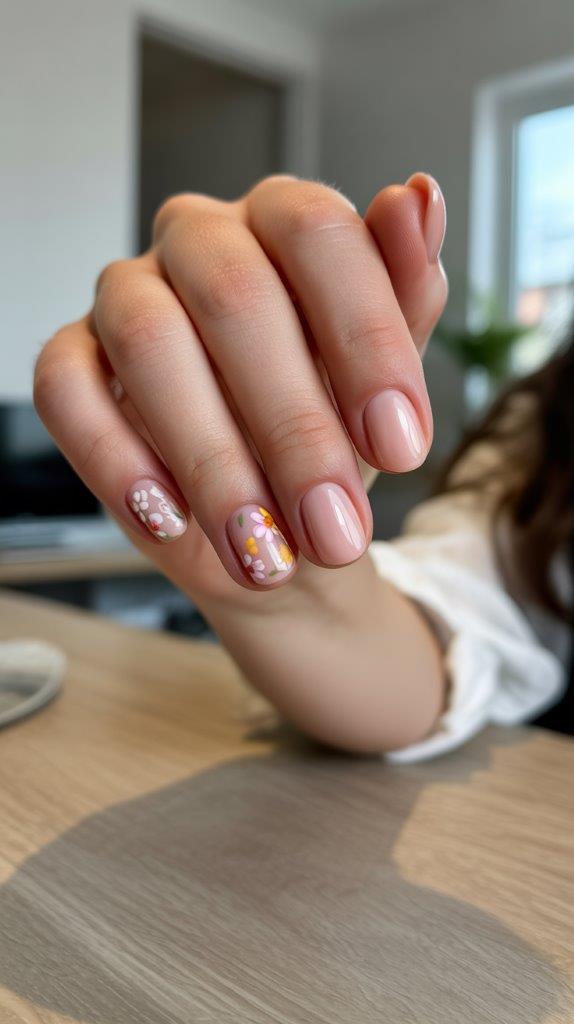
Add tiny flowers to one or two accent nails using a thin brush and gel polish. Keep the florals small and simple for a spring vibe that doesn’t overwhelm.
We’re talking small daisies, cherry blossoms, or simple flower shapes—not botanical illustrations. Use a dotting tool for petals (five dots in a circle) and add a center dot. Cure between steps to prevent smudging.
The gel formula allows for precision work that lasts. Regular polish would chip at the delicate details within days, but gel keeps those tiny flowers perfect.
13. Pastel Rainbow
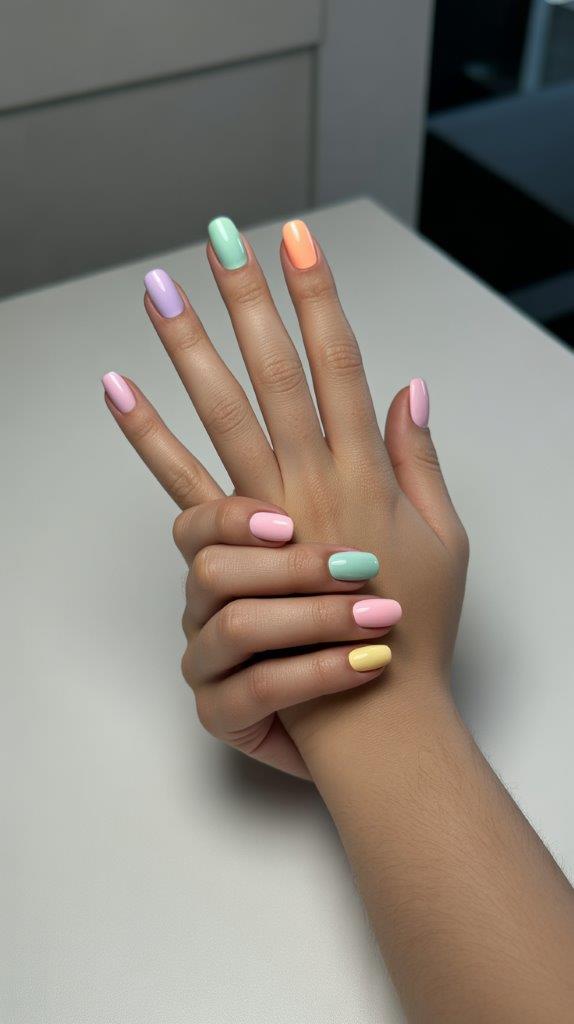
Paint each nail a different pastel shade for a soft rainbow effect. All the spring colors without committing to just one.
The pastel palette keeps this from looking overwhelming or childish. Baby pink, lavender, mint, soft yellow, peach—the combination feels cohesive because they’re all in the same tonal family. The gel shine unifies them visually.
This design is perfect for indecisive people (guilty) who want to enjoy multiple spring shades at once. It’s the sampler platter of spring manicures.
14. Glazed Donut Effect
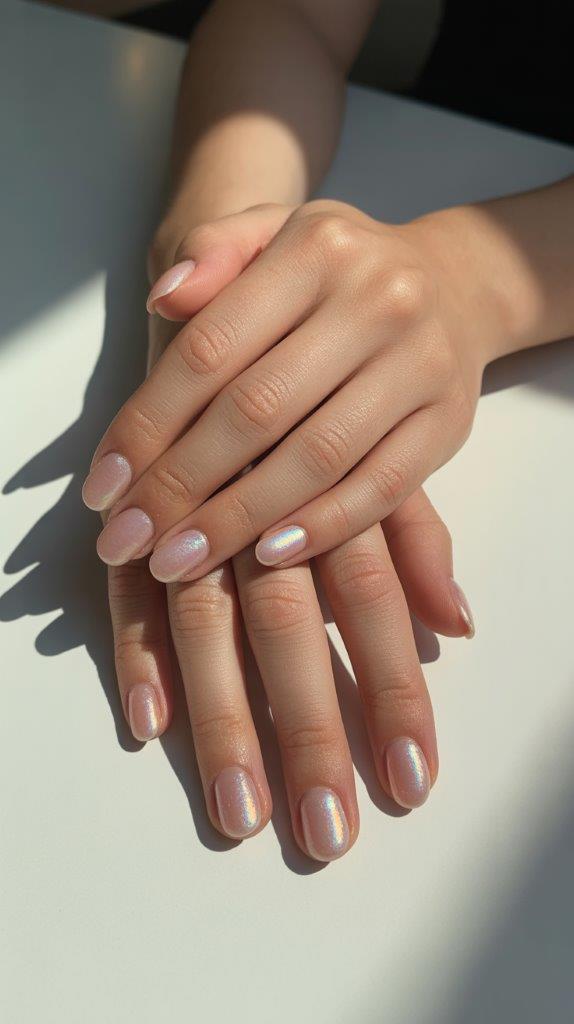
Apply a sheer nude or pink gel base, then add chrome or iridescent powder for that subtle pearly glow that’s been trending.
The glazed donut look is elegant without being flashy. It catches light beautifully and works for any occasion. Apply your base color, cure it, apply a no-wipe topcoat, cure again, then rub in the chrome powder with a silicone tool or your finger. Seal with regular topcoat.
This technique looks expensive and complicated but is actually pretty straightforward once you know the steps. The gel base is crucial for making it last.
15. Simple Geometric Patterns
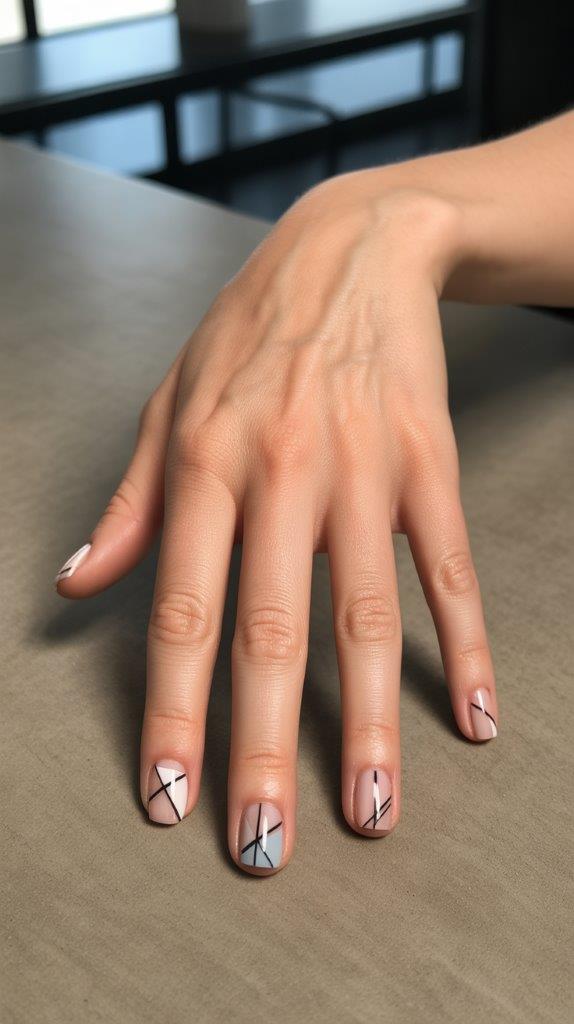
Create clean geometric shapes—triangles, diagonal lines, or color blocks—using striping tape and gel polish. Modern, artistic, and easier than it looks.
Apply your base color and cure it. Add striping tape in your desired pattern, paint the exposed areas with a contrasting gel color, remove the tape while the polish is still wet, then cure. The tape creates perfectly clean lines without requiring steady hands.
Geometric designs feel current and intentional. They’re also versatile—play with different shapes and color combinations to match your style.
Gel Application Tips for Spring Perfection
Proper prep makes the difference between gel that lasts three weeks and gel that chips in three days. Start with clean, dry nails—push back cuticles, lightly buff the surface, and wipe with alcohol.
Apply thin layers. Seriously, thinner than you think is necessary. Thick gel layers don’t cure properly and lead to peeling. Apply base coat, cure. Apply color in 2-3 thin coats, curing between each. Apply topcoat, cure. The multiple thin layers create durability.
Cap the free edge—run your brush along the tip of your nail with each coat. This seals the edge and prevents chipping, which is where most gel manicures fail first.
Making Your Spring Gel Manicure Last
Moisturize your cuticles daily with cuticle oil. Gel can be drying, and dry cuticles make your manicure look less polished even if the gel itself is perfect.
Wear gloves for cleaning and dishes. I know, I know—but gel’s durability doesn’t mean it’s indestructible. Harsh chemicals and prolonged water exposure weaken the bond over time.
Avoid using your nails as tools. That goes for regular polish too, but it’s worth repeating. Opening cans, peeling stickers, scratching things—all of these stress your gel and cause lifting or chipping.
Gel vs. Regular Polish for Spring
Gel wins for longevity—that 2-3 week wear time vs. 3-5 days for regular polish is unbeatable. The glossy finish stays glossy instead of dulling after a week. Gel dries instantly, so you can leave the salon and immediately do normal activities.
Regular polish wins on flexibility and nail health. It’s easier to remove at home, doesn’t require UV exposure, and allows your nails to breathe between manicures. Some people find gel too harsh on their natural nails long-term.
IMO, gel is perfect for spring because you want your manicure to survive all your activities. You can always take gel breaks during slower seasons if nail health is a concern. :/
Removing Gel Properly
Never, ever peel off gel polish. Peeling damages your natural nail and can cause weak, thin nails that take months to recover from.
The proper removal process: file off the shiny topcoat, soak cotton pads in acetone, place them on your nails, wrap your fingertips in foil, wait 10-15 minutes, then gently push off the softened gel with an orangewood stick. If it doesn’t come off easily, soak longer—don’t force it.
Alternatively, get professional removal at the salon. It costs a bit extra but ensures your natural nails stay healthy. Healthy nails are the foundation of any good manicure.
Essential Gel Supplies
If you’re doing gel at home, invest in quality basics:
- LED nail lamp: Cures gel properly (don’t cheap out here)
- Base and topcoat: Proper gel formulas, not regular polish
- Spring gel colors: 5-7 shades in your favorite spring palette
- Thin nail art brush: For details and precision work
- Dotting tools: Multiple sizes for various effects
- Striping tape: Clean lines without steady hands
- Acetone: Pure acetone for removal, not acetone-free
These basics cover 90% of gel manicure needs. Add specialty items as you develop preferences and skills.
Final Thoughts
Spring gel manicures combine durability with beauty in ways regular polish just can’t match. These 15 designs prove you don’t need elaborate nail art to have gorgeous spring nails that last.
The beauty of gel is that even simple designs look polished and professional. A solid pastel gel looks better and lasts longer than the most elaborate regular polish design. Sometimes less really is more, especially when that “less” lasts three weeks.
So pick your favorite spring gel design (or try multiple throughout the season), book that appointment or set up your home gel station, and give yourself spring nails that can keep up with your life. Your fingertips deserve to be as durable as they are beautiful. And honestly? Looking down at perfect, glossy nails for three weeks straight is a mood booster we could all use more of.
Happy spring, and happy gel-ing!
Leave a Reply
You must be logged in to post a comment.