
Staring at your hair, feeling that familiar itch for a change? You’re not alone. We all hit that wall where the same old ponytail feels like a surrender, and wearing it down just feels… blah. But the thought of a complicated updo? Exhausting. What if I told you that stunning, head-turning hair doesn’t require a professional stylist or an hour of wrestling with bobby pins? This list is your new best friend. We’re breaking down 29 updo hairstyles—from the “I woke up like this” messy bun to the “red carpet, who?” intricate braid—into totally achievable steps. Let’s find your next signature look.
1. The Effortless Messy Bun
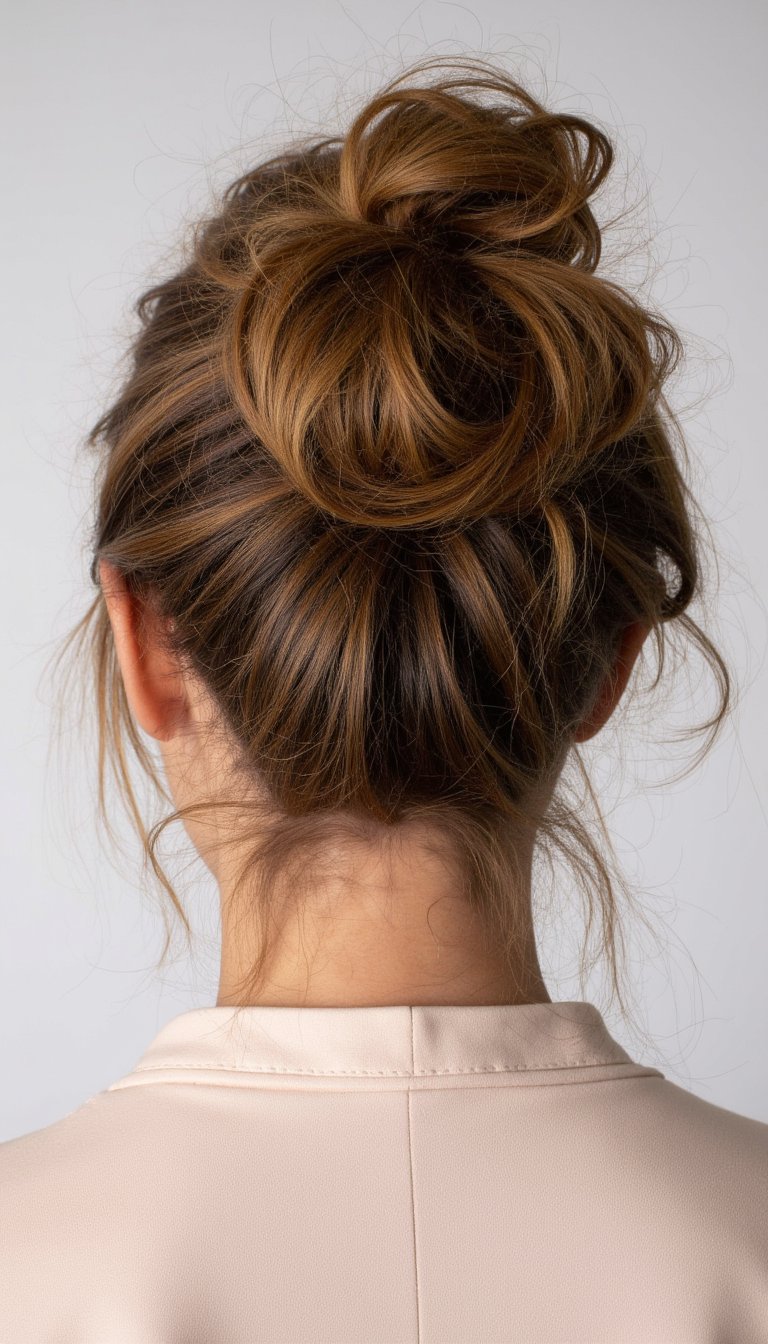
This is the queen of all updos for a reason. It’s the perfect blend of “I tried” and “I’m too cool to care.” The key is texture. Start with second or third-day hair, or spray in some dry shampoo for grip. Pull your hair into a high ponytail, but on the last loop of the hair tie, only pull the hair halfway through to create a loop. Gently pull at the sides of the loop to enlarge it, and tug out face-framing pieces. The messier, the better.
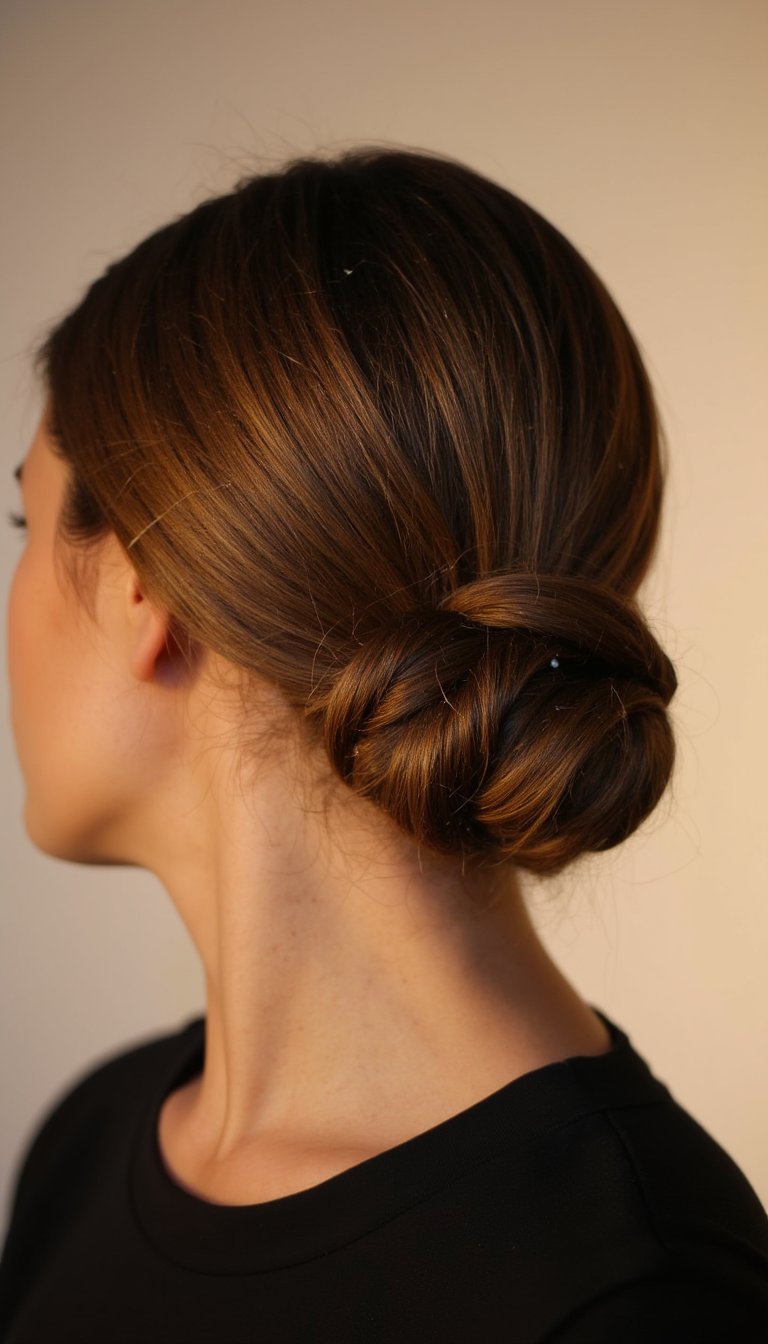
2. The Classic French Twist

Timeless, elegant, and surprisingly simple once you get the hang of it. Gather your hair at the nape of your neck as if for a low ponytail. Twist the length of your hair upwards, folding it in on itself as you go. Secure the roll horizontally with U-pins or strong bobby pins. A light-hold hairspray will tame any flyaways for a polished finish. This updo hairstyle screams sophistication with minimal effort.
3. The Bubble Ponytail

Remember this from the early 2000s? It’s back, and it’s better than ever. Create a high, medium, or low ponytail and secure it with a clear elastic. Space another elastic a few inches down, and gently pull the section of hair between the two elastics to create a “bubble.” Repeat all the way down the tail. Pro tip: gently tug each bubble to make it fuller and rounder. It’s playful, modern, and instantly adds volume.
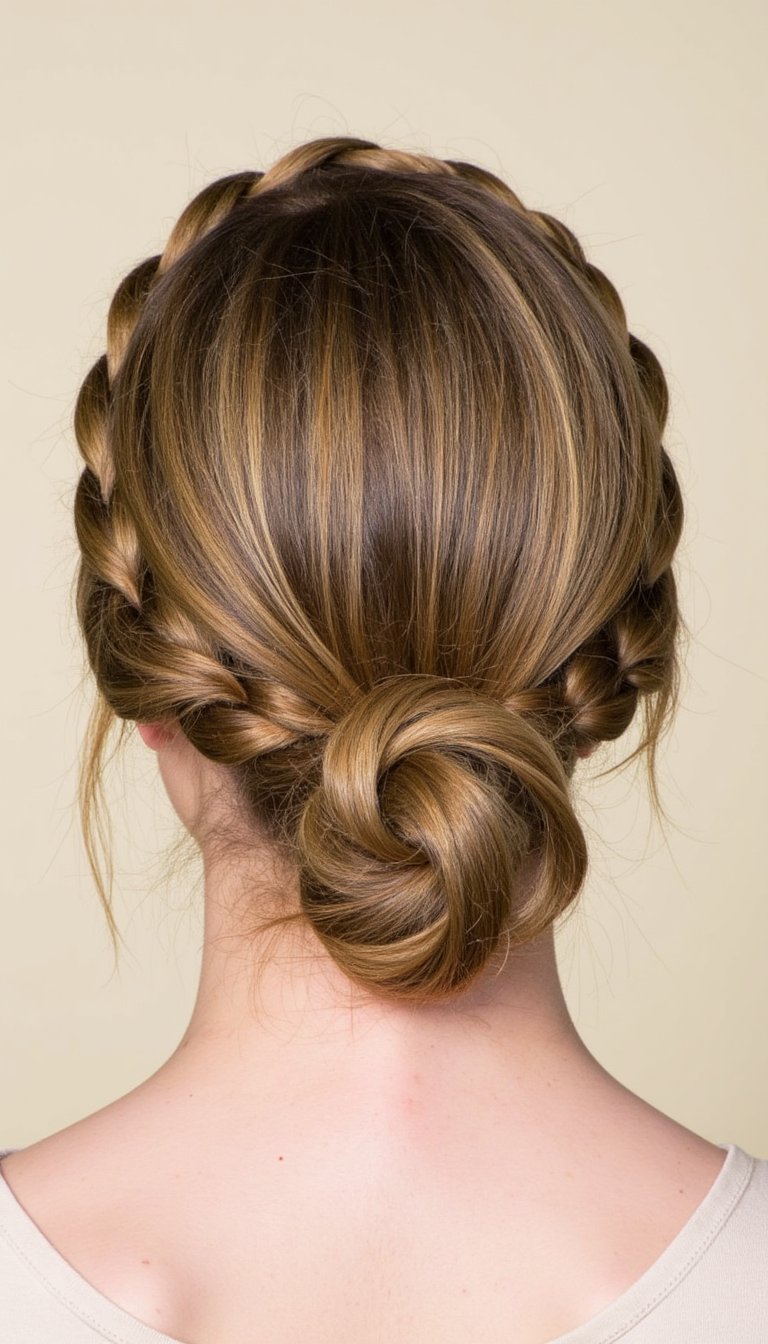
4. The Braided Crown

Feel like a literal queen with this romantic style. Part your hair down the middle. On one side, create a Dutch braid (braiding sections under, not over, for a 3D effect) starting at your hairline, braiding back and around your head like a headband. Secure at the nape. Repeat on the other side, incorporating the tail of the first braid. Tuck the ends and pin. It’s a gorgeous updo for weddings, dates, or just feeling fabulous on a Tuesday.
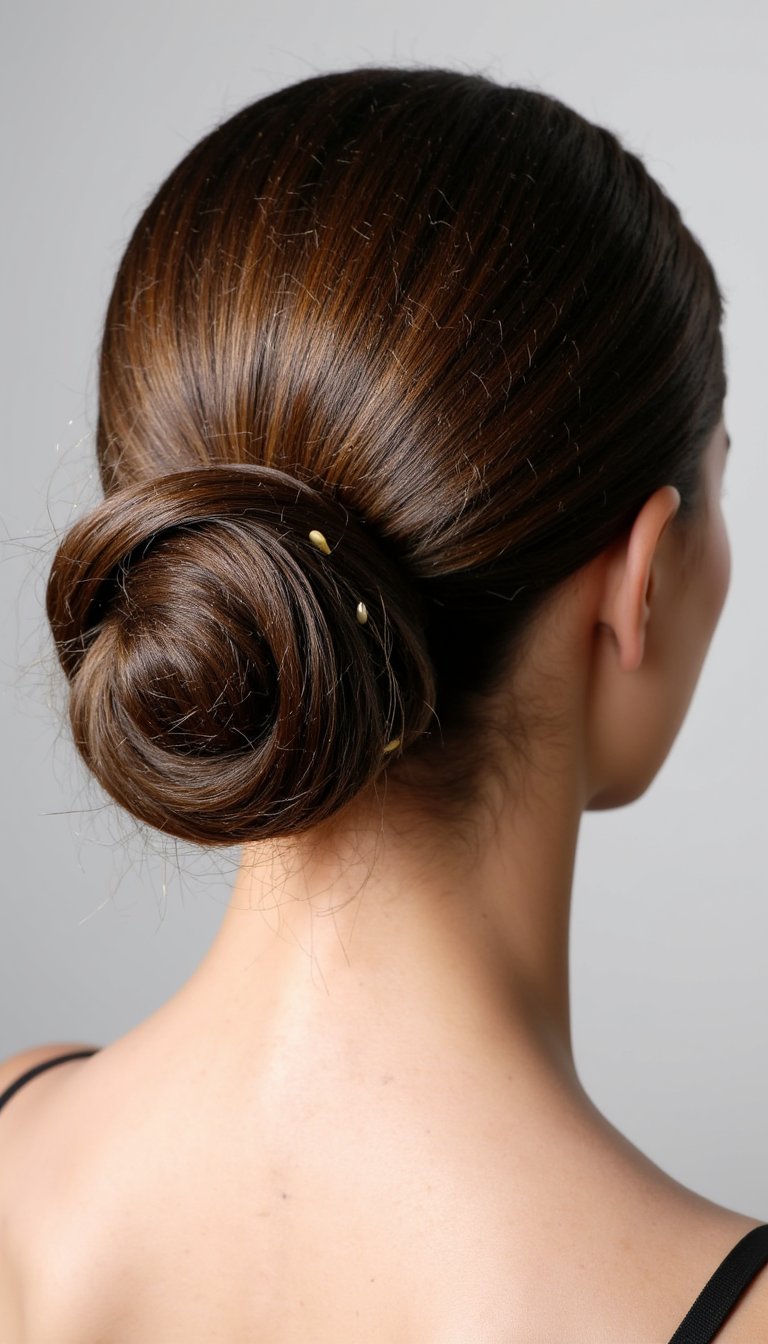
5. The Low Knotted Bun

This is the chic, older sister of the messy bun. It’s sleek, secure, and looks incredibly intricate (but shhh, it’s not). Create a low ponytail. Split it into two sections and tie them in a simple knot. Tie them again. Wrap the remaining ends around the base of the knot and pin securely. Smooth any bumps with a boar bristle brush and a touch of serum. Perfect for the office or a dinner out.
6. The Half-Up Twisted Pony

Can’t decide between up or down? This is your perfect compromise. Take two small sections of hair from the front, twist them back, and secure them together at the back of your crown with a clear elastic. You can leave it as is for a subtle look, or pull the ponytail through the gap above the elastic to create a mini flip. It’s a five-second updo that adds instant polish.
7. The Textured Top Knot

When a high bun needs a little more attitude, enter the top knot. Tease the crown of your hair lightly for volume before gathering it into a very high ponytail. Twist the length and wrap it around the base, but don’t aim for perfection. Let pieces fall out, and keep the texture rough. Secure with pins and a strong-hold elastic. This updo says, “I have things to do, and I look amazing doing them.”
8. The Gibson Tuck

A vintage beauty that’s having a major moment. Create a deep side part. Gather all your hair at the nape of your neck, but don’t pull it all the way through the final loop of a hair tie—create a loose loop. Tuck the ends of the loop up and into the space between the elastic and your head. Pin generously to secure. It creates a beautiful, soft roll at the back of the head.
9. The Fishtail Braid Updo
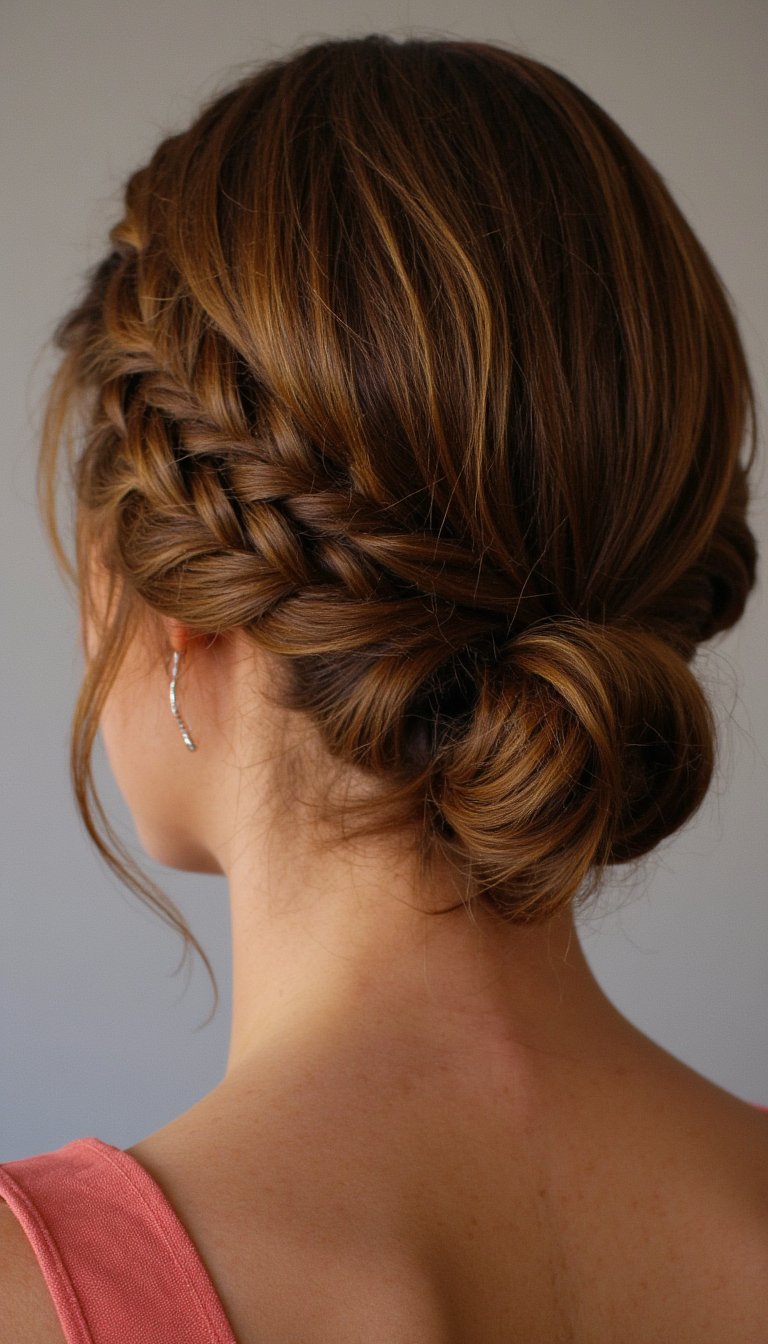
Take your basic braid to the next level. Create a low, side-swept fishtail braid (divide hair into two sections, take tiny pieces from the outside of one and cross it to the inside of the other). Once braided, gently pull at the edges of the braid to pancake it and make it wider. Coil the braid into a bun at the nape and pin. It’s boho, elegant, and shows off serious braiding skills.
10. The Sleek Low Ponytail

Don’t underestimate the power of a perfectly executed low ponytail. It’s the ultimate power hairstyle. Apply a smoothing cream or gel to damp hair, then blow-dry straight. Brush all hair back, gathering it at the nape. Use a bristle brush to smooth every last flyaway, and secure with a tight elastic. Wrap a small piece of hair around the base to conceal the elastic. Impeccable.
11. The Voluminous Ballerina Bun
The classic dance bun, but make it glamorous. Start with a high ponytail. Use a bun form or roll your hair into a sock bun for that perfect, round shape. Smooth the surface with a hairnet or by wrapping a fine layer of hair around the bun. Pin in place and spray thoroughly. This is one of those updo hairstyles that looks professional from every angle.
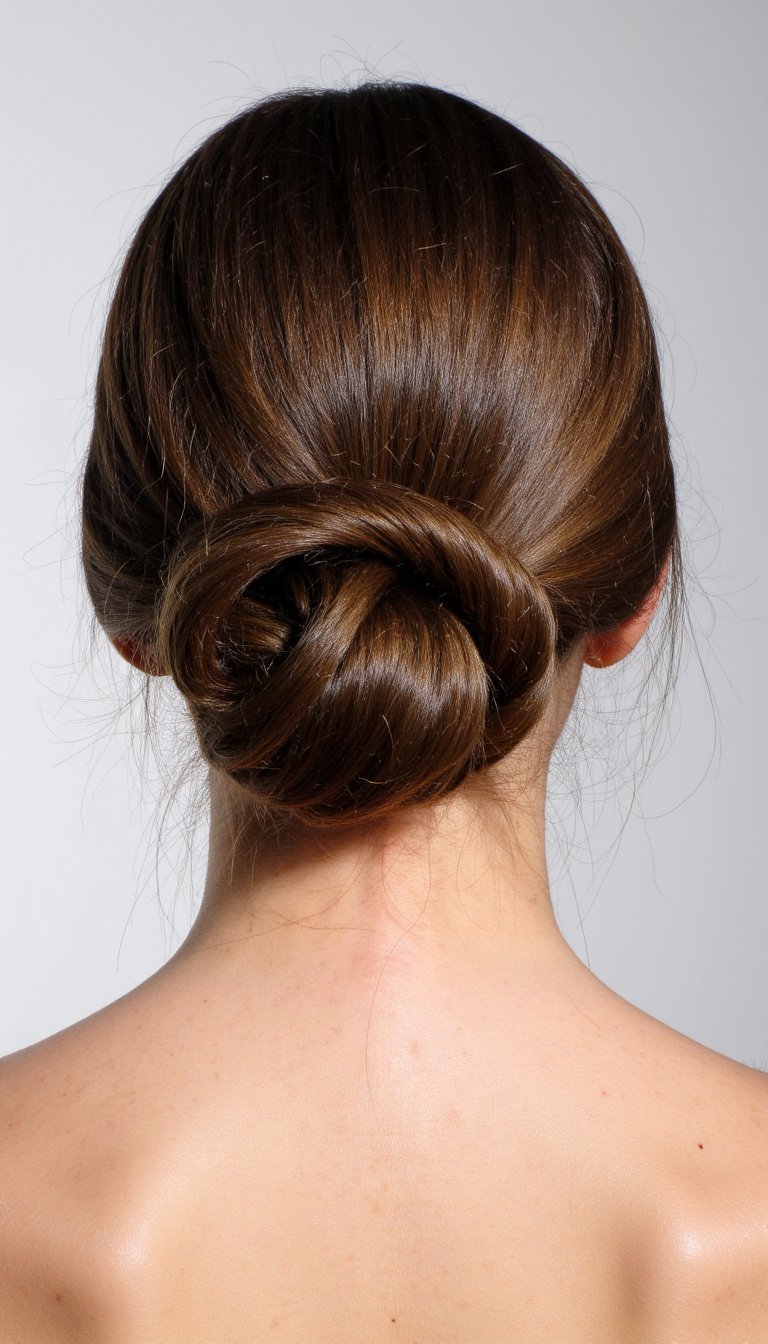
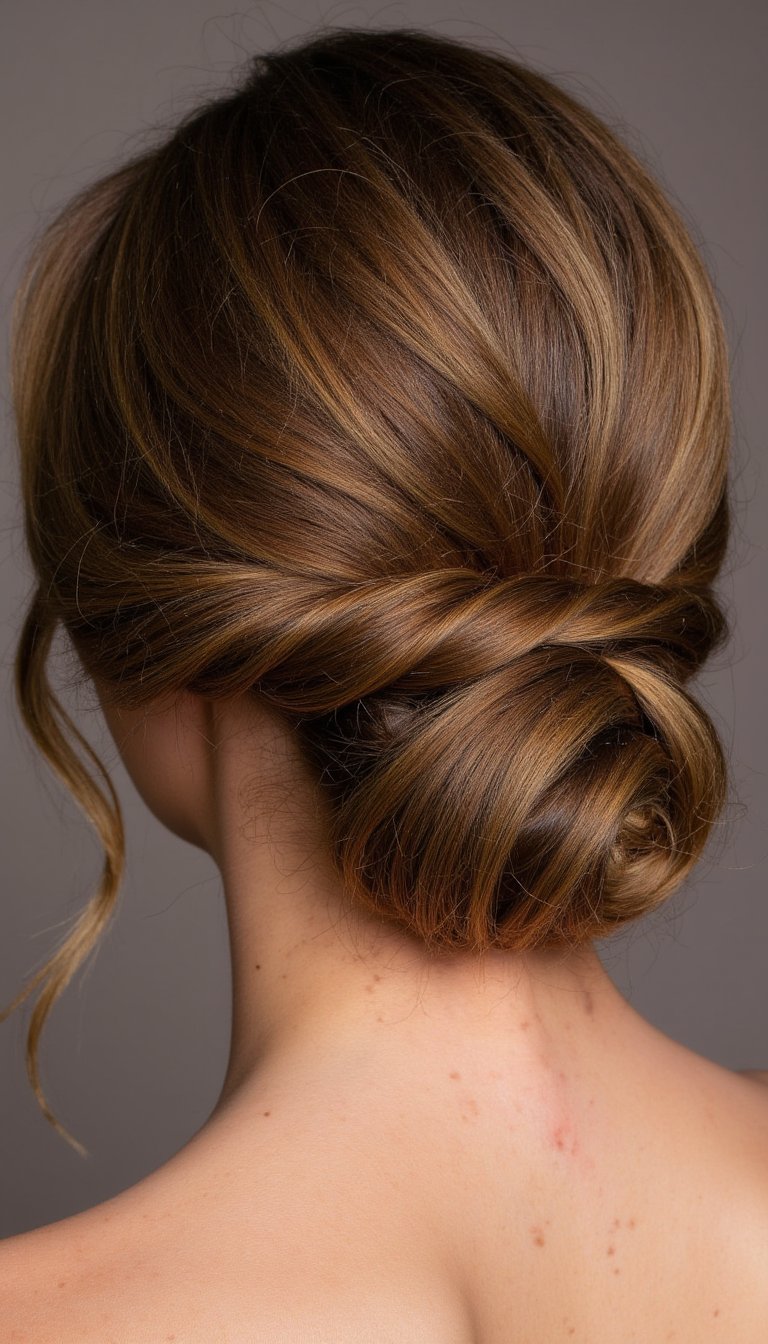
12. The Rope Twist Ponytail

Two minutes, maximum impact. Create a high or mid-height ponytail. Split it into two even sections. Twist each section tightly in the same direction, then twist them together around each other in the *opposite* direction. Secure the end with an elastic. It creates a beautiful, textured rope effect that’s far more interesting than a standard pony.
13. The Messy Braided Bun

Combine the best of both worlds. Create a loose, messy braid (a regular three-strand is fine) with all your hair. Don’t braid too tightly. Once at the end, twist the braid into a coil and pin it randomly at the nape of your neck. Pull out plenty of pieces around your face and at the crown. It’s the ideal “running errands but might run into my ex” updo.
14. The Asymmetrical Twist

For when you want something modern and artistic. Gather all your hair to one side, at shoulder level. Twist the entire section tightly, then coil it into a small, compact bun just behind your ear. Secure with pins. Keep the other side completely clean and sleek. The contrast is stunning and fashion-forward.
15. The Waterfall Braid into a Low Bun

This sounds complex, but it’s a showstopper. Start a waterfall braid along your hairline on one side (you drop a section as you braid, picking up new hair from the top). Continue it back until you reach the opposite side, then gather all remaining hair into a low bun. It looks like a piece of jewelry woven into your hair.
16. The Tousled Updo with a Scarf

Your favorite silk scarf is about to become a hair accessory. Create a deliberately messy, low bun or twist. Before you pin it, take a long, thin scarf and tie it around your head, letting the ends blend into the bun or hang down. It adds a pop of color and instantly makes any simple updo look styled.
17. The Mini Buns (Space Buns)

Embrace the fun! Part your hair down the middle. Create two high pigtails. Twist each into a bun and secure. The key is to make them messy and not too perfect. Pull out face-framing pieces and wispy ends. This playful updo hairstyle is perfect for festivals, concerts, or just beating the heat in style.
18. The Pull-Through Braid

This creates the illusion of a complex braid with zero braiding skill required. Create a high ponytail and secure with an elastic. Add another elastic a few inches down. Split the hair above the second elastic and pull the tail through the hole. Repeat down the length of the hair. It gives you that beautiful, full, braided look in under a minute.
19. The Elegant Chignon
The chignon is the epitome of understated class. It’s a softer, often looser version of a low bun. Twist your hair at the nape, coil it into a loose knot, and pin without making it too compact. Allow some softness and tendrils to escape. This is arguably the most versatile of all updo hairstyles, fitting for both a boardroom and a ballroom.
20. The Half-Up Bouffant

Channel some retro glamour. Tease the crown section of your hair generously for height. Smooth the top layer only, creating a voluminous pouf. Gather that section and a bit of hair from the sides, and secure it at the back of your crown. Leave the rest down in curls or waves. Instant vintage vibes.
21. The Dutch Braid Halo

Similar to the braided crown, but often thicker and more dramatic. Create a Dutch braid (underhand) along your entire hairline, circling your head. Secure the end with a tiny clear elastic and tuck it under the start of the braid, pinning it discreetly. It’s a gorgeous way to keep hair completely off your face.
22. The Twisted Headband Style
No headband? No problem. Take a front section of hair from one side, twist it back across your forehead, and pin it behind your opposite ear. Do the same from the other side, overlapping the first twist, and pin. Gather the remaining hair into a low ponytail or bun. It creates the look of a woven hair accessory.
23. The Sock Bun (No Sock Needed)

The secret to a perfect donut bun without buying anything. Create a high ponytail and put it through a rolled hair donut or use the old-school method: roll the toe of a sock into a donut shape. Spread your hair evenly around the donut, then roll it down to your scalp. Tuck the ends and pin. Perfectly round every time.
24. The Braided Ponytail

Elevate your basic pony in seconds. Create a mid-height or high ponytail. Braid the tail—fishtail, regular, or rope twist. Wrap an elastic at the end, and for a finishing touch, take a small piece of hair from the braid to wrap around the base elastic. Simple, sporty, and chic.
25. The Low Twisted Bun with Volume
Start by teasing the hair at the crown for lift. Then, gather hair into a low, loose ponytail but leave out two front sections. Twist the ponytail into a bun and pin. Take the two front sections, twist them loosely, and wrap them around the bun, pinning to secure. This adds beautiful detail and frames the face.
26. The Mermaid Waves Updo
For when your waves are too good to hide. Gently gather all your hair to one side, twist it loosely, and then casually pin it at the nape or just below your ear. The goal is to preserve the wave pattern while getting it off your neck. Pull out lots of pieces to keep it soft and romantic.
27. The Structured Bow Bun

A whimsical and cute option. Create a high ponytail. Split it into two loops (the bow halves) and a center “knot” piece (the middle of the bow). Pin the loops into shape and use the center piece to wrap around the middle. It takes some practice with pins, but the “wow” factor is worth it.
28. The Pin Curl Updo

Vintage glamour at its finest. Set your hair in pin curls or hot rollers. Once set and brushed out, don’t just leave it down! Gently pile the voluminous curls onto the crown or at the nape, securing with decorative pins or a comb. It’s soft, voluminous, and oh-so-Old Hollywood.
29. The “Hair Tapas” Updo

My personal favorite for bad hair days. I call it “hair tapas” because it’s a little bit of everything. Do a small twist on one side, a tiny braid on the other, pull half of it up, and let the rest be messy. The secret? Confidence. When you stop trying to make it perfect and just play, you often create the coolest look. Throw in some pins and call it art.
And there you have it—29 updo hairstyles to rescue you from any hair rut. The real magic isn’t in following a tutorial perfectly; it’s in making the style your own. Pull it looser, add a accessory, or combine two ideas. Your hair is your most versatile accessory. So next time you’re bored, grab some pins and a hair tie, pick a number from this list, and just go for it. The best updo is the one that makes you feel unstoppable. Now, which one are you trying first? 😉
Leave a Reply
You must be logged in to post a comment.